
This fly-tying tutorial is brought to you by Mossy’s Fly Shop in Anchorage, Alaska, where the legendary advice on flies, gear, and techniques is hotter than their coffee. (907) 770-2666 or mbrown@mossysflyshop.com.
Have A Request?
This Fly Tying Tutorial comes straight from the request of one of our loyal subscribers. If there’s a pattern you’d love to see next, don’t be shy—send us your suggestions, and it might be featured here soon.
Submit Fly Tying Requests Here.
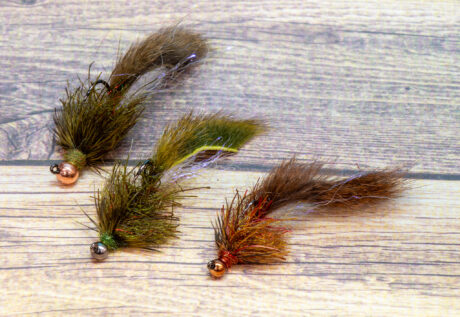
The Poacher by Lance Egan is a ruthlessly effective nymph pattern, but it works well on the swing too (if it didn’t, it wouldn’t be here), and has been systematically connecting fish with anglers effectively since its introduction. This easy but effective pattern is equal parts subtle and scandalous because it straddles the line between nymph and streamer. Built with a tungsten bead, a slender dubbed body, and enough flash to make an Arctic Tern do a double-take if you’re not careful. Although it looks like something you could tie in your sleep, trout, apparently, cannot tell the difference between this modest little fly and whatever they actually intended to eat, which, if you’ve spent any time trying to match hatches with obsessive precision, is both humbling and deeply funny.
Let’s get into it.
Designed By: Lance Egan
Tied By: Brian Davenport, Mossy’s Fly Shop, Photos By: Mike Brown, Mossy’s Fly Shop
Materials:
- Hook: Firehole 523 Sz 10 to 4 (this fly was tied on a sz 6)
- Bead: Firehole Slotted Tungsten Black Nickel 3/16 (4.5mm)
- Lead Wire: .015
- Tail: Olive Pine Squirrel Zonker (alternate: Micro Rabbit Strip)
- Flash: Ripple Ice Fiber Pearl (alternate: Ripple Ice Dub)
- Body: FTD Super Kraken Dub Sculpin (Alternatives: STS Trilobal, Lazer Dub, Arizona Mega Semi Seal)
- Hackle Collar: Hen Saddle Barred Olive
- Collar: UV Ice Dub Dark Olive (alternate can be any dub or the body dub)
- Thread: Veevus V70 Olive
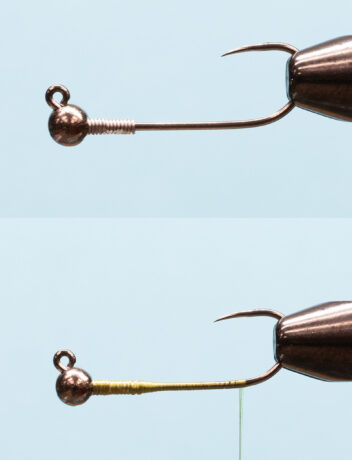
Step 1. Slip your bead onto the hook and place it in the vice. Make 12-15 wraps of lead wire and wrap it into the back of the bead. Start your thread and secure the lead wire in place, then build a small ramp of thread and wrap your thread to the start of the bend.
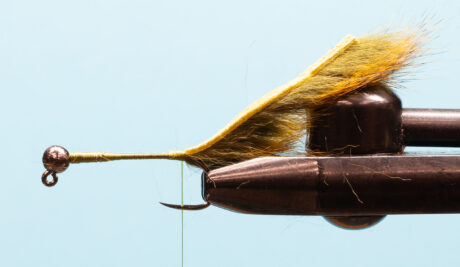
Step 2. Using a strip of squirrel, make the tail a little longer than the length of the hook. Rotate the vice upside down and place the squirrel tail with the hide side up. Tie down.
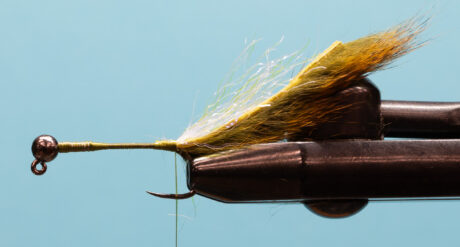
Step 3. Using a small pinch of ripple ice fiber, a little shorter than the tail length, and tie in. Rotate the vice back over.
Step 4. Create a dubbing loop and place your body dub in and spin. Pick and brush out the dubbing, creating a thin rope core.
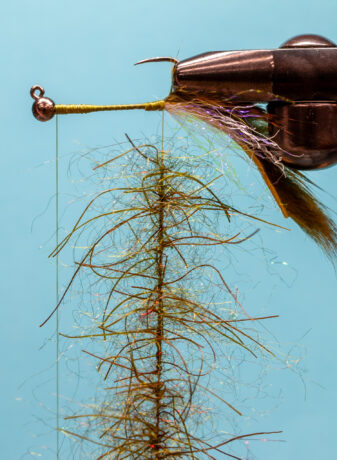
Step 5. Wrap the dubbing loop forward, using touching turns. Wrap to the base of the bead and secure. Brush out all the trapped fibers, creating a bushy appearance.
Step 6. Split the dubbing evenly and sweep down, then rotate the hook upside down and pull all the fibers together. Choose the desired body width and cut the dubbing at a downward slope.

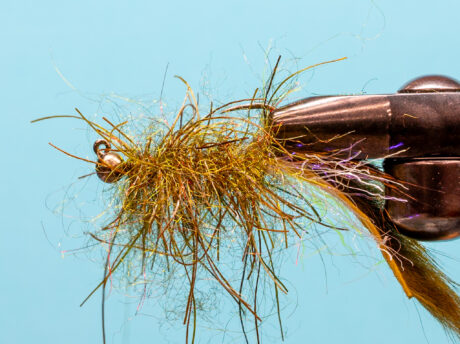
Step 7. Tie in your hen hackle and make two turns, tie down, and trim excess off.
Step 8. Using your collar dubbing, build a small collar. Whip Finish.
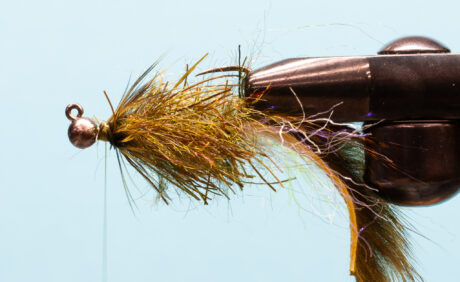
Step 9. Rotate the fly upside down and trim the center of the body flat.
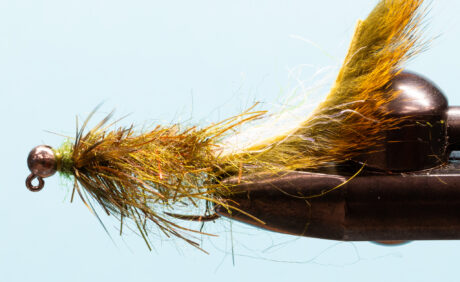
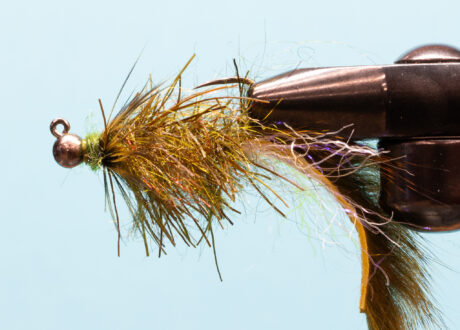
Completed Fly

Leave a Reply