
This fly-tying tutorial is brought to you by Mossy’s Fly Shop in Anchorage, Alaska, where the legendary advice on flies, gear, and techniques is hotter than their coffee. (907) 770-2666 or mbrown@mossysflysho.com.
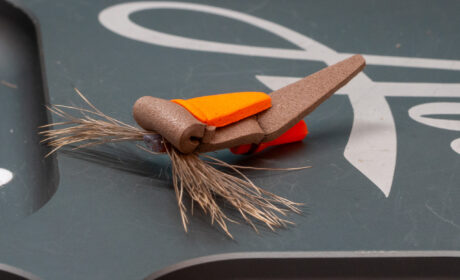
You asked for a skater, and we ollied into reality. We really, really like top water fishing too. Built for grabby fish and bold casts, the Morrish Hitched Skater Tube isn’t your average surface skater—it’s a topwater showboat with moxy. Part tube, part mischievousness, this fly carves, wakes, and taunts leopard Rainbow Trout and other chrome-bright fish like it’s got something to prove. Tie it on, and watch the surface riffle, taunting fish to strike. When that V-wake vanishes in a flash of silver, you’ll know the skater did its job— vibrantly, proudly, and with a smirk. Give it a shot, tie one on, and land a legend. Please share the results with us at info@deneki.com. We’d really like to see what you did!
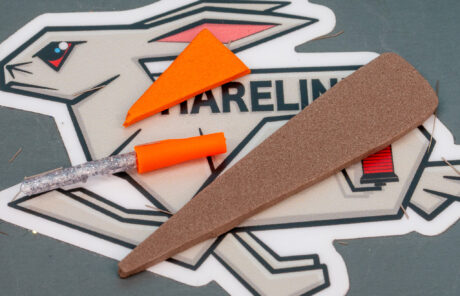
Materials List:
- Tube: Pro Tube Medium Grey Chrome
- Hook Guide: Pro Tube Hook Guide
- Body: 2MM Foam Brown
- Wing: Deer Hair
- Indicator: 2MM Foam Orange
- Thread: Veevus 140 Brown
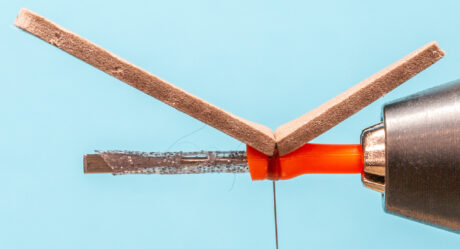
Step 1: Cut materials. The Morrish Mouse foam cutter from Hairline cuts the perfect foam body for this. Cut a 1” piece of tube, then cut one end at a 45° angle. Finally, cut a pizza slice-shaped indicator.
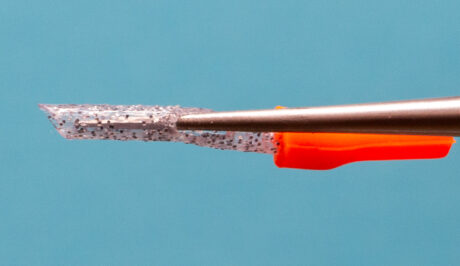
Step 2: Using a bodkin and lighter, heat the tip and pierce a tapered hole appx 3/8” from the front of the tube. Piece the hole so it is 90° from the top.
Step 3: Tie in the foam body, and make the tail approximately 7/8” long. Tie off and whip finish.
Step 4. Start your thread on the front of the tube, be sure to place the thread so that when you spin the deer hair you do not cover the hitching hole.
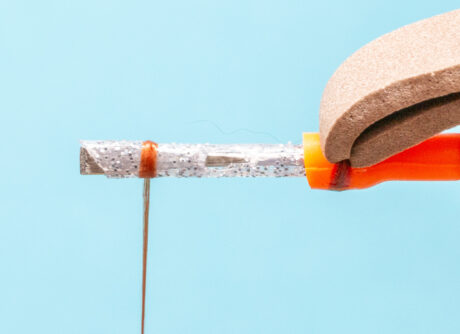
Step 5. Using a pencil diameter of deer hair, comb out the guard hairs and then stack the tips. Trim the butt ends even and place on top of the tube using two loose wraps.
Step 6: Spin the deer hair.

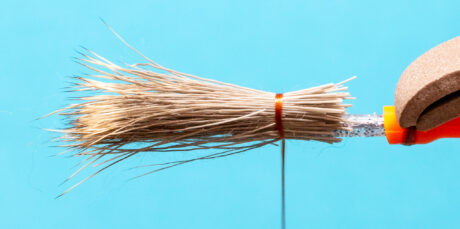
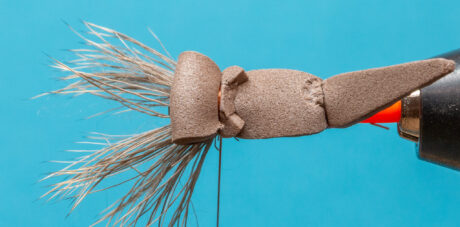
Step 7: On the top of the tube, trim a flat centered patch and then repeat on the bottom of the tube. Trim the excess butt ends down.

Step 8. Pull your foam body over the top and tie it down.
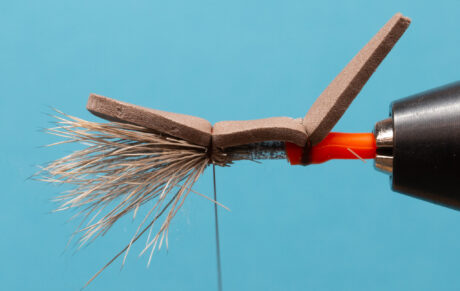
Step 9. Fold the balance of the foam over, making sure that the foam folds evenly with the tube. Tie down.

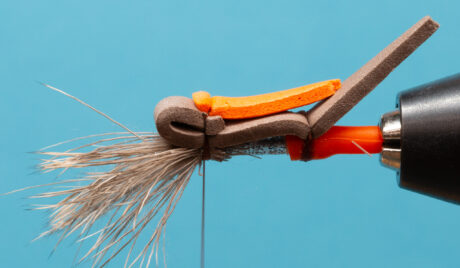
Step 10: Cut a small notch in the body foam. This gives the indicator a place to set.
Step 11: Tie in your indicator
Step 12: Bring your thread around and come underneath the deer hair. Fold the wings back and place a few wraps to keep the wings in place. Whip finish and glue. It is important to dab a little glue so it won’t slip off the tube.

The Completed Fly:

Leave a Reply