The Simple TC Mouse wasn’t born in a fly-tying cathedral with exotic materials and a glass of bourbon nearby. It showed up out of mild desperation, a short materials list, and the uncomfortable realization that the fish did not care about your artistic expression.
It had to be quick. It had to float. Ideally, it had to resemble something worth violently eating. It also had to be smaller. While many mouse patterns lean toward “large rodent with a life insurance policy,” on the Kanektok, there are plenty of side channels and softer edges where smaller isn’t optional; it’s the difference between getting ignored and getting looks, then getting crushed.
So this pattern skips the foofooness, ignores the ego, and gets right down to business. A strip here, a wrap there, and suddenly you’ve got a passable rodent with just enough attitude to get noticed, and just enough durability to survive poor life choices from large trout. There’s even a slick little foam stamp in the mix, because if you’re going to keep things simple, you might as well make them look halfway intentional.
And for the record, the “TC” isn’t Theodore Calvin from Magnum P.I.—though that would be a way cooler origin story involving helicopters and questionable mustaches. It’s for AKW alum Trevor Covich @opflyguy, who, thankfully, spent more time figuring out what works on big fish than chasing TV drama.
It’s not pretty. It’s not complicated. But it works, which is really the only personality trait that matters in a mouse fly.
Let’s get into it.
Have A Request?
This Fly Tying Tutorial comes straight from the request of one of our loyal subscribers. If there’s a pattern you’d love to see next, don’t be shy—send us your suggestions, and it might be featured here soon.
Submit Fly Tying Requests Here.
Photos and Tied By: Captain Andrew Abraham @andy.abraham_fishing, AKW Alum
Materials:
- Size 2 to 4 streamer style hook; Gamakatsu B10s, Ahrex TP610, Umpqua U502 etc.
- 3mm Brown, Gray or Black foam
- Brown, Gray or Black bucktail (substitute with calf tail, coyote etc)
- Brown Gray or Black Rabbit Zonker strips
- Ultra Chenille Brown Gray or Black
- Veevus 140 thread in brown
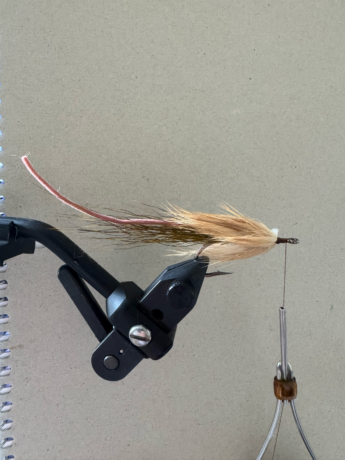
Step 1. After applying the entire shank of the hook with thread, tie in a small amount of deer hair in the
back of the fly as if your tying a streamer. This small amount of hair acts as a prop to keep the
chenille tail from fowling around the hook as well as adds to the flies tracking ability acting as a
rudder to keep the fly upright and swimming straight.
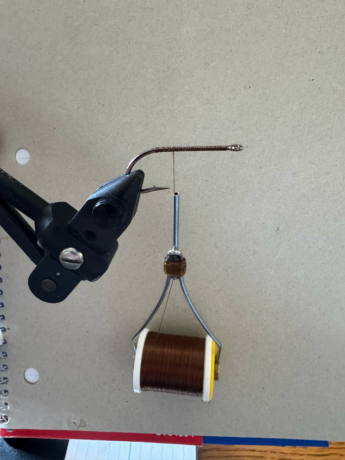
Step 2. Next add your chenille tail. Tie this in over your deer hair and have it extend about 1 to 1.5
inches past the hair.
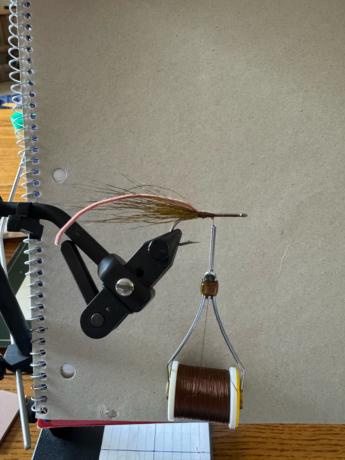
Step 3. Now wrap up the shank of the hook with your zonker strip finishing about ⅛ of an inch before
the eye of the hook. You need to leave a small gap between the fur and hook eye. You can
either do this by palmering the entire strip on or put the hair in a dubbing loop and wrap on that
way. Personally I use a dubbing loop as I find the addition of the leather hide can make it
sometimes too bulky, especially when tying off the end of the zonker strip by the eye.
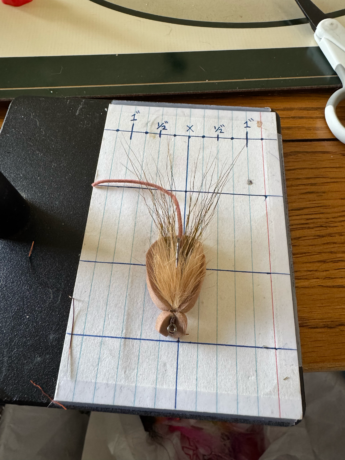
Nonetheless we are looking to cover the body of the hook in fur as this will be our under belly
and body of the fly that the fish looks at from underneath.
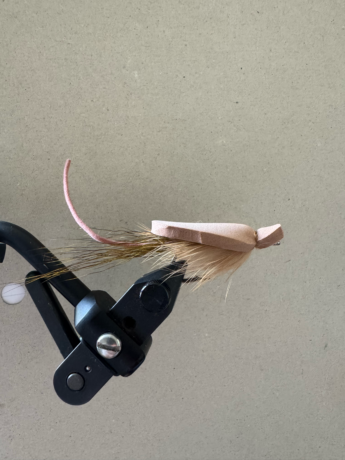
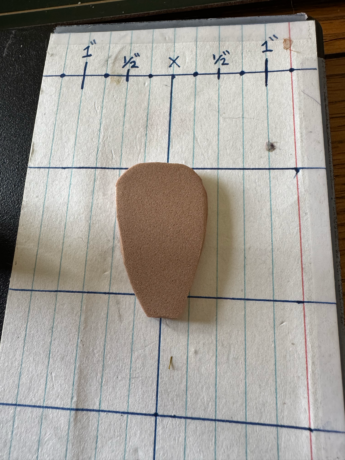
Step 4. Now, with scissors you will cut out a body from your foam. The shape looks like a tear drop with
the point being cut off about half an inch up. I cut these by hand (and they look as such). They do
not need to be absolutely perfect as long as it is relatively symmetrical. The body is about an
inch and a half long and about an ¾ of an inch across at its widest point.
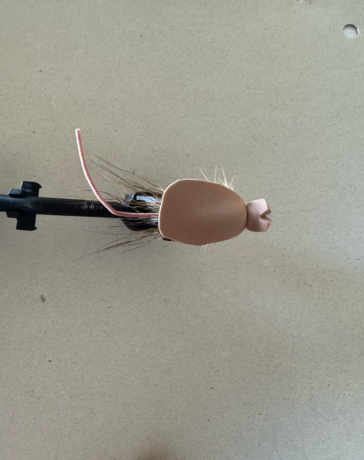
Step 5. To tie the foam in, go ½ inch above where you cut off the tip of your tear drop. Place that spot
right between the zonker and eye of the hook (you should have left yourself a little room). Once
you wrap it on with two relatively loose wraps you should have a ½ inch of foam flaring up over
the eye of the hook. If you are pleased with how it’s sitting, tighten your wraps and secure the
foam to the shank. Finish by wrapping around the eye of the hook in front of the foam lip and
whip finish.
Step 6. Finally, I will take scissors and snip the flared foam over the eye of the hook right down the
middle to create a V shape. This makes it slightly easier for your line to pass through the eye
when tying it on. After I will add a dot of super glue to my whip finish to ensure the knot holds. I
will add a dot of super glue underneath where the foam was tied in so it does not spin or slide. I
will also add glue to the underside of the foam body section to connect it to the hook shank /
zonker strip so it does not flare upwards and it rides flat on the water.
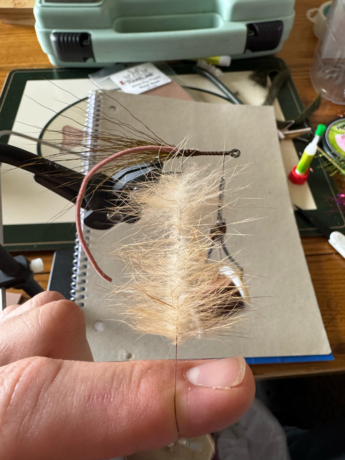
This fly takes no time to tie and is wildly effective. It slides and skates effortlessly and chugs
water if given the right twitching action like a gurgler. It does everything you want a mouse to do!
It’s my go to choice when guiding anywhere in the state. Bass loves them as well down here in
the lower 48! Happy tying and Good luck friends!

Leave a Reply