This fly-tying tutorial is brought to you by Mossy’s Fly Shop in Anchorage, Alaska, where the legendary advice on flies, gear, and techniques is hotter than their coffee. (907) 770-2666 or mbrown@mossysflyshop.com.
Have A Request?
This Fly Tying Tutorial comes straight from the request of one of our loyal subscribers. If there’s a pattern you’d love to see next, don’t be shy—send us your suggestions, and it might be featured here soon.
Submit Fly Tying Requests Here.
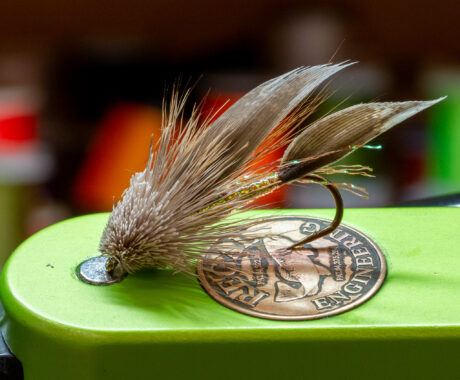
The Muddler Minnow was created by Don Gapen in 1936. He created it after watching First Nations Guides on the Nipigon River in Ontario, Canada, collect sculpins, then explain to him their importance as forage for the large trout in the river.
The Muddler is a true classic that can get overlooked with today’s more modern patterns, but it should still be in every buddy’s streamer box. This is a fun pattern to tie and gives you a great opportunity to work on spinning and trimming deer hair.
Let’s get into it.
Designed By: Don Gapen
Tied By: Brian Davenport, Mossy’s Fly Shop, Photos By: Mike Brown, Mossy’s Fly Shop
Materials:
- Hook: Sz 2 – 12 3x or 4x Streamer Hook
- Tail: Mottled Turkey Quill
- Lead: .015-.030 lead wire
- Body: Veevus Mini Flat Braid or Holo Braid
- Underwing: Squirrel Tail
- Wing: Mottled Turkey Quill
- Head: Deer Hair
- Thread: Veevus 6/0 or 140 (depending on size of fly) and 100 Denier GSP
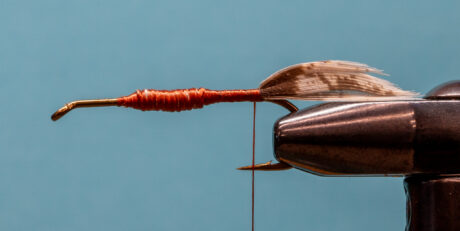
Step 1. Start your 140 thread appx ¼ back of the hook eye. Run your thread to the bend of the hook.
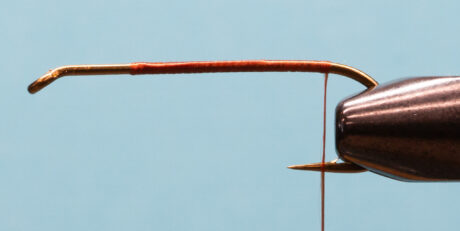
Step 2. Strip a left and right piece of turkey quill. Make the width of your tail the same width as the hook gap. Measure your tail to be approximately the length of your thread body. Mary the two quills together and place them on top of the shank. Using a pinch wrap, gently wrap your thread around the quill (pinching the thread with the quill. As you come underneath and start your next wrap, slowly pull up and collapse the quill. Make a couple more securing wraps before letting go of the quill.
Step 3. Tie the rest of the quill down to create a little more body, then wrap 10-12 turns of your lead wire, and then secure with your thread. I like to build a little bit of a rear taper to make the body look uniform.
Step 4. Tie in your flat braid. Making overlapping turns, covering your body. Leave yourself a little extra and tie off a flash wing on top.
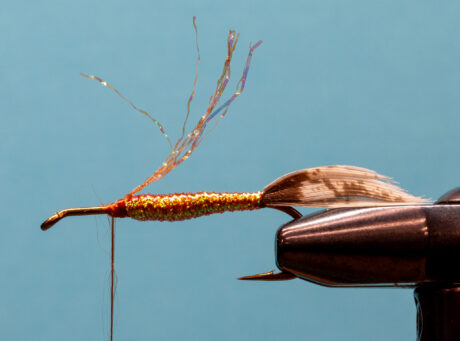
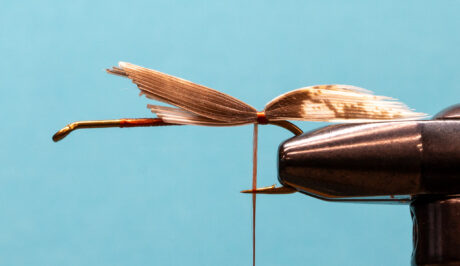
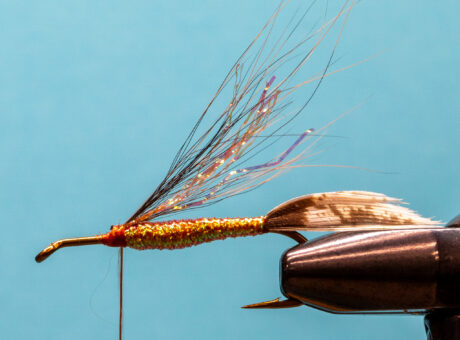
Step 5. Use a sparse clump of squirrel tail, tie it in as an underwing. You want the flash and underwing to be appx at the middle of the tail.
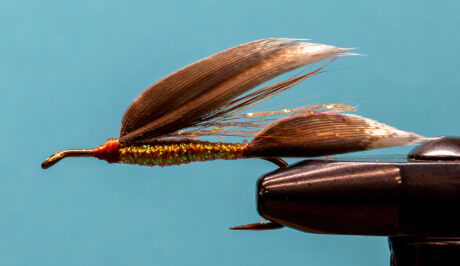
Step 6. Strip a left and right piece of your quill, using the longer side of the quill. Make your wing a little wider than the hook gap. Measure your wing to be approximately in the center of the tail. Repeat the pinch wrap method used in step 2. Tie off and whip finish. Switch your thread to the GSP and wrap a base of thread in front of the wing.
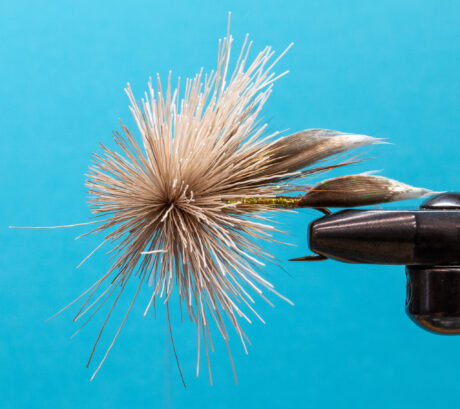
Step 7. Cut a clump of deer hair. Brush out all the underfur (important), stack the tips. Place the deer hair on top of the shank at the base of the wing. Hold the deer hair and place two wraps of thread. Apply just a slight amount of pressure with each wrap (Don’t let go of the deer hair during those wraps) on the thread wrap. Apply more pressure and let go of the deer hair as you wrap. The deer hair will spin around as you wrap. Apply enough wraps till the hair has fully spun around.
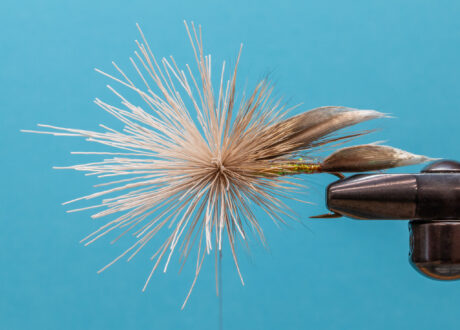
Step 8. Pull the tips back and apply a second clump of deer hair if needed. With the second clump, I even up the butt ends and trim the tips off. Repeat step 7, spinning method. Pull back and whip finish.
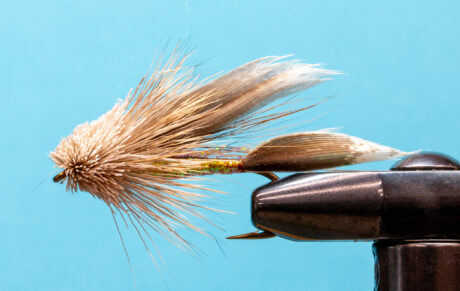
Step 9. Using a flexible double-sided razor blade, begin to trim your head to shape. Bend the blade in a U shape and trim the hair off at the angle of the hook eye. Continue to trim to shape. Be patient and remember you can continually remove hair, but you can’t put any back.

Leave a Reply