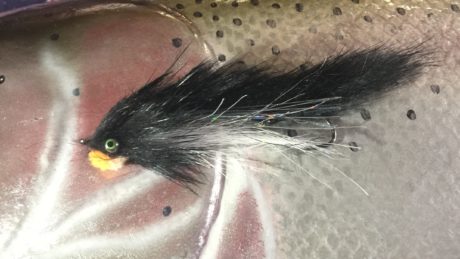
Deneki Outdoors Alum Tom Larimer is currently the National Sales Manager for G. Loomis Fly Fishing Division and Skagit line designer for Airflo. In his prior life, Tom was an Alaska fishing and Pacific Northwest (PNW) steelhead guide. It was during Tom’s guiding career, he created The Loop Sculpin pattern for his Alaska and PNW guiding. Tom’s original version was tied on a tube, but production versions were tied on shanks.
Sculpin patterns are uber effective for trout and this fly gives you a sculpin with the added tasty morsel of an egg. Anytime you have salmon in the river spawning and with sculpin always on the menu, this pattern is super effective for Alaskan-sized trout. You can play with alternative colors and tie them in olive, natural, tan, purple, or any color that you like. Play with color variations in both the rabbit and the glo bug.
Originator: Tom Larimer
Tied By Mike Brown
Photos By Greg Tooke
Materials List:
- Thread: Veevus 140
- Read Hook: Gamakatsu C14s Sz 2
- Tail: Black rabbit zonker
- Articulation Thread: 30# Power Pro
- Front Shank: OPST 32mm intruder shank or sacrificial hook
- Body: Pearl Diamond Braid
- Belly: White Craft Fur ( Fox or Bucktail will also work)
- Flash: Holographic Flashabou
- Dumbell Eyes: Medium iBalz (you can use whatever dumbells you like)
- Head: Crosscut Rabbit
- Egg: McFly foam (Globug yarn also works)
Step 1: Start your thread and wrap it back in line with the hook barb.
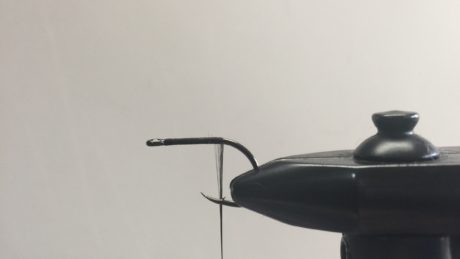
Step 2: Tie in your rabbit zonker with a slight overhang for the tail. Don’t make it too long or you will get short strikes.
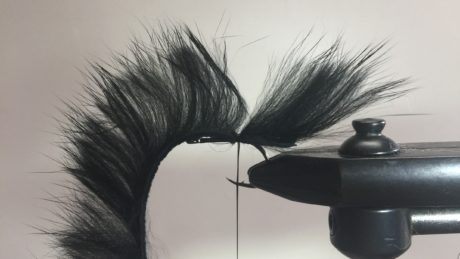
Step 3: Pull your rabbit strip tight and fasten down just behind the hook eye, leave enough room for a whip finish under the strip.
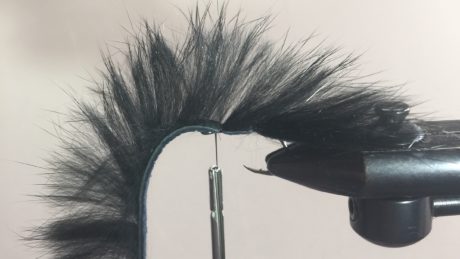
Step 4: Cut a 6” piece of your braid and loop it into the hook eye
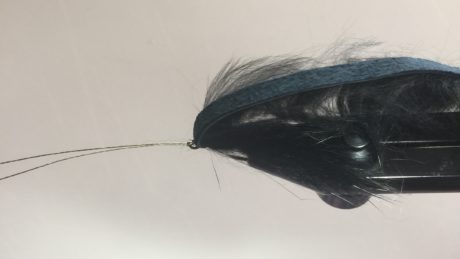
Step 5: Put your shank (or sacrificial hook) into the vise. Using figure eight wraps, attach your dumbbell eyes about 3 hook eye widths back of the eye. Wrap your thread back to a little more than halfway down the hook shank.
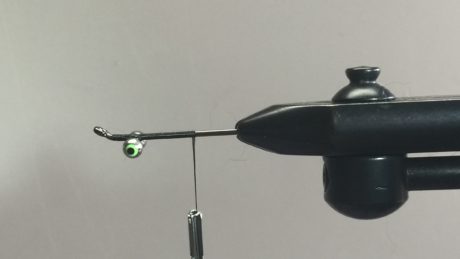
Step 6: Attach your articulation thread and fasten it into place. Before tying it in solid, adjust your tail length to the desired length (I typically make this a 3-4” fly). Tie-down your thread to about a hook eye width behind the dumbbell eyes and fold over, tying the tags back to the starting point. Attach your pearl flat braid.
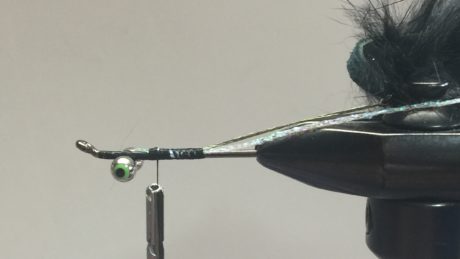
Step 7: Wrap your pearl flat braid forward and tie off. I wrap the pearl flat braid forward, back, and forward again to create a little bigger body.
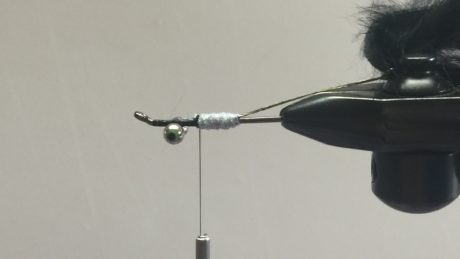
Step 8: Rotate your fly upside down and tie in a clump of craft fur. I want the tips to be just inside the point of the rear hook.
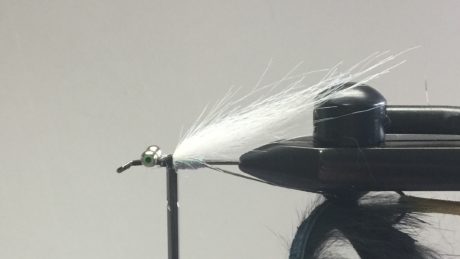
Step 9: Rotate the flyback over and attach 4-5 strands of flash. Fold the flash over your thread and slide down to the top of the hook and fasten down. Cut your flash appx. to the length of the tail.
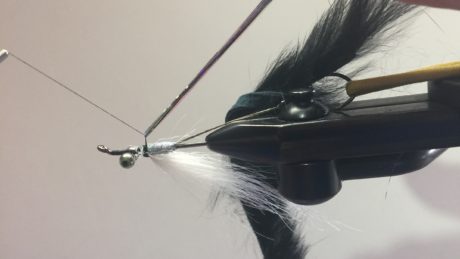
Step 10: Pull your rabbit strip tight and fasten it into place. Cut off the excess rabbit and secure it with tight thread wraps.
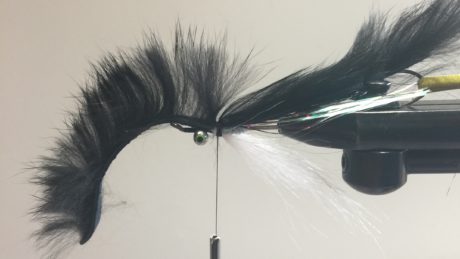
Step 11: Rotate your fly back over and take a couple of strands of McFly foam, appx 2-3”, and tie in under the center of the dumbbell eyes. Pull the strips uptight.
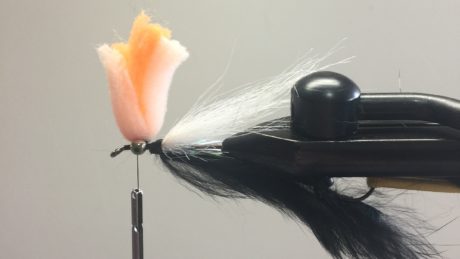
Step 12: Create a dubbing loop, using appx 3-4” of rabbit cut from the hide (I like to use cross-cut strips for this) place the rabbit into the loop.
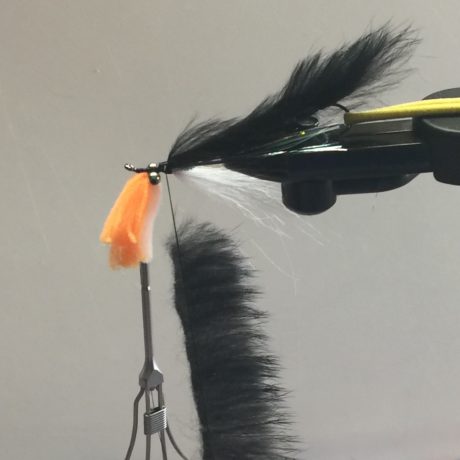
Step 13: Spin your rabbit up. Brush or comb out the rabbit to create a small inner core.
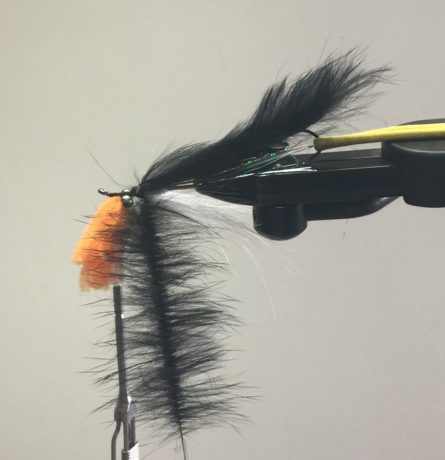
Step 14: Wrap your rabbit, brushing the rabbit back each turn, 2-3 turns behind the dumbbell eyes. Once you wrap up to the eyes, using figure-eight wraps over and around the eyes. You will have to pull the McFly foam down and out of your way keeping it separated from the rabbit. Finish with a couple of turns in front of the eyes. Whip finish and glue.
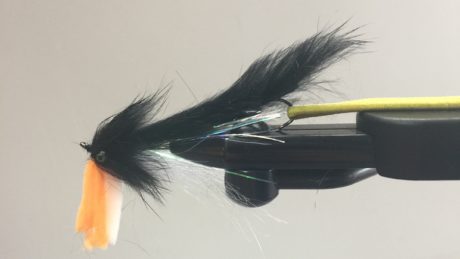
Step 15: Rotate the flyover. Pulling up tight on the McFly foam, angle your tying scissors to make a rounding cut to achieve the shape of the egg. You can vary your egg size by how long you cut the McFly foam.
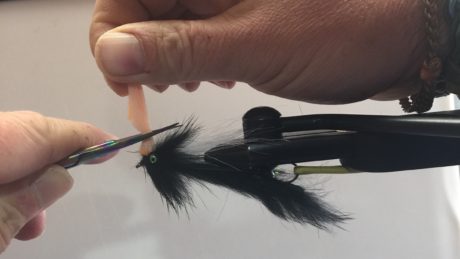
Finished Fly:
Other Deneki Outdoors Posts:

Leave a Reply