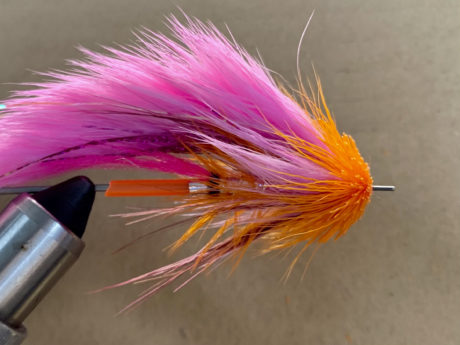
“Bright day, bright fly. Dark day, dark fly.” right? More on that later. The PNW Munker is just that, Bright. With a wide profile and well-balanced fly, this fly is very effective for Steelhead and Pacific Salmon.
Tie Instructions and photos by Alex Belonga. If you’d like to see more of Alex’s flies or want to inquire about custom flies, you can find him on Instagram- @straitsonthefly_customflies or Facebook- @Yooperfly.
Materials List:
- 3mm & 1.8mm tubing (SRFS)
- Nano silk 50d (Semperfli)
- Large brass bead to fit over 3mm tubing (SRFS)
- Mirage Flat tinsel large (Semperfli)
- Flat silver tinsel large (Semperfli)
- Peacock herl
- Pink dubbing
- Hot pink Flouro Fiber (Future Fly)
- Fine oval tinsel silver (SemperFli)Orange saddle hackle
- Pink Pheasant rump hackle (Fish Hunter)
- Accent flash (Hedron)
- Mirage Flashabou
- Orange deer belly hair (Nature Spirit)
Step 1: Connect 3mm tubing and the 1.8mm by cutting a slit in the 3mm and tying them together. For reference, push the 1.8mm about 3/4 back into the 3mm tube.
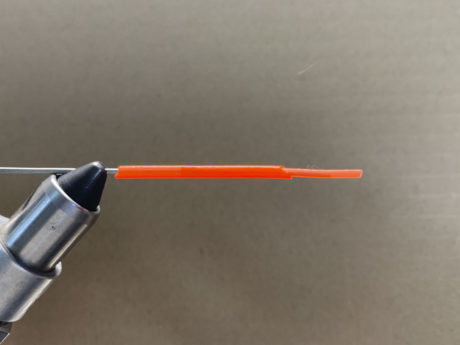
Step 2: Bring the thread back to where the 1.8mm ends.
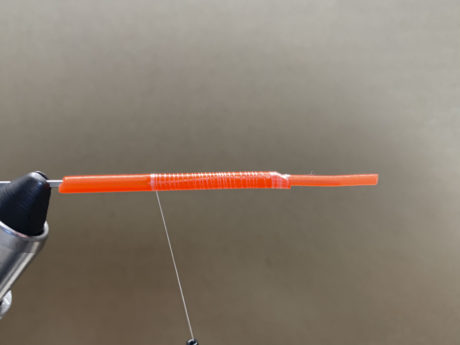
Step 3: Secure in a section of flat silver tinsel.
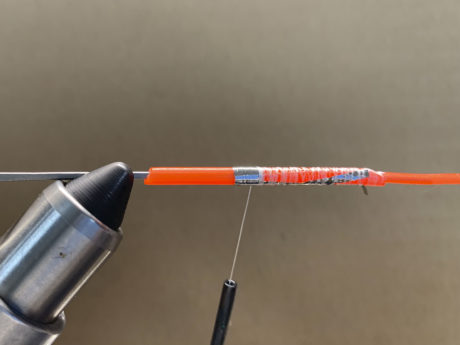
Step 4a: Lock in some fluoro fiber as a tail. I wrap the fluoro fiber all the way down the body for security. Don’t reverse tie it because it leaves a huge bump and doesn’t make this synthetic fiber very secure anyway.
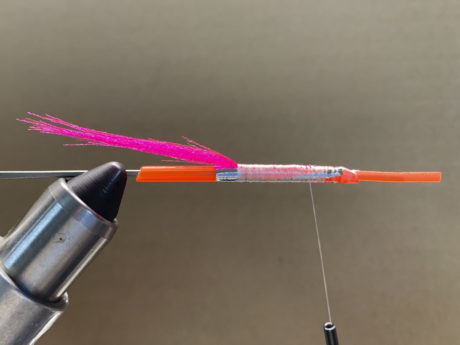
Step 4b: Take a few wraps behind the Flouro Fiber to make it stand up more.
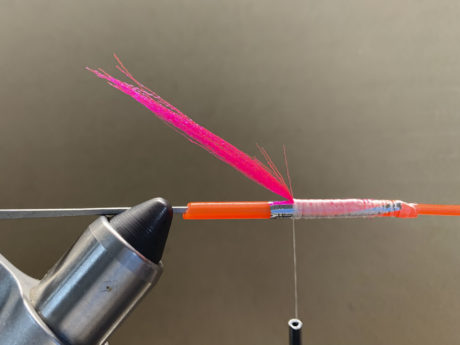
Step 4c: Taper it like a wing with your scissors.
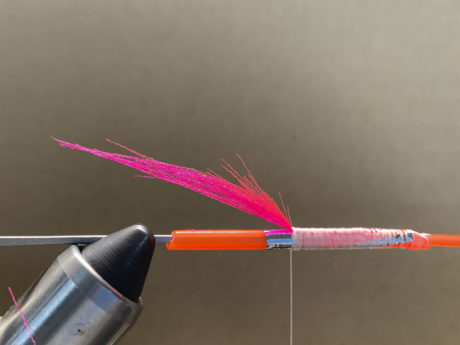
Step 5: Tie in the Peacock Herl.
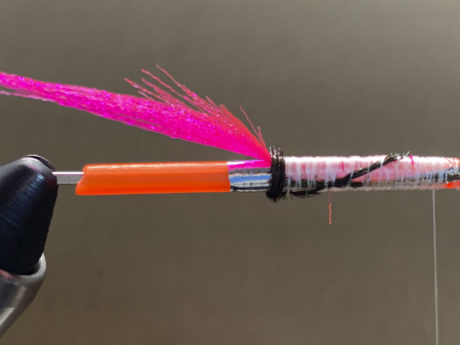
Step 6: Lock in some Mirage tinsel and the oval tinsel for the counter rib. (generally, you should tie in materials up and down the majority of the tube to keep the body diameter the same to remove any bumps or drop-offs)
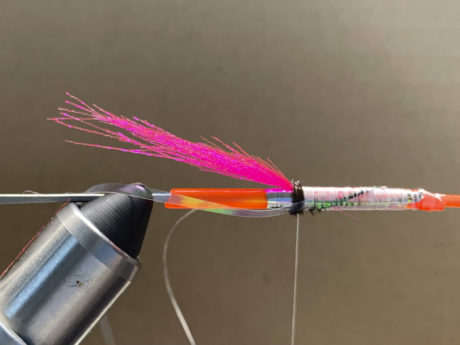
Step 7: Lock in your orange saddle hackle.
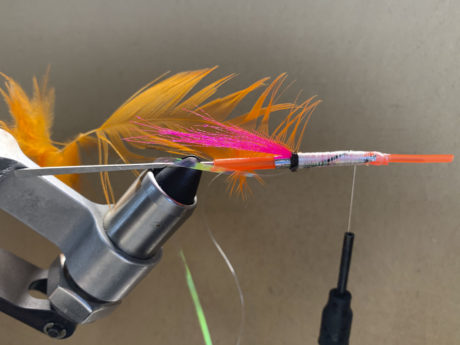
Step 8: Wrap the Mirage tinsel and then add some pink dubbing. Notice the space left on the tube for the brass bead over the 3mm tube.
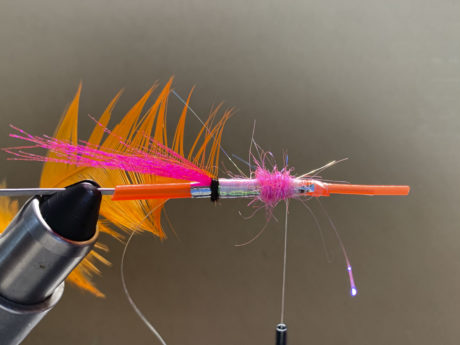
Step 9: Wrap the saddle hackle up, then wind your router rib up.
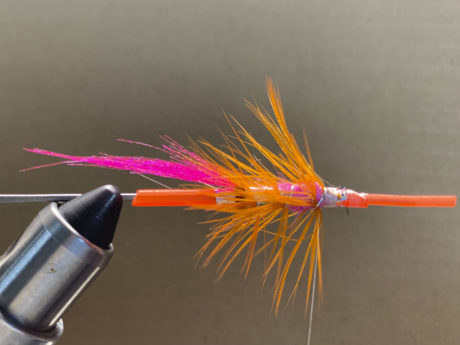
Step 10: Slide on your Predator brass bead and secure in. By having the bead on the 3mm tube instead of the 1.8, you get a much stronger fly that is bombproof. Notice you still have an area to tie on before reaching out to the 1.8mm. The goal is to always do the majority of your tying on the 3mm and finish on the 1.8mm. This will always make a super strong fly!
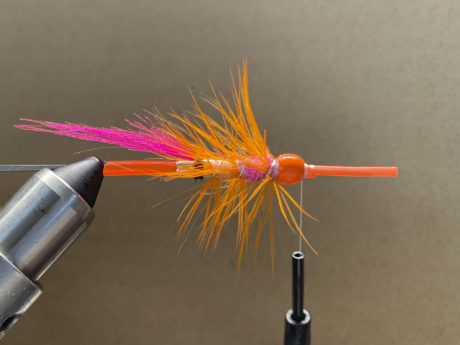
Step 11: Add a hot pink Pheasant rump hackle.
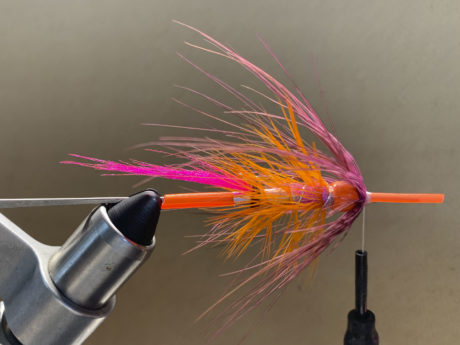
Step 12: Tie in a wing of accent flash.
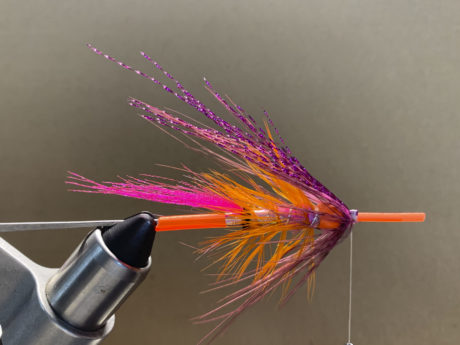
Step 13a: Prepare Rabbit Zonker by tapering it into a ‘V.’ By doing this, you create a wing with much more movement and significantly reduce a Zonkers propensity to ‘roll’ in the water; thus, the pattern keels correctly. Cut a small slit in the front.
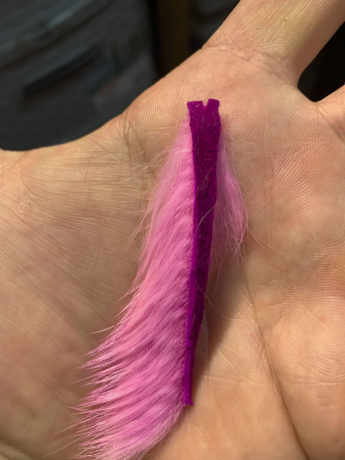
Step 13b: Tie down in reverse. Try folding the slit around the tube for extra security and tie in.
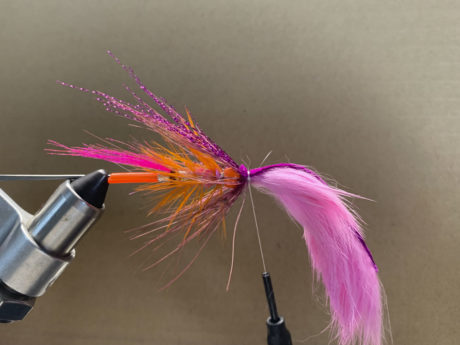
Step 13c: Fold the wing back and make a thread dam in front of the wing. Do not tie back on the zonker. Notice the beautiful lift in the wing. This will dance nicely in the current. As an added bonus, you can fold back the rabbit hair that’s on the sides and use it like a hackle!
This allows your next materials (whether it be marabou or hackle) to tie in tight against the wing. This makes for really clean tying and a nice profile.
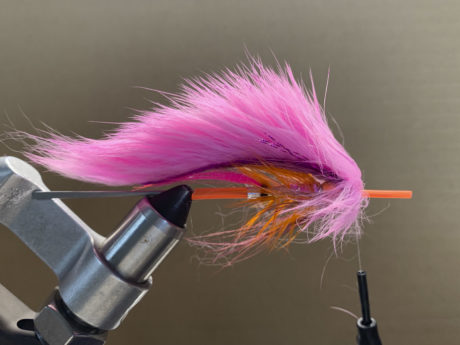
Step 14: Tie in some mirage flashabou.
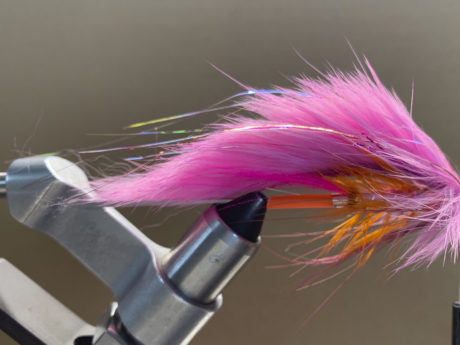
Step 15: Now, the tricky part! Carefully slide tube off of mandrel and cut off, so you have a few mm’s left. Burn a flange and slide it back on.
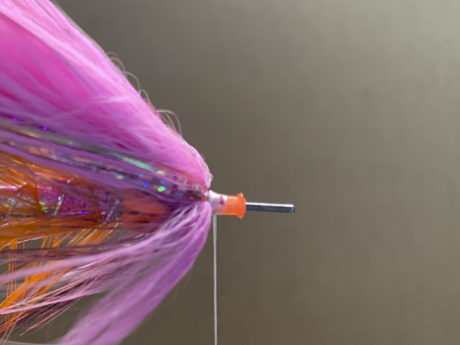
Step 16a: Gently tie in a stacked clump of orange deer belly hair. If you tie in too tight, it won’t spin. If you tie in too loose, it won’t suck into the flange, and you’ll have a mess! You’ll have to play with it and discover for yourself.
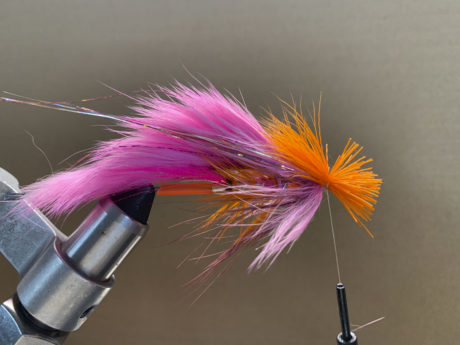
Step 16b: Rotate your vice and do the same thing on the underside (180deg from the previous clump.
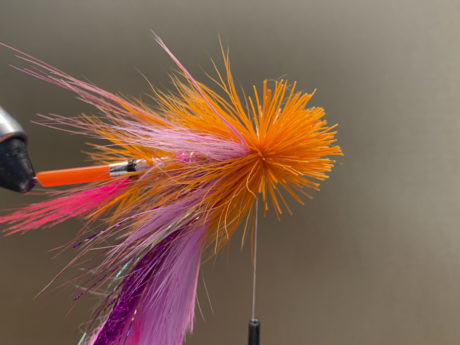
Step 16c: Spin Deer hair!
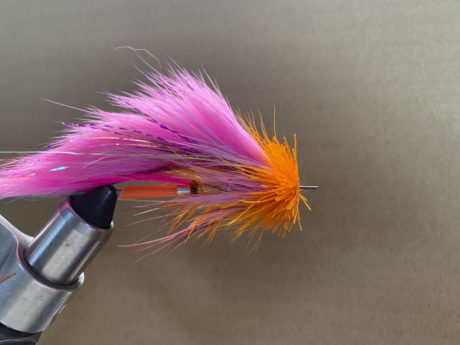
Step 17: Pull hair back and lock thread behind the flange. Add some glue and whip finish twice into the flange.
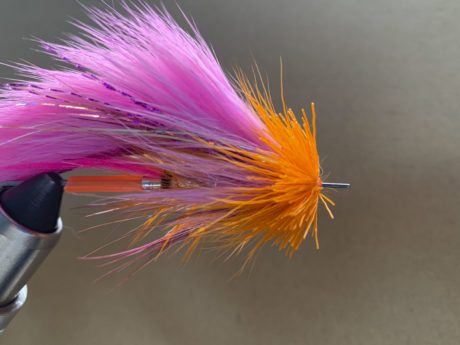
Step 18: Use curved razor scissors and shape the head like a Turbo Cone, so the profile flows back with the rest of the fly. The goal is to have a nice wide profile but not a huge amount of hair. This is my favorite way to get that nice wide shape and only tie in one spot on the tube. This pushes a lot more water than simply putting a cone on it, and for some reason, fish love deer hair!

Finished Fly:

Other Flies to Tie and Tips:
Leave a Reply