About Kevin Foley
Kevin Foley is the fly-tying instructor at Mossy’s Fly Shop in Anchorage, Alaska. His philosophy and teachings on fly tying involve the use of natural and synthetic materials to create the illusion of life. As a scientist, having received his Master of Science in Fisheries, he believes that observation and time on the water are as important as time spent behind the vise, and that incorporating aspects of fish biology and organism behavior into patterns results in superior flies.
His passion for fly tying began on the temperate shores of the Atlantic Coast, learning innovative saltwater streamer patterns to lure inquisitive Striped Bass. This early influence leads to what Kevin now describes as a fusion of contemporary saltwater streamers of the Nor’ East with steelhead, salmon, and trout patterns of the Pacific Northwest.
Kevin loves dark beer, a good joke, and home-baked goods. When not tying flies or instructing others, Kevin enjoys spending time with his wife and two dogs at their home in Anchorage.
Write-up, Instructions, and Photos by Kevin Foley
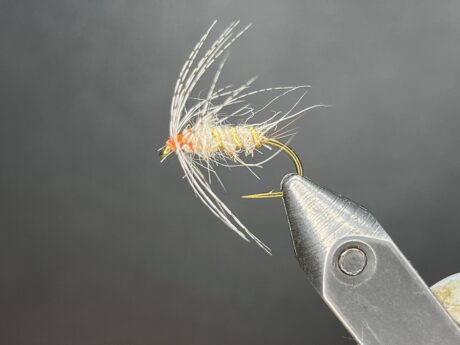
This fly pattern is a combination of a soft-hackle and a wingless wet or a “flymph”. Flymph is a term first coined by Vernon S. “Pete” Hidy in his efforts to popularize aspects of old British traditional hackle flies (aka soft-hackles) fished just below the surface of the water.
In his book, Wet Flies: Tying and fishing soft-hackles, flymphs, winged-wets, and all-fur wet flies, Dave Hughes writes of flymph’s “[they] do a remarkable job of imitating caddis pupae approaching the surface for emergence, and also caddis adults diving down to the bottom to lay their eggs.”
I like this fly because it imitates a variety of species and life stages and is well-suited for both single- and two-handed fly rod setups. It is a great searching pattern when trout are not rising or visibly feeding. I also tie this with fine-diameter wire or lead-free weight wrapped about the shank under the dubbed body.
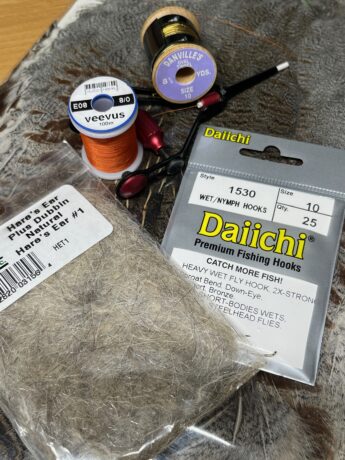
Step 1. Materials for this fly include all that are shown here including the Hungarian Partridge.
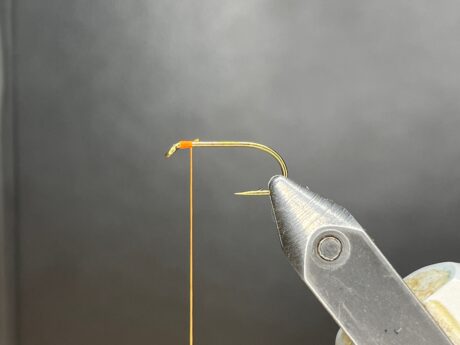
Step 2. Start the thread at the hook eye with four or five turns to lock it into place.
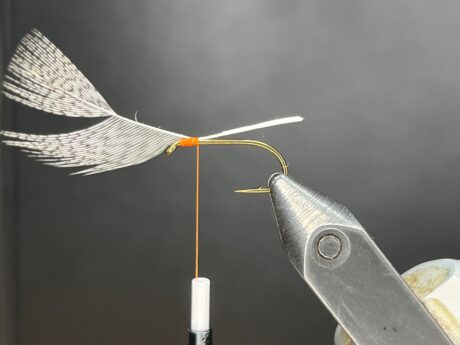
Step 3. Prepare the Partridge hackle by stripping away the barbs on one side of the feather. Stripping the barbs adds to the sparseness of the fly. Although hard to tell from the photo, the hackle is tied with the concave side of the feather facing us. Do this if you are right- or left-handed.
Step 4. Add the oval tinsel to the top of the hook and return the thread to the rear of the fly near the tinsel tie-in point. I find a piece of tinsel cut at about 4” allows me to tie several flies and is an easy length to work with (with or without hackle pliers).
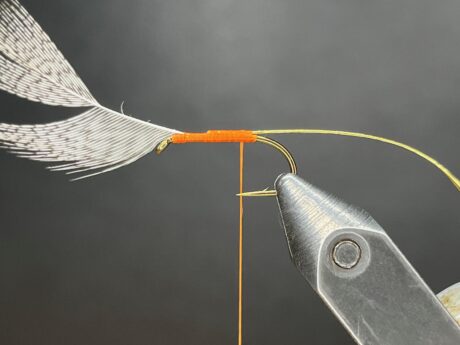
Step 5. Twist about 4” of Natural Hare’s Ear dubbing onto the tying thread and with touching turns, advance the dubbed thread to tie in the point of the partridge hackle. Avoid twisting the dubbing too tightly to the thread, buggier is better (in my opinion).
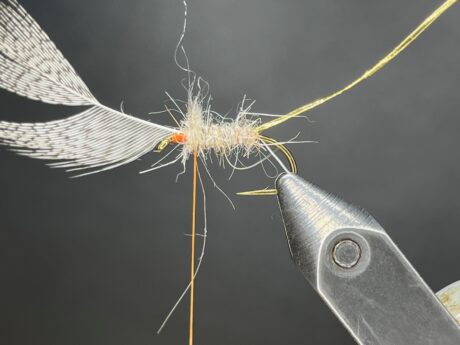
Step 6. Wind the oval tinsel forward towards the hook eye with evenly spaced turns, secure with two-three turns of the thread, and cut the tag end. Keep securing wraps to a minimum to avoid unnecessary bulk.
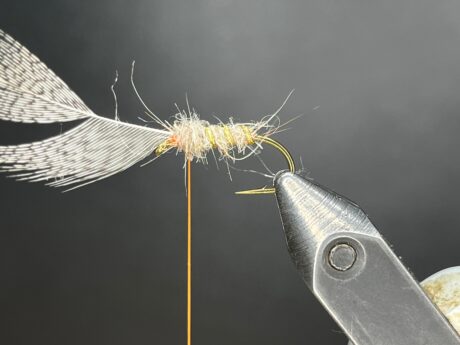
Step 7. Use hackle pliers to grasp the tip of the Partridge hackle, making sure to catch the feather shaft in the jaws of your pliers. Make one – three turns of the hackle behind the hook eye, making sure to tuck each successive turn behind the previous, but also taking care not to trap or mat down any of the fibers from a previous turn. Ideally, the hackle fibers should stand out 90 degrees from the hook shank. While still holding the hackle tip, make two-three turns to secure the hackle tip into place. This is done behind the wound hackle, not in front between the hackle and hook eye.
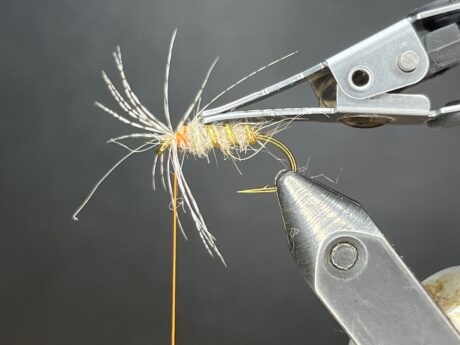
Step 8. Take two-three turns of the thread through the hackle to the front of the hook just behind the hook’s eye. Care should be taken to not mat down the fibers. Focus on maintaining the fibers at 90 degrees to the hook shank as you advance the thread forward.
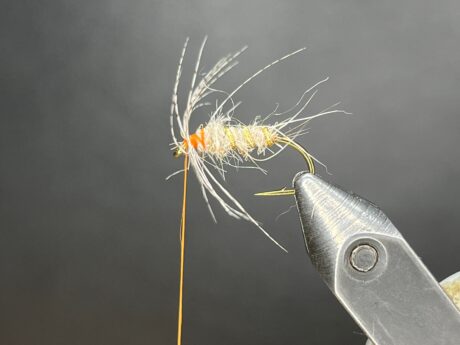
Step 9. Take as few head/finishing wraps as possible when finishing the fly again taking care to maintain their 90-degree orientation to the hook shank. Whip finish or glue and voila!

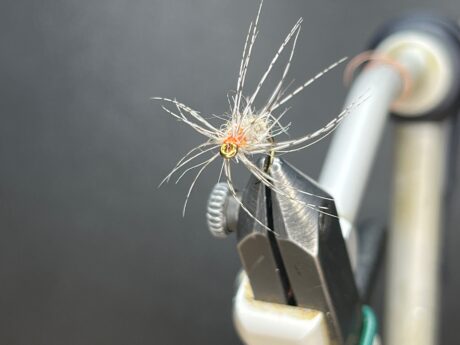
Step 10. The finished fly as viewed from the front. This fly has a fairly dense hackle collar with many fibers even though we only used two turns and tripped one side of the hackle.
Other Flys to Tie by Kevin
Leave a Reply