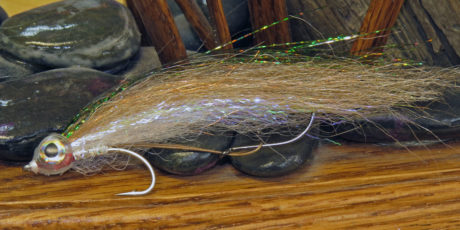
The AK Chovey and fly pattern is used for Kings and Coho alike. This pattern captures the image and likeness of bait, favorites of both King Salmon and Coho Salmon in the salt
Capelin, Herring, and Sand Lance all being common for King Salmon and Coho, the AK Chovey is a cool and easy pattern to tie to emulate such bait.
Since folks are trolling these more than anything else, we thought incorporating a trailer hook, much like a herring rig, would help increase hook-up rates. If the rear hook is not needed, it can be removed without affecting the fly at all. This is a fun and easy fly-to-tie and can be tied in a variety of color schemes and sizes.
Designed by Mike Brown
Tie, Instructions, and Photos By Mike Brown of Mossy’s Fly Shop in Anchorage, Alaska.
Material List:
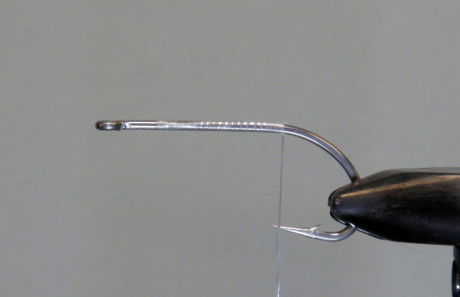
- Main Hook: Daiichi 2546 Sz 1/0
- Rear Hook: Tiemco 600SP Sz 1
- Wire: Rio Bite Wire 40LB
- Body Tinsel: Veevus Silver Tinsel and Veevus Red Tinsel
- First Wing: Farrar’s SF Blend White
- Second Wing: Ripple Ice Fiber UV Pearl
- Third Wing: Farrar’s SF Blend Mullet Brown
- Flash: Holographic Flashabou Olive
- Head: Fish Skull Fish Mask #7
- Eye’s: Fish Skull Living Eyes Ice 7mm
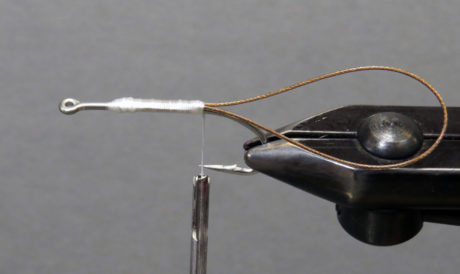
Step 1. Start your thread about 2 hook eye widths back from the front and wrap it back to just before the bend starts, approximately about the point of the hook.
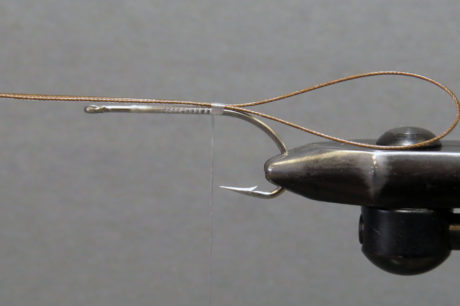
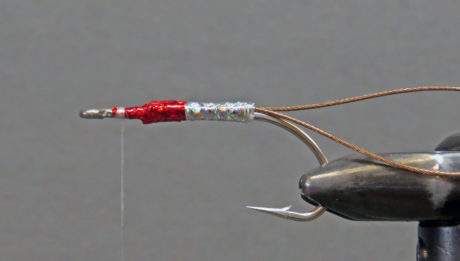
Step 2. Cut an 8” length of 40# bite wire. Fold the wire in half, matching the two ends evenly, and put a few turns of thread around the wire to hold it in place. Adjust the rear loop to be about 1-1/2” long. Wrap your thread down the wire and hook the shank up to where you started the thread.
Step 3. Fold both wire ends back, I like to place one down each side of the shank to make a more uniform body. Put a few good tight turns of thread down to hold them in place.
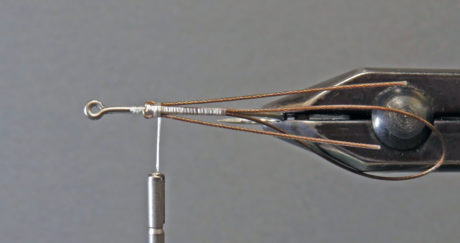
Step 4. Wrap your thread well and tight over the front end of the wire, build a nice taper for your tinsel and then wrap your thread back to the end where you started. Cover the thread with some zap-a-gap or super glue to add a bit of security from all this pulling apart.
Step 5. Tie in your tinsel for the body.
Step 6. Wrap your tinsel up to about 2 hook eye widths from the end of your thread.
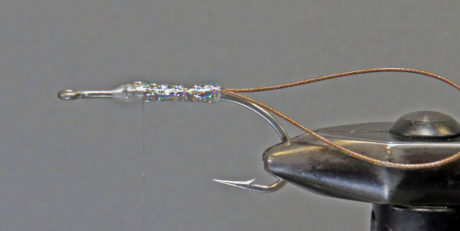
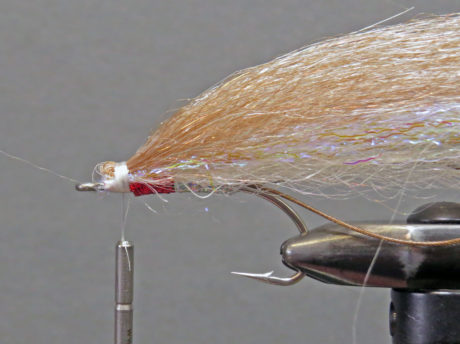
Step 7. Tie in your red tinsel
Step 8. Wrap your red tinsel down over the end of the bump of wire to appx 1 hook eye width from the hook eye.
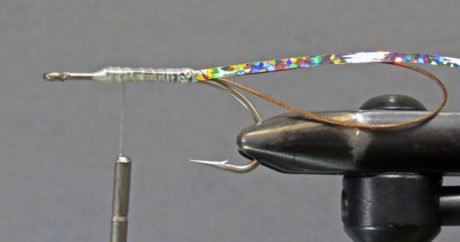
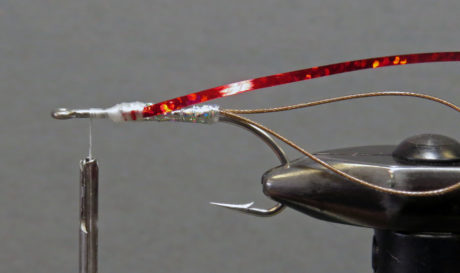
Step 9. Take appx half a pencil width of the white Farrar’s Blend and tie down at the base of the bump from the wire. You want the Farrar’s Blend to extend past the rear wire loop by a couple of inches.
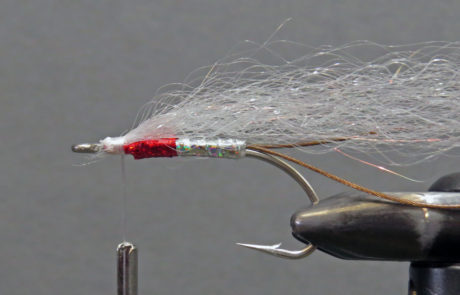
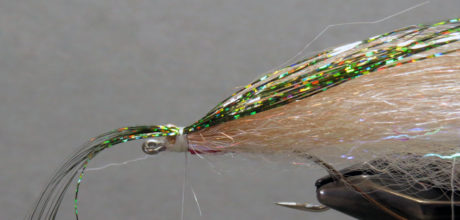
Step 10. Take a half pencil width of your Ripple Ice fiber and tie in on top of the white Farrar’s fibers. This material may be a little shorter in length.
Step 11. Take appx a pencil width of the brown Farrar’s, this hunk you want to tie in the middle, but do not cut it off. Tie this clump on top of your previous two materials.
Step 12. Fold the brown Farrar’s back over the top and lash down good and tight.
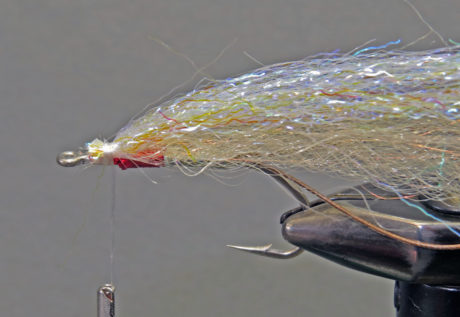
Step 13. Take 20 strands of your flash and tie down in the middle, be sure your flash matches in length for both halves. Now fold the front-facing flash back over the top. Build a nice tapered head.
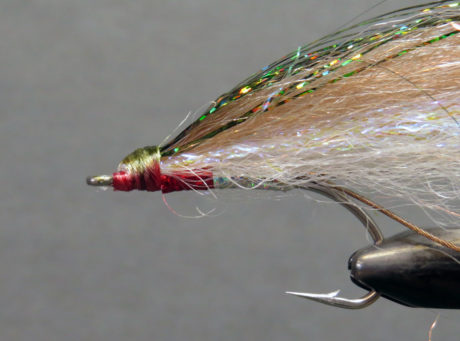
Step 14. Using a red marker color the bottom of the head red. Using an olive marker, color the rest of the head. Using your Zap-a Gap or Super Glue, put a good coat over the entire head.
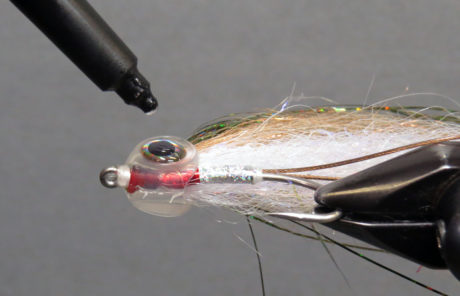
Step 15. Slip your Fish Mask over the hook eye and push it into place, you should have enough room to build a small head in front of the mask to keep it securely in place.
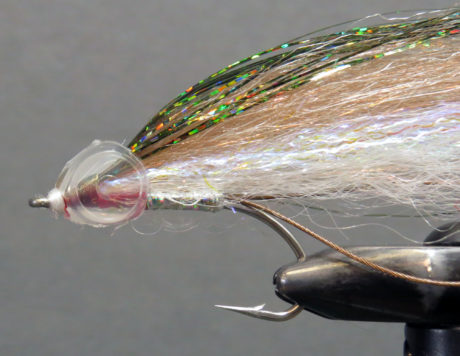
Step 16. Rotating the fly to its side, put a small drop of UV resin into the eye socket. Now place your eye into the socket, then cover the entire eye with UV resin and cure with light. Repeat this step for the other side.
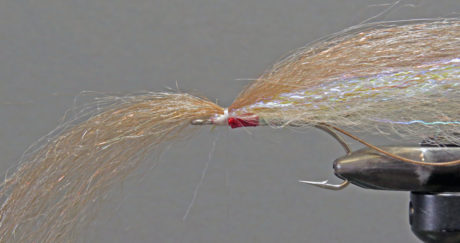
Step 17. Now trim your body material to shape using tapering cuts down both sides and bottom. You can trim this to whatever shape you want to mimic. I trimmed this one to have a slender profile tapering to about 1” past the rear hook.
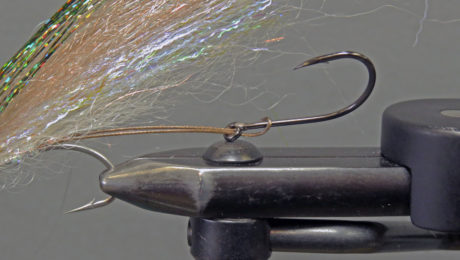
Step 18. Attach your rear hook with hook point facing up. By facing the hook up, you can tuck it up into the material to hide it.
More Fly tying:
Leave a Reply