Lefty Kreh is one of the more well-known and prominent names in the fly fishing community. If you’ve been fly fishing for any amount of time, chances are you’ve heard the name, Lefty Kreh. In a sport that can be, at times, burdened with tradition, Lefty was known to go against the grain, always trying to make things simpler and more manageable. A consummate innovator and instructor, Lefty always radiated possibility when it came to fly fishing. Teaching many directly or indirectly through his books, videos, and other resources, Lefty has left a legacy that will be heard until there is one to listen to them.
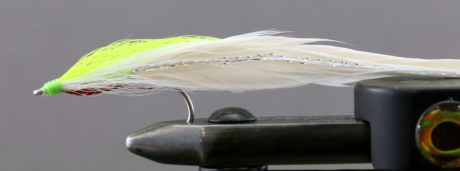
In honor of Lefty, we tie Lefty’s Deceiver in today’s Fly Tying. Arguably the most famous saltwater pattern, so famous, it was featured on a postage stamp by the USPS. Lefty’s Deceiver was initially designed for striped bass in windy conditions. But this simple pattern can be used in various situations, including fishing off the beaches along the coastlines of Alaska, for Salmon. The beauty of this pattern is its intentional simplicity and castability in windy conditions by not wrapping around itself. Fishing on the beach or just off the coast in a boat, the wind is inevitable when you are in coastal areas. Try other variations and even smaller sizes to imitate fry or smolt. They can produce exciting results.
Most fishermen use the double haul to throw their casting mistakes further
lefty kreh
Original Fly Design: Lefty Kreh
Tie, Instructions, and Photos by Mike Brown of Mossy’s Fly Shop in Anchorage, Alaska. IG: @mossysflyshop
Material List:
- Hook: Daiichi 2546 Sz 1 through 2/0
- Tail: 4-5 Strung Saddle Hackles White
- Flash 1: Krystal Flash Silver
- Flash 2: Polar Flash Pearl or Medium Pearl Flashabou
- Body: Veevus Mini Flat Braid Pearl
- Collar: Bucktail White
- Wing: Bucktail Chartreuse
- Throat: Krystal Flash Red
- Thread: Veevus 140 Chartreuse
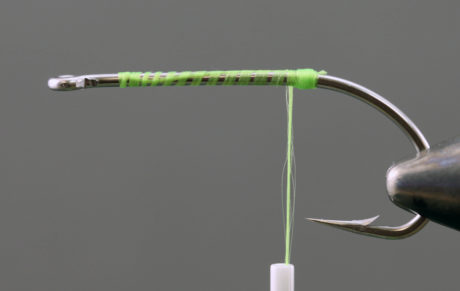
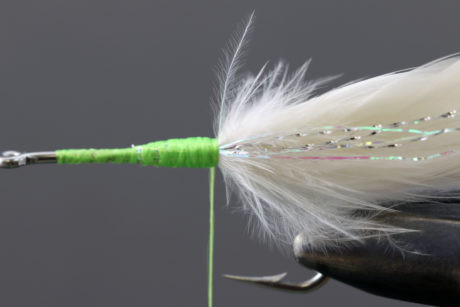
Step 1. Start your thread appx two hook eye widths back, and wrap the thread back to the bend of the hook. Make a small bump for the hackles to prop on at the bend.
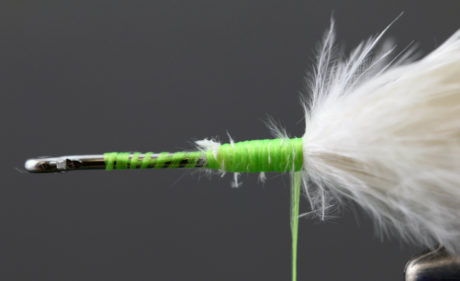
Step 2. Take four or five saddle hackles, roll the stems together (this will make tying them in easier) cut them about three shank lengths long. Holding the wound feathers together, tie them to the hook’s shank. The rolling of the stems will cause the feathers to layout and make an even tail.
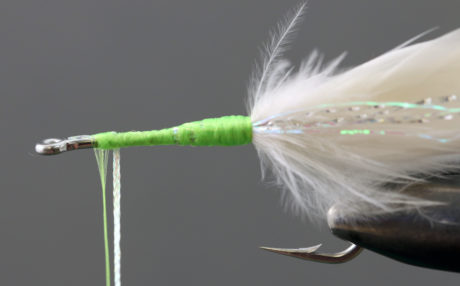
Step 3. Take three strands of silver Krystal flash and tie them in on one side. Repeat this step on the adjacent side. Cut flash equal to hackle tips.
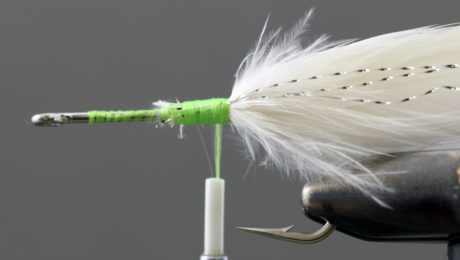
Step 4. Take a few strands of pearl polar flash and tie in on top of the Krystal flash, same as step 3. Cut the polar flash to be a little longer than the tips of the hackle tail
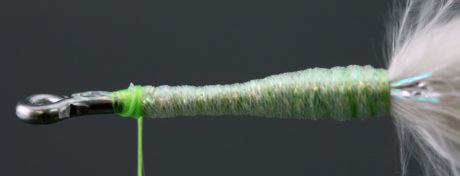
Step 5. Wrap your thread back to the front, where you started. Tie in your pearl flat braid.
Step 6. Wrap your flat braid back to the base of the hackles and back forward.
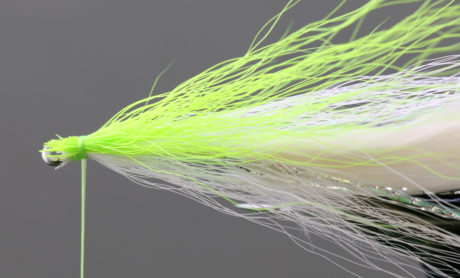
Step 7. Take a small clump of bucktail, appx ½ a pencil width, and measure this out to be about half the length of your hackle tail. Cutting an angled edge, tie the clump to one side of the shank. Repeat this step for the other side. Before tightening it down securely, roll your fingers and spread the hair around the shank. Tighten down.
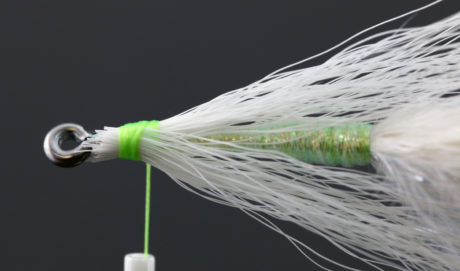
Step 8. Take a little bigger clump of your wing bucktail and tie it in on top of the shank. You want this wing to be appx half the length of your collar.
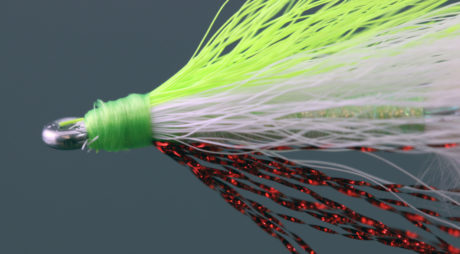
Step 9. Take a few strands of your red Krystal flash, fold in half over the thread, and tie in on the bottom side of the shank. Cut the flash at the end of the hook point.
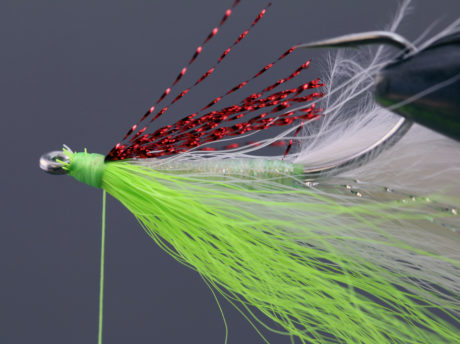
Step 10. Build your head, whip, finish, and glue.
Other Posts about Fly Tying:

Leave a Reply