Spring has arrived across the country, and many of us are anxious to get out and enjoy some fishing with the sun on our faces and ice-free fly rod guides before long. But before you get too ambitious, spring is a great time to ring in the new season by making sure your fly fishing equipment is checked, prepped, and ready to go to avoid any early season disasters. It would behoove you to do this before any extravagant fishing excursions you’re planning this year.
Before that first trip of the year, there’s a lot of cleaning and preparation to do – the goal is to make sure your equipment is in working order and that you’re ready to make only that first cast once you assemble your rod, but also every last cast without your equipment falling on you. So without further ado, here is a simple list of things to inspect and prep before your first outing of the season.

Fly Rods- Give your fly rods a good once over and check for any visible damage. Look for any warps, cracks, or splintering near the ferrules. Check the guides to see if there are any bends or breakage, and examine the wraps around the guides for loose thread. Check the stripping guides for loose or missing rings. Check the reel seat next. It’s simply a matter of time before it slips off the butt area if it’s loose. Check the nuts on the reel seat for corrosion or wear.
If you discover a problem, send the rod in for service now, before it fails you on the water. If the rod is firm and there are no issues, clean it using a microfiber cloth or chamois and a solution of warm water and a tiny bit of mild dish soap. Wipe each portion of the rod down gently, and don’t put it back in its tube or sock until it’s absolutely dry.
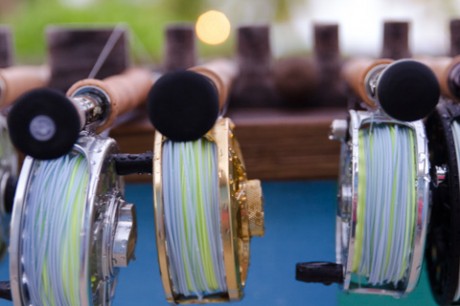
Fly Reels- The best reels are solid and reliable, but we can only keep them that way if we look after them. Many fly reels simply require a cursory examination before another season of use. Others take a little more work, which necessitates dismantling them. Please take it to your local fly shop if you’re not comfortable doing it yourself. One thing you can do that will reap maximum benefit is simply testing the drag system. Apply your drag at various levels, and pull the backing—test for warping, drag slip, or lack of drag power.
Fly Lines – Take your fly line off the spool, and examine for any breakage or cracks. If you find either of them, you’re better off going to your local fly shop and getting a new fly line for the season. After examination, you find your line solid, clean your line. Simple warm water and dish soap solution in a large bowl will do the trick. Simply agitate, rinse, then dry with a clean rag. After cleaning, apply a fly line dressing. Consult your local fly shop if you’re not sure what dressing is best. We’re confident they will have a proper solution. It doesn’t hurt to do this practice during longer fishing trips. Lines aren’t cheap, and like many other things, if you take care of them, they’ll last several seasons.
Leader and Tippet- First things first, check if you have enough leader and tippet, to begin with. You don’t want to get caught with an empty spool while out on the water. Next, of the leader and tippet material you have, make sure it’s not brittle. Some leader material may look fine but could be fragile. Finally, if you have premade leaders, check those too, especially the knots. With that said, it’s best if you start the new season with freshly built new leaders with new material.
Flies and Fly Boxes- Empty your fly boxes and check your flies for rust, damaged, or loose material. If you can salvage anything, of course, you should. After assessing your flies, organize your fly bins, and fly boxes. There are various ways to organize your fly boxes- by species, the water you’ll be fishing or season. Whatever way makes sense to you, just do it. It will save you time and trouble out on the water. After examining your flies, check your fly boxes themselves for any damage, looks slots, weak hinges, or broken latches. You don’t want to spill your newly organized flies because of a damaged fly box.
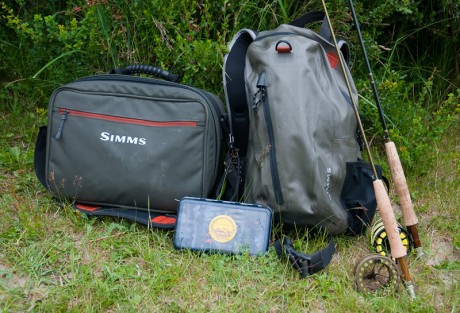
Vests, Slings, Packs, Bags- Items that we use to transport our stuff will wear out over time and usage. Check zippers and snaps, paying specific attention to the hook-and-loop (Velcro) connections, usually the first to wear out. They’re simple to replace, but it’s better to do it before you lose your full fly box or your riverside tools and spools you thought you had on the boat but now can’t seem to find. Examine all D-rings, snaps, straps, and latches to ensure they are in excellent working order and that the plastic or steel hasn’t become fragile to the point of failure. Check to see if any of your pockets have frayed or developed holes. Simply go through the object with a fine-toothed comb. It will help you avoid any unpleasant surprises on your first day on the water.
Waders- You’ll undoubtedly notice if your breathable waders leak. However, some leaks are so minor that they are impossible to detect. It’s actually an easy repair. Turn your waders inside out and fill a small spray bottle with rubbing alcohol. Spray the area where your waders appear to be leaking. If there is a hole, it will darken when the alcohol is sprayed on it. Mark it with a Sharpie. Empty the waders, then after they are completely dry, add a dab of Aquaseal to the marked areas. You should “push” the Aquaseal into the fabric. All you have to do now is wait for it to dry. Even the best pair of waders are likely to have more than one microscopic “pin-prick” hole. Now mind you, not all waders are created equal. With some waders, the alcohol process won’t work. Check with the wader manufacturer or local fly shop for best practices.
Wading Boots- All you need to know about your boots is to take a good look at them. Check for splitting soles and cracks in the material. Examine the obvious items, such as the lace eyelets and the laces themselves. Are they frayed or worn out? Simply replace the laces. If your soles have studs, check if they are missing or need replacing.
Rain/ Wading Jackets- Check your rain/wading jacket for any obvious damage, tears, or failures in the seams. Check the zippers to make sure they work properly. Check the linings of the pockets for holes where things can fall out. Also, If your jacket has a few seasons on it, and you notice the waterproofing is not working as well due to abrasion, dirt build-up, or even body oils, there is good news. You can restore your jacket’s ability to repel water. First, test your jacket’s ability to repel water by spraying or sprinkling water on it. Does the water bead off? When you shake it, are there dark “wet” spots? If so, your jacket can use a refresh of DWR (Durable Water Repellant). You can find DWR at a local outdoor gear store. Make sure to follow the instructions properly for maximum effectiveness.
If all this sounds apparent, excellent! But we’ve all been caught off guard by equipment failure that could have been avoided had we made an effort to examine our equipment. So a friendly reminder is never out of place. Make it a point to clean and inspect your equipment. You’ll learn a lot about your fly fishing gear, and you’ll be able to tell when anything needs repair or replaced entirely. Dig the well before you get thirsty to ensure you avert disaster due to equipment failure while out on the water.
Other Things to Consider When Fly Fishing:
Leave a Reply