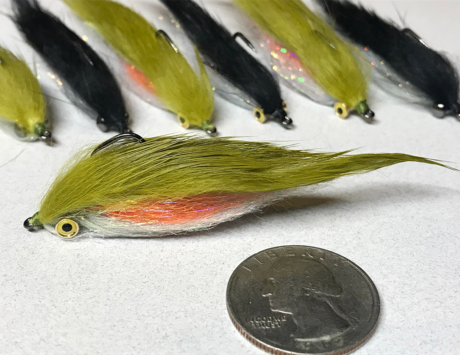
Today’s Tie comes to us from Kevin Foley. Kevin is a scientist, fly angler, fly tier, and drinker of dark beers. Kevin’s philosophy on tying flies involves using natural and synthetic materials to create the illusion of life. As a scientist, Kevin believes observation and time on the water are just as important as spending time behind the vise. When he’s not busy working as a fisheries biologist, he enjoys spending time with his wife and his two griffs, Chewbacca and Lumi.
Kevin also dubs as a Fly Tying instructor at Mossy’s Fly Shop in Anchorage, Alaska.
The Bling Fry emerged from a need for a fry/ smolt type pattern that could use for both single- and two-handed fly rod fly fishing in Alaska.
One evening at the vise, I was thinking back to a particular day on the water when I kept getting strikes not on the swing but on the retrieve. I was quickly stripping in line, coiling it in hand for the next cast, when the water would explode from fish chasing the fly. That day the fish wanted a fast-moving (stripped) bait with stop and go behavior.
I thought about a pattern design that would present well on the swing and the retrieve, incorporate high contrast, and be capable of use across several fly rod types. The Bling Fry is what result.
At the core of the Bling Fry is a technique I learned from tying Jonny King’s Hoo Fly, a virtual bombproof pattern that may be adapted to nearly every piscivorous fish species. The Hoo fly incorporates “V” ties of Senyo’s Laser Dub, finished with a light coat of Liquid Fusion thinned with water to create a highly impressionistic, durable fly. It is a technique that allows you to manipulate the material into just about any profile you want.
Material List:
- Hook: Firehole 811 #6-#8
- Thread: Veevus 8/0 (White and olive)
- Eyes: Barbell eyes of desired size/ weight
- Wing: Magnum cut Zonker (rabbit) strip
- Body: Senyo’s Laser Dub blended with Ripple Ice Dub (Pearl red hue); Liquid Fusion
- Head cement: Loon UV finish
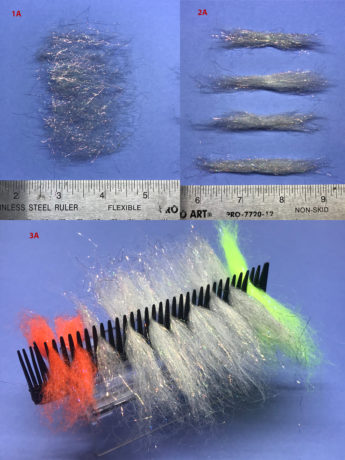
Step 1: Prepare materials. Material prep is often the first step in tying any fly. For the Bling Fry fly, we blend our body material clumps; first, lay down a thin veil of Senyo’s Dubabout 3″ length on the table. Top this evenly with Ripple Ice Dub. Roll the material, so it forms a clump and set it aside. It helps to make up several clumps at a time for all of your tying needs during a tying session. Here a black comb is used to hold materials for easy access. [PICS 1a, 1b, 1c ]
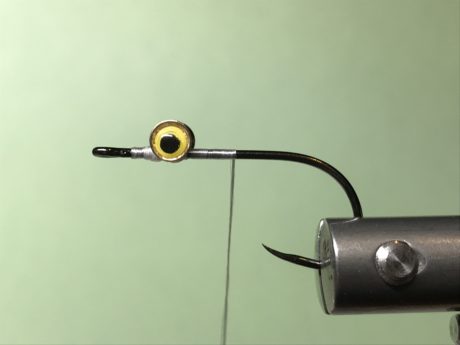
Step 2: Attach the barbell eyes to the hook at approximately one hook eye’s length behind the hook eye and on the opposite side from the hook point. [PIC 2]
Step 3: Tie in the accent color of Senyo’s Laser Dub clump. Use the “V” tie technique. On the same side as the barbell eyes, attach the laser dub clump at its midsection and wrap your thread to the rear. Fold the laser dub clump to the rear (Forming the “V,” and wrap tightly over the fold, stopping just behind the barbell eyes. Using a small comb, gently brush out excess material from the clump. [PICS 3a, 3b, 3c]

Step 4: Tie in the body color of Senyo’s Laser Dub clump. Use the “V” tie technique as described in Step 2. Comb the two clumps together into one. [PICS 4a, 4b, 4c]

Step 5: Tie in a single clump of Senyo’s Laser Dub behind the eyes. Leave about 1/3 the length extending to the rear of the hook. Advance thread in front of the barbell eyes and wrap 3-4 securing wraps tight to the barbells. Fold the forward portion of the dubbing clump to the rear of the fly and comb together the entire fly. In this tutorial, we change our thread color to olive to match the zonker wing. However, this is not necessary and is purely for our aesthetic interests. [PICS 5a, 5b, 5c]

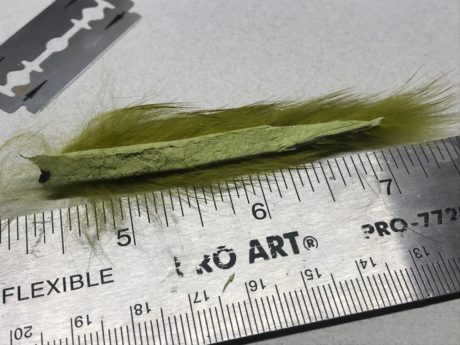
Step 6: Cut a piece of magnum zonker strip 2.5″ (#6 hook) or 2.25″ (#8 hook) and cut a taper in the “back” end of the strip. The back will be determined by the direction the hair extends off the hide. [PIC 6]
Step 7: Place the zonker strip against the hook and make a pen mark in the location where the hook will pierce the hide. To find the best spot, line up the end “tip” of the laser dub body with the point of the tapered end of the zonker strip. Mark the hide at about the bottom of the hook bend, making sure to give yourself about 1/4″ of hide that extends past the eye of the hook. Remove the fly from the vise, pierce the hook through the hide at the pen mark, and return the hook back to the vise. [NO PIC]
Step 8: Part the rabbit fur on the hide at a point where the hide falls just behind the hook eye. Once parted, it is helpful to pinch and form the rabbit strip around the shank before securing. Make 4-5 tight thread wraps and cut the tag end of the zonker strip. Whip finish and apply head cement, or Loon UV acrylic to the thread wraps. [PICS 8a, 8b, 8c]

Step 9: For this next step, I find it helpful to use a clip to hold the rabbit skin in place. Here we use the Marc Petitjean Magic Tool. Apply a thin bead of Liquid Fusion to the skin side of the zonker strip. (Be careful not to apply too much! If you do, when the glue dries, it contracts, and excessive amounts may warp the rabbit strip into an unnatural shape.) Gently tamp the combed material down onto the strip, taking care not to get glue on your fingers. The trick is to just touch the fibers to the skin along the length of the zonker strip. The more you tie, the easier it gets. [PIC 9]
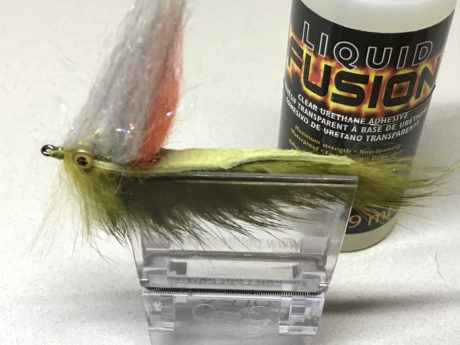
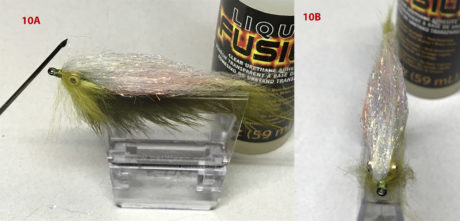
Step 10: Apply a small amount of Liquid Fusion to the body of the fly using your bodkin. In this case, less is more! I find it useful to squeeze a small amount into a disposable cup and add a few water droplets to dilute. It makes working with the Liquid Fusion much easier. Take care not to apply too much pressure and compress the Laser dub. Move the bodkin over the body from the front to the rear when applying the diluted Liquid Fusion. [PIC 10a, 10b]
Step 11: Feel free to experiment with your own color blends of Senyo’s Laser Dub and flash, as well as contrasting colors of magnum rabbit strips. For smaller hook sizes, I have used regular zonker strips. However, there is less margin for error with piercing the skin at the dead center of the strip, which may reduce the durability of the fly.

Other Flies to Tie
Leave a Reply