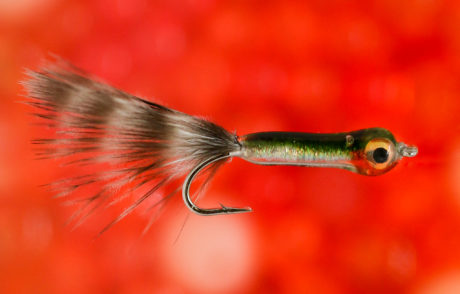
Summer is slowly but surely coming. During the early part of the season is when the water levels and water temps are rising; this combination kick starts the salmon smolt migration out into the big deep blue yonder of the ocean to grow up, and like any good college student after five years return home to roost, because they have nowhere else to go.
One thing is a given, trout love high protein meals, and when a bait ball of smolt and fry comes barreling down the river, they are ready to ambush and eat as many of them as possible. Is quite a phenomenon to see this happening, Arctic Terns swirling and crashing the water trying to get their share and trout slashing and swirling trying to get theirs as well. It is a fast-feeding frenzy like no other. it’s no surprise smolt and fry patterns this during the early season.
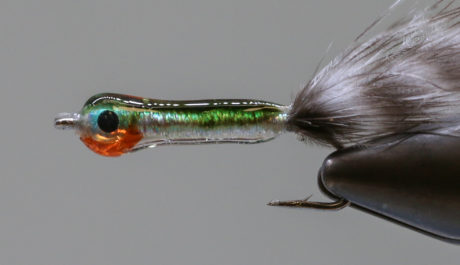
This style of fly requires a lot of spinning of your vise, I had to think if it would be a good pattern for a step-by-step tutorial. Ultimately, I felt you would be able to understand the process without seeing everything in action.
Originally Designed By: Curtis Fry
Tie, Instructions, and Photos by Mike Brown. Mike B own is the owner of Mossy’s Fly Shop in Anchorage, Alaska.
Material List:
- Hook: TMC 9394 Sz 10
- Thread: Veevus 140 White
- Tail: Grizzly Mini Marabou
- Under Body: Veevus Pearl Mini Flat Braid
- Eyes: 1/8” Super Pearl Eyes
- Back: Loon UV Olive
- Throat: Loon UV Orange
- Over Body: Loon UV Thick
- Finish: Loon UV Flow (this covers up the tackiness of the thick)
Step 1. Start your thread and wrap back in line with the hook barb.
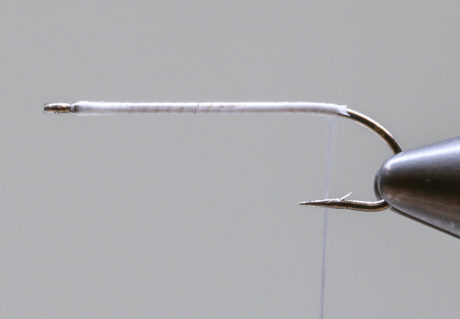
Step 2. Tie in your mini marabou tail. Make the ail approximately the length of the hook shank. I like to tie the feather down the length of the shank to help create a little more body as well as give the body a level of uniformity.
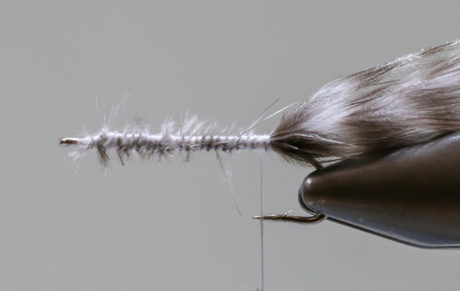
Step 3. Tie in the mini flat braid.
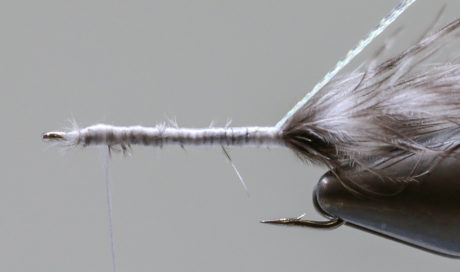
Step 4. Wrap your mini flat braid forward to approximately one hook eye width back of the eye. Whip finish.
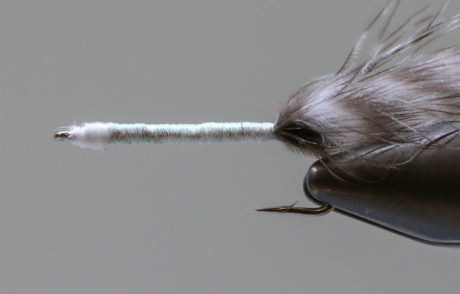
Step 5. Using a little Loctite Gel, glue the eyes to the hook on each side. Give the glue a couple of minutes to set.
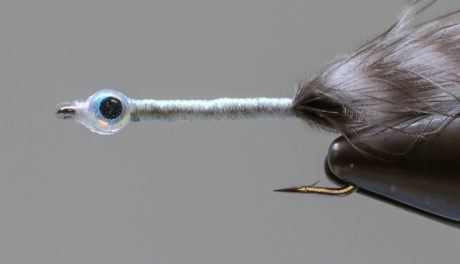
Step 6. Using the Loon UV Olive, cover the back of the shank. Be sure to go b ween the eyes. Shake the color well and apply it smoothly. The product is thick enough it shouldn’t run. You can use a bodkin to thin out. Cure with UV Light.
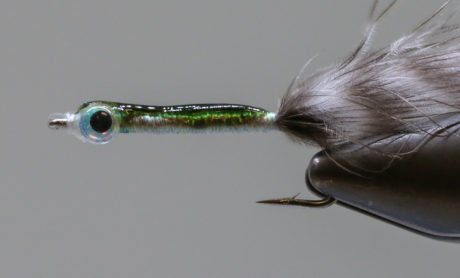
Step 7. Turn the fly upside down. Apply your Loon UV Orange between the eyes. Cure with your light.
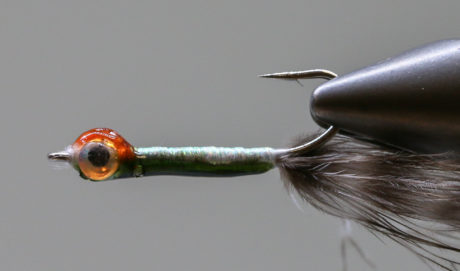
Step 8. Using Loon UV Thick, apply over the entire fly. Using your bodkin, spread the resin around to cover everything. While doing this continually rotate your fly, this will help keep the resin from globing and dripping. Apply smaller amounts to build to the desired size and shape you are looking for. Once the fly is the size you want, cure it with your light as you are rotating the fly around. You can go back and apply little amounts to level out any dips or irregularities. For the finish coat and to remove the tackiness, apply some Loon UV Flow and cure with UV light.
Other Flies To Tie:
Leave a Reply