Part 3 of 3.
We at Deneki Outdoors are fans of Classic Fly Patterns. The sheer beauty of a fully dressed classic fly is a sight to look at. If These flies are not the easiest flies patterns to tie. They are complicated but even tiers with basic skills can achieve this fly.
It’s best to tackle this fly in stages. Sure you can tie this fly in one sitting, but that would be akin to trying a perfectly cooked Prime Rib Roast in one fell swoop. Take your time. Over the next three week’s we’ll release the steps to get this fly to fruition. Trust us, you’ll be better off.
A big Thank you to Stuart Foxall for the Instructions and Photos. You can find Stuart on Instagram @stuartfoxall.
Note: The original patterns used materials from animals that are now endangered or extinct. Please do not attempt to use materials from endangered or extinct animals. Please consult your local fly shop for appropriate substitutes.
I’ve been tying classic salmon flies for several years now and get asked quite a few questions on ‘how to’ and ‘where yo begin’? Most folks who start on classics will usually struggle as they begin with patterns like the Jock Scott or similar complicated patterns.
One of the best patterns, to begin with, is ‘The Kate.’ This version comes from George Kelson’s book, so I’ve done the married wing in single replicated fibres, which Kelson did with most of his patterns. I believe the Kate is a good starter as it’s not super complicated, and most of the materials are relatively easy to find.
I think Classic flies are worthwhile tying because they really make you think and plan your tying processes out. This planning will really help you become a better tier when tying modern flies.
Tie, Instructions, & Photos By Stuart Foxall.
Material list:
- Single hook
- Tag. Silver twist and light yellow silk.
- Tail. A topping.
- Butt. Black herl.
- Body. Two turns of crimson silk gut, and crimson Seal’s fur.
- Ribs. Silver tinsel (oval).
- Hackle. Crimson, from second turn.
- Throat. Light yellow hackle.
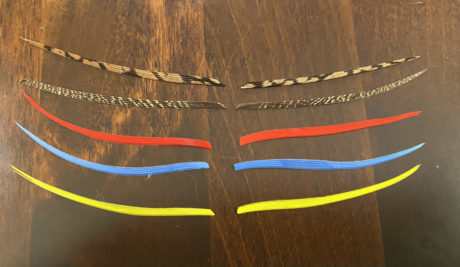
- Wings. (Thin) Grey Mallard, and tippet strands, Bustard, Golden Pheasant tail, Swan dyed light yellow, crimson and light blue; Mallard and a topping.
- Sides. Jungle.
- Horns. Blue Macaw
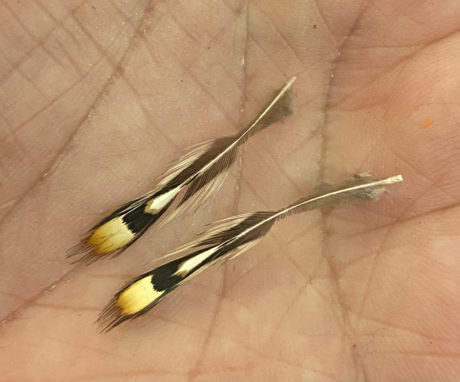
Step 21: I’ve shaped two matching pairs of Golden Pheasant tippet feathers. The original fly would have been smaller and used ‘strands’ of tippet. But as this fly is quite big I’ve had to use the whole feathers.
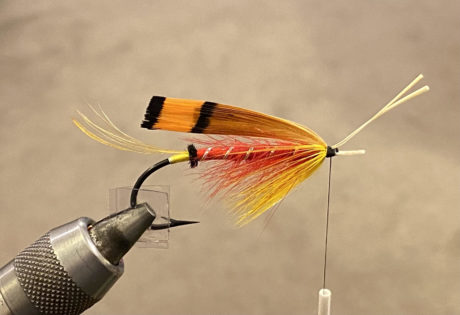
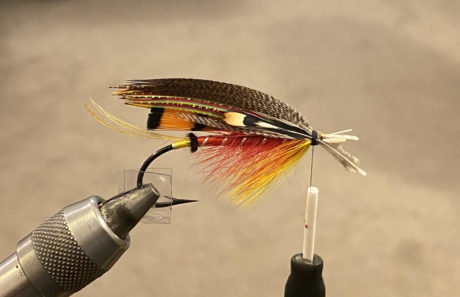
Step 22: Tie in a strip of grey mallard on either side of the underwing.

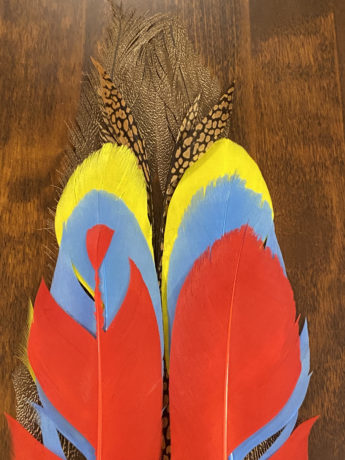
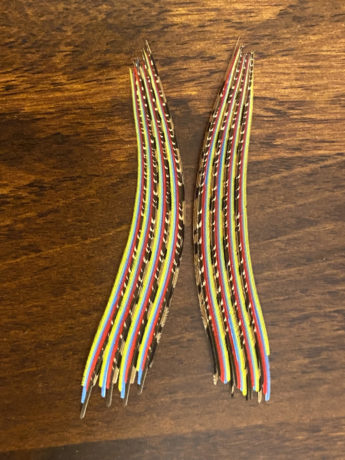
Step 23: These are the feathers you will need to create the wing. I have placed left hand feathers together on one side and the right hand feathers together on the other side. This makes it easier for me to cut the correct fibres to marry together.
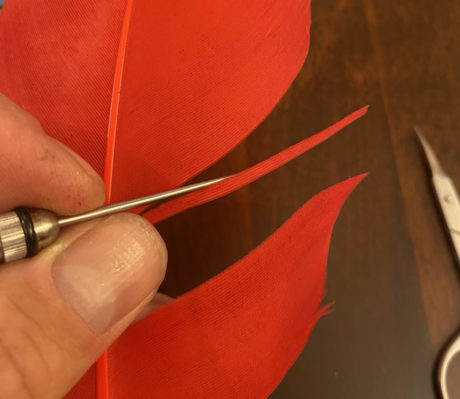
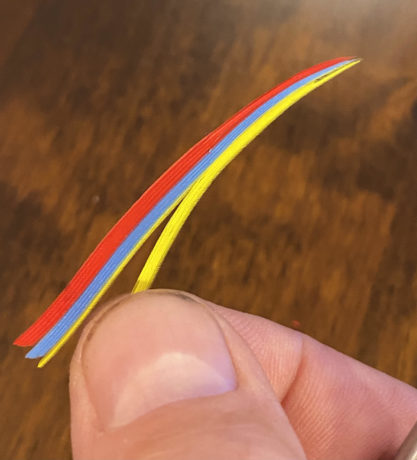
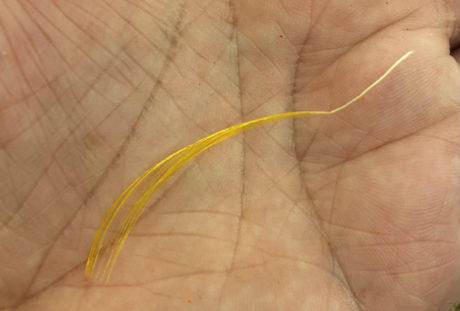
Step 24: Use a dubbing needle to pull 4 fibres off each feather and cut them off.
Step 25: Here I have once again placed each set of 4 fibres together in the order they are to be married together.
Step 26: Here you can see how the fibres of the feather are ‘married’. Each feather fibre has little barbs on them which ‘zip’ together and marry.
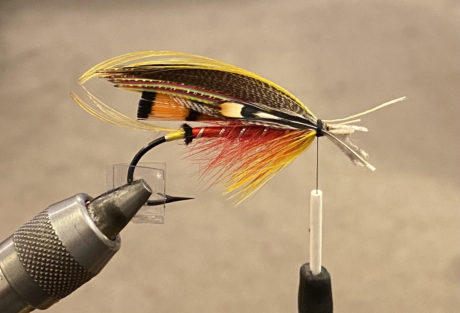
Step 27: Place the two wings together and place them to the tying in point.
Step 28: Using your finger and thumb to pinch the wings together, wrap a loose loop of well-waxed thread around the wings.
Step 29: Drop the bobbin slowly. This should help collapse the feather fibres to compress so you can tie them in more securely. You can slightly dampen the tying in point of the wings with spit which softens the fibres and makes life a little easier.

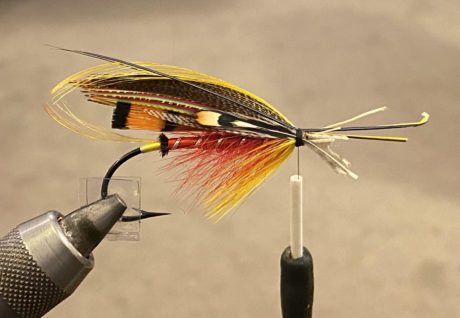
Step 30: Prepare a pair of jungle cock eyes by trimming the fibres off at the tying in point. The barbs that are left on the stalk help hold the feather in place when tying in.
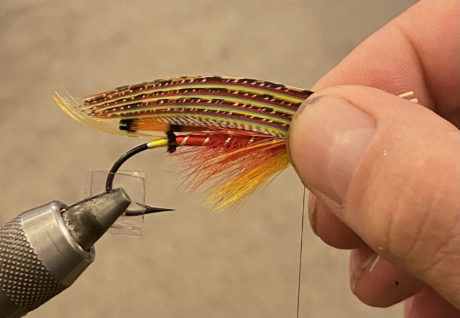
Step 31: Snip off the butts of the wing securely and tie in a ‘slip’ of bronze mallard as a roof. Tie in the jungle cock eyes securely with well-waxed thread. You may want to dab a little cellulite varnish to soak into the thread to hold everything in securely here.
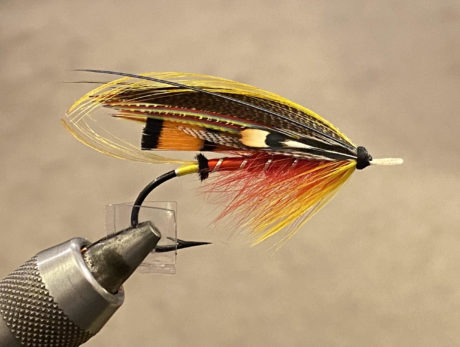
Step 32: Prepare and shape a Golden Pheasant crest.
Step 33: Tie in the crest to extend over the wing.
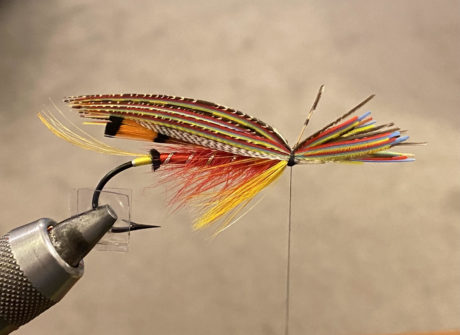
Step 34: Place a blue macaw fibre on each side of the crest to create the horns. The tips should cross over themselves at the rear of the fly. You may notice I didn’t cut off any of the materials until the whole stage was completed. This helps us from creating ‘lips’ that our thread may want to slip off which usually means we have to wind more thread creating bulk.
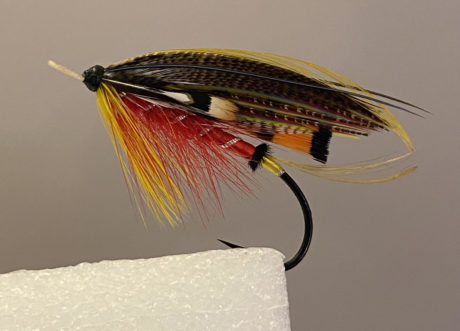
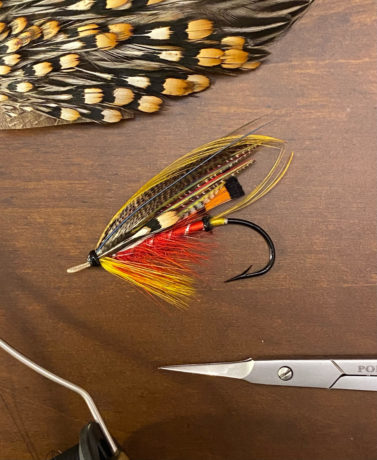
Step 35: Give a few coats of varnish to create a bulletproof head.
As I suggested tying Classic flies like this will improve your overall tying skills. You can’t really take shortcuts but this means you don’t waste wraps of thread and plan every step ahead of time which results in tidier and more robust flies for your normal fishing.
Completed Fly:
Here are the links to Part 1 and Part 2:
Other Flies to Tie:

Leave a Reply