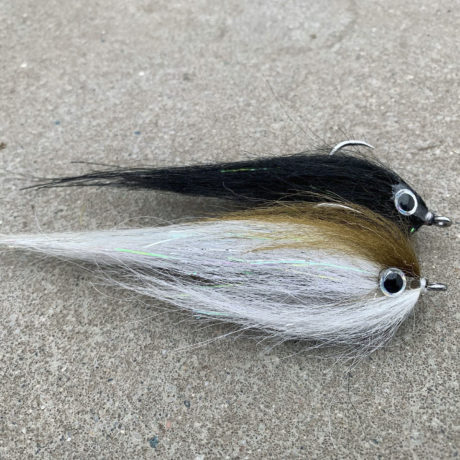
A ton of action in the water and very easy to cast for its size, Jack The Stripper is a pattern that’s effective on a variety of saltwater species that target baitfish…Tarpon, Tuna, Stripers, Pike, Chinook Salmon in the salt, and even GT’s.
The Snowrunner material IMO is far and above the best for large baitfish patterns. It retains its shape in the water far better than Goat and soft hairs. It doesn’t tangle like Icelandic sheep, and you can use about half the amount of material versus Sheep or Yak because of its structure. It is durable as heck and just comes alive in the water!! You have to see it underwater. You’ll swear a fish just swam up!
Tie Instructions and photos by Alex Belonga. If you’d like to see more of Alex’s flies or want to inquire about custom flies, you can find him on Instagram- @straitsonthefly_customflies or Facebook- @Yooperfly.
Materials List:
- Ahrex Bluewater short shank hook #2/0 – #4/0
- heavy dumbbell eyes
- Snowrunner Brush (SRFS)
- Snowrunner Hair (SRFS)
- Gen 2 Tab eyes (SRFS)
- Nanosilk 100D (semperfli)
Step 1. Tie in hook upside down. This is a #4/0 Ahrex Bluewater. You’ll want to cover the point of the hook, trust me.
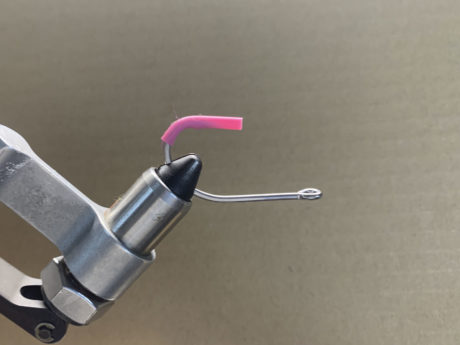
Step 2. Lock in the dumbell eyes. Add some glue and really lock these down!
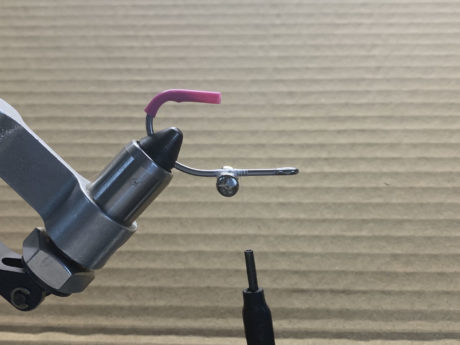
Step 3a. Lock in the wire from the Snowrunner brush.
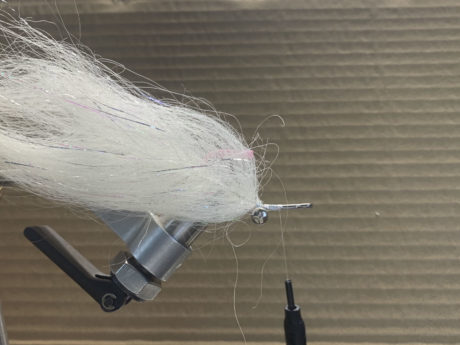
Step 3b. Take 3-4 turns and pick all the hair out. Lockdown the wire really well before trimming.
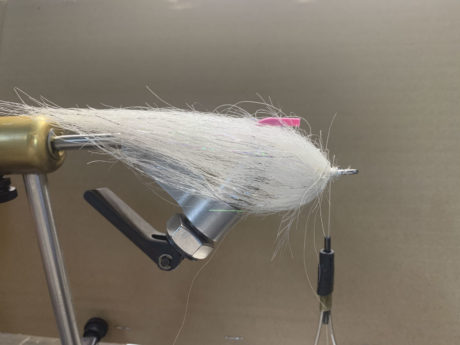
You should get a nice teardrop profile like this when done. And herein is the beauty of Snowrunner material, you get a full profile with a minimal amount of material!
Step 4. Rotate your vice around and gently glide your scissors on the ‘belly’ of the fly. This exaggerates the baitfish profile.
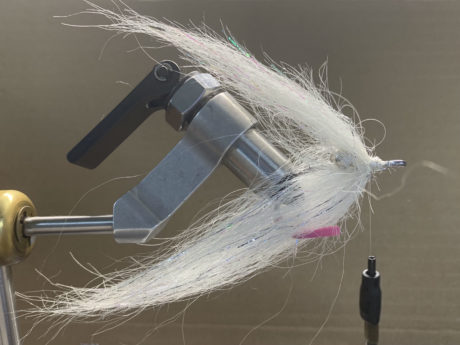
Step 5. Add a long ‘flash tail.’ Leave it really long and trim at the end if you like.
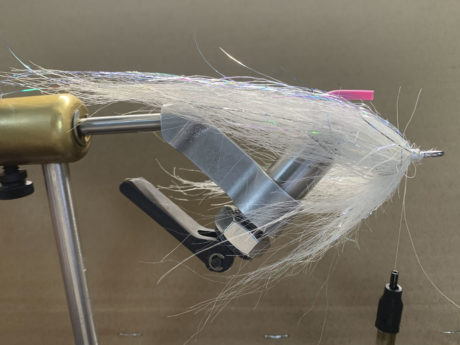
NOTE: If you want to tie on smaller hooks or just don’t need a huge profile, you can skip step 6 and go right to step 7. I tie them both ways depending on the size of the hook and species.
Step 6a. Reverse tie in a longer overwing of Snowrunner.
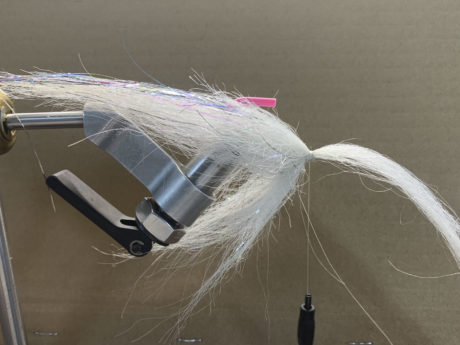
Step 6b. Fold back and lock in securely. Adding some glue is nice here.
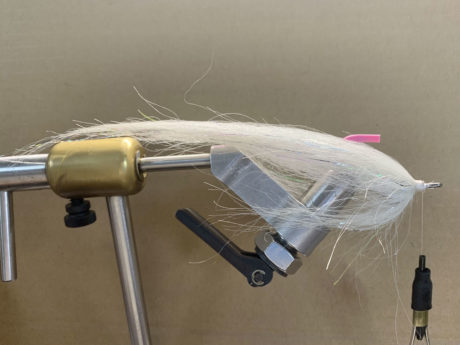
Step 7a. At this point, I’ll reverse tie in a short overwing and a throat. This will add a great accent color and fill out the profile we are after so the fly holds shape in the water.
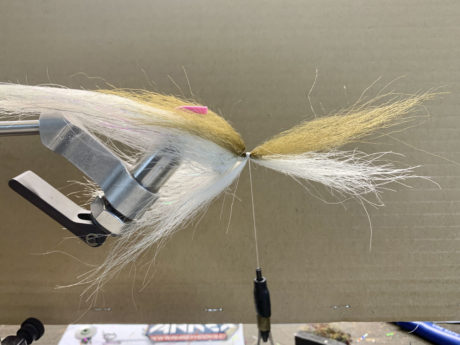
Step 7b. Fold back and secure in tight.
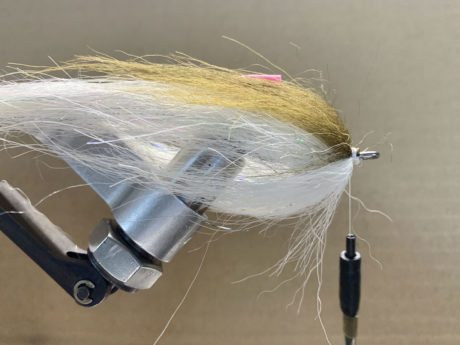
Step 8a. I use tab eyes for baitfish patterns. They are the most secure you can get and I like their profile and lack of bulk. These new Gen 2 eyes from Skeena River Fly Supply are my favorite!
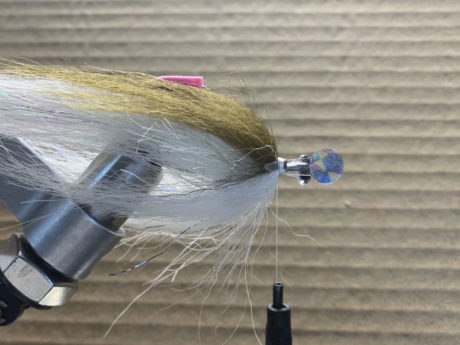
Reverse them in and add something like Aqua Seal on the back of the eyes…(I just buy clear, flexible caulk from my local hardware store.)
Step 8b. Fold back and whip finish. At this point, I add Sally Hansens hard as nails over the eyes, so they don’t slip off. And I’ll add it around the final whip finish for security.
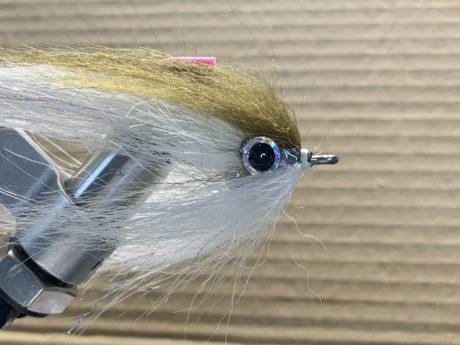
Finished Fly:
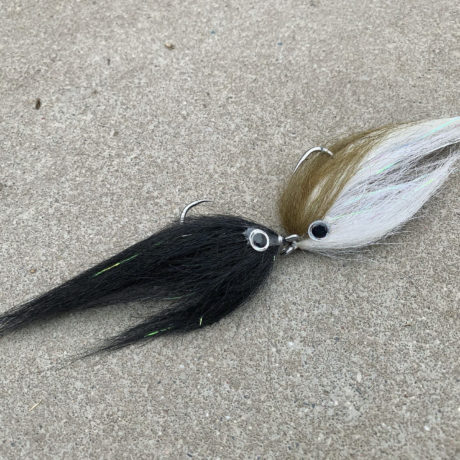
Other Flies to Tie:
Leave a Reply