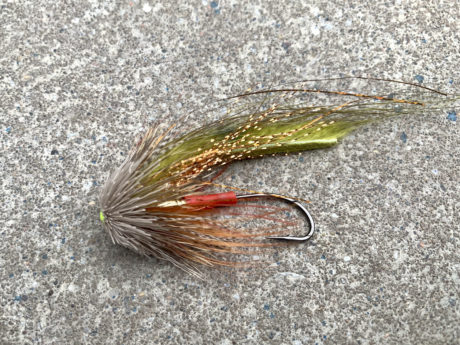
Today’s fly instruction comes to us from Alex Belonga with Straits On the Fly, Custom Flies. A proud Yooper from St. Ignace, Michigan, a beautiful harbor town on the straits of Mackinac Island, nestled between Lake Huron and Lake Michigan, Alex grew up outdoors, hunting and fishing.
Most days, Alex specializes in horticulture as a Garden Center and Flower Shop owner and operator. In addition, Alex is blessed with a wife, three daughters, and a young son that keep him on his toes.
Alex started tying flies after he received a fly tying vise for his birthday. Since then, he’s been all in. After posting some of his work online, He’s been noticed and started receiving requests for customer flies. Naturally, it became a hustle, and Straits On The Fly, Custom Flies, was born. Alex’s flies are well thought out, creative, and most importantly, super fishy.
If you’d like to see more of his flies or want to inquire about custom flies, you can find him on Instagram- @straitsonthefly_customflies or on Facebook- @Yooperfly.
The tie instructions and photos by Alex Belonga.
Materials List:
- Brass skittle tube from Skeena River Fly Supply (SRFS)
- 1.8mm tough tubing (SRFS)
- Silver pheasant hackle or schlappen is fine
- Ringneck pheasant rump hackles or golden pheasant rump hackles
- Nutria zonkers (SRFS)
- Accent flash or krystal flash
- Flashabou
- Deer hair
Step 1: Slide 1.8mm tubing through a skittle tube and melt a flange on the end to keep the tubing from sliding off. I prefer the ‘tough tubing’ or ‘soft tubing’ because it is much stronger due to its flexibility. The skittle tube is awesome and provides not only a great rate of sink-ability, but offers perfect balance as well. You can fish these full float to the heaviest of sink tips which provides great versatility.
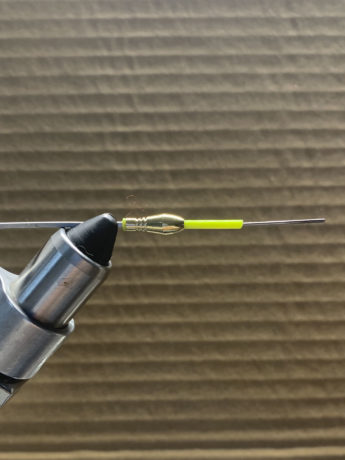
Step 2: Wrap the silver pheasant by the tip. You can use any soft hackle you want here in place)
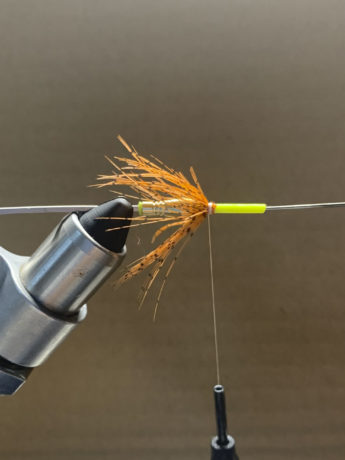
Step 3: Make a short wing with accent flash or krystal flash. This gives a color pop behind the wing and provides some support as well.
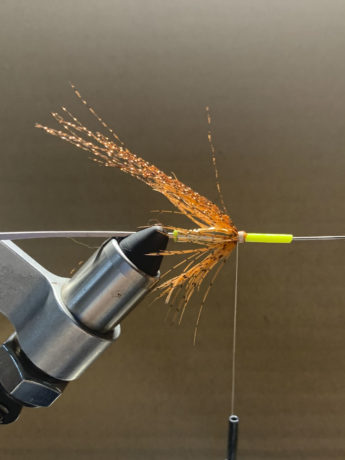
Step 4: Prepare your zonker strip by cutting it into a ‘V’ shape…….it doesn’t have to be perfect. Doing this in hand because it’s easiest. Also, cut a small slit at the top of the wing.
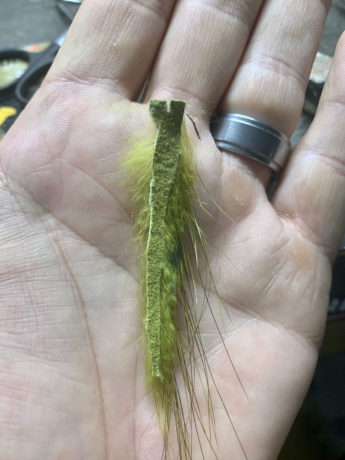
Step 4a: Tie down in reverse, and try to fold the slit around the top half of the tube. This makes it extra secure! a touch of glue on the thread doesn’t hurt also.
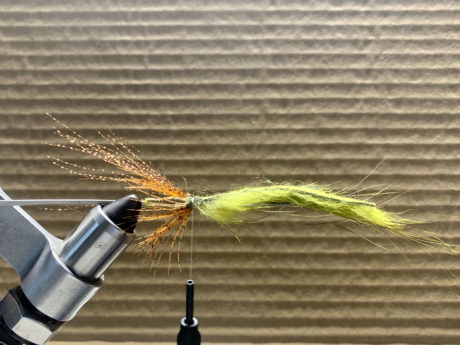
Step 4b. Fold the wing back, and tie a thread damn in front of the material. DO NOT tie back on the zonker. By tying in front you create a beautiful lift to the wing and create a zonker that never wraps the hook. (This is especially effective with softer zonkers like rabbit). Also, by tapering the zonker, you get much more movement out of it.
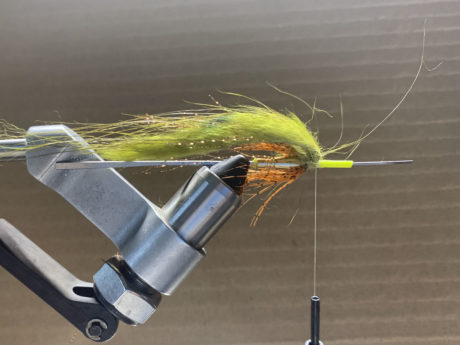
Step 5: Tie in some holographic copper flashabou into the wing, and add a large jumbo teal feather in front to help hold the zonker hair back. I prefer the teal feathers over mallard because the barring is generally stronger.
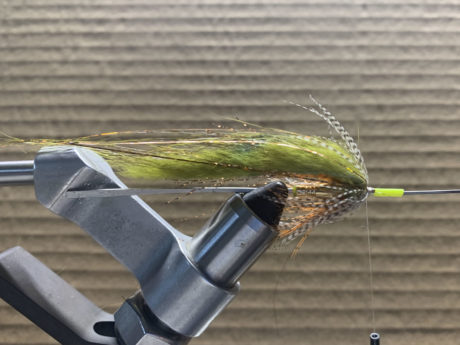
Step 6: Tie in 2 pheasant rump hackles concave, this is to create the pectoral fins.
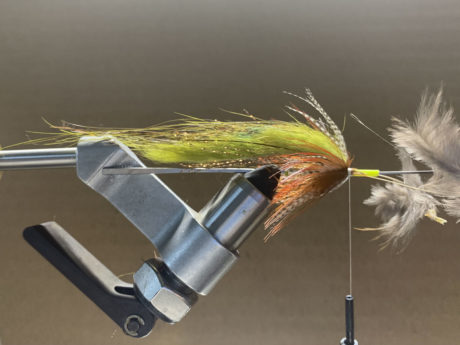
Step 6a: Should look like this from a top view. Tying them in concave makes them flare out and breathe in the current (you can be creative with these as well and use Guinea, Peacock, etc etc.).
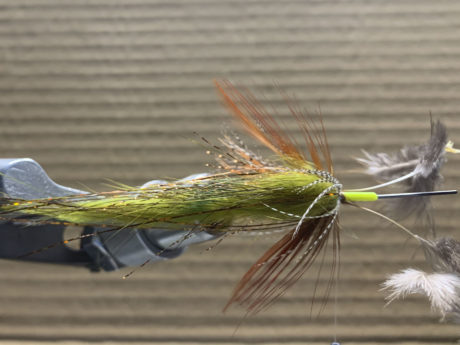
Step 7: This is where it gets somewhat tricky! Carefully slide the tube off and melt a flange to only leave a few millimeters (Note, leave extra room until you are comfortable. You have to spin the deer head in this space!).
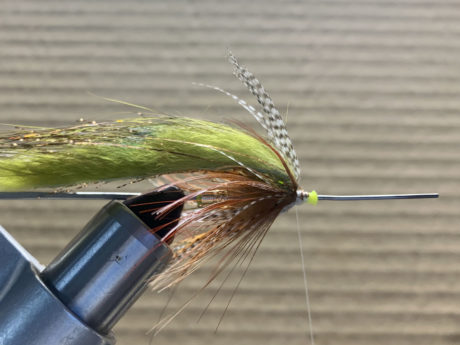
Step 8: The whole goal of this head shape is to get a very wide yet sparse head that is tight against the body of the fly. This is my favorite way:
**tie in a stacked clump, tips back, on top. Only use a couple of wraps and don’t tighten too much! We have to spin 2 clumps in one space, and if you tighten too much it won’t spin. You’ll have to practice to find that ‘perfect’ tension.
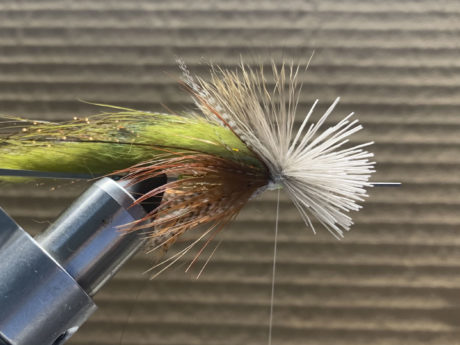
Step 8a: Rotate vice and tie in an equal size stacked clump 180 deg from the other clump.
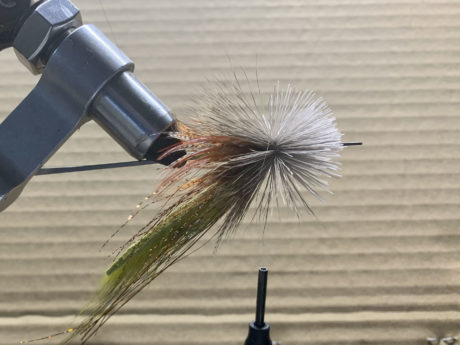
Step 8b: Spin the head!
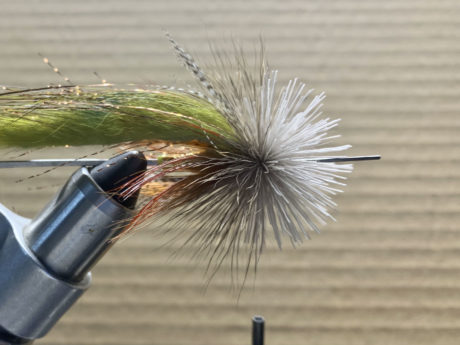
Step 9: Pull hair back and lock thread behind the flange. Brush some super glue on my thread and throw a couple of whip finishes in as well.
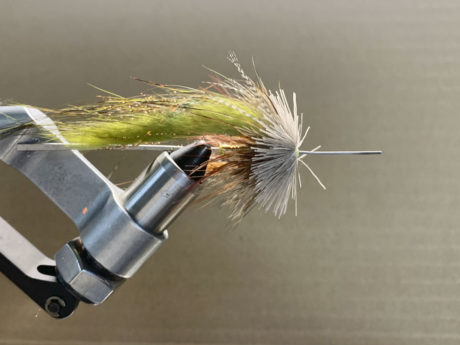
Step 9a: Use a pair of curved razor scissors and trim the head so as to create that turbo cone shape. Notice how it’s trimmed to follow the taper of the fly.
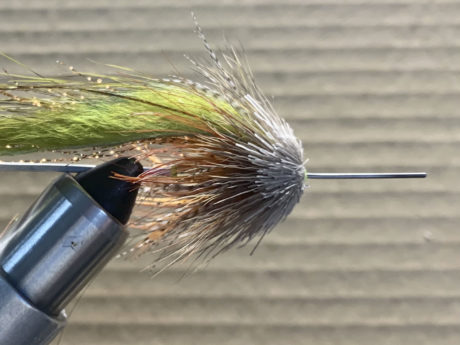
Finished Fly:

Other Fly Tips & Tricks:
Leave a Reply