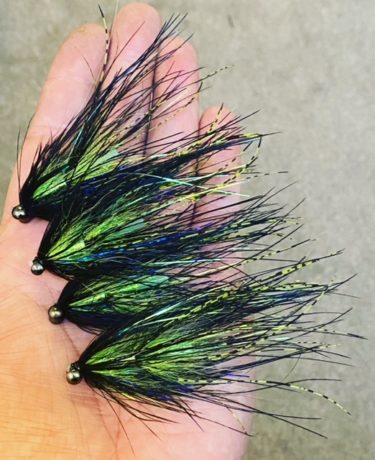
Hello! It’s November, and you know what that means… It’s the holiday season. Lights are going up, Christmas shopping, and the Hallmark Channel Movie Marathons have begun. All That said, Here is another fly instruction provided to us by Friend of Deneki Outdoors Stuart Foxall to help us all keep calm and tie on. Enjoy.
It seems a lifetime ago that my good friend and Spey casting maestro Brian Niska designed the Pieroway made “Metal Detector” fishing rods. While fishing with his prototype rods, we realized he’d come up with something special. So I thought it would be a great idea to design a fly using the colors of the rod, dark blue blank, chartreuse green whippings, and black reel seat.
The Metal Detector intruder fly is what I came up with, and since its early days, it has caught many different species throughout the world. Aquaflies sell the fly on shanks commercially if you want to buy some, but here’s how to tie them on a tube.
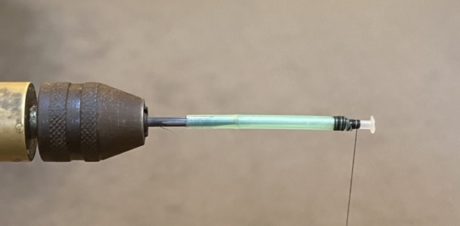
Step 1: Tie in a clear inner tube into a chartreuse outer tube, length to your choice. Notice how I’ve burred inner tube to create a lip that stops your thread from slipping off when finishing your fly off.
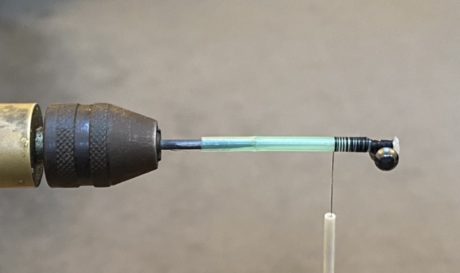
Step 2: Tie in some dumbbell eyes of your choice and weight.
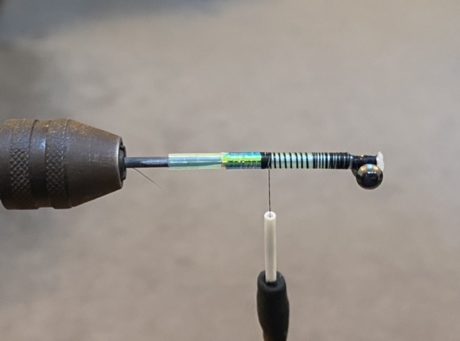
Step 3: Tie in a mirage mylar tag at the rear of the fly. I started the tag where the liner ends inside the outer tube. This ‘cavity’ of the outer tube will act as a hook holder while fishing.
Step 4: On the original, I used chartreuse gel blob Fritz for the ball to create the ‘prop’ for the softer materials. On smaller flies, I like to use a chartreuse flashabou dubbing well-scrubbed.
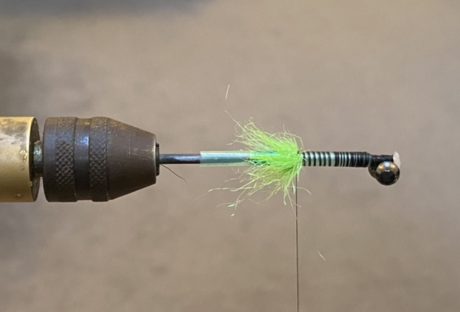
Step 5: Tie in a small bunch of chartreuse fox pointing forwards.
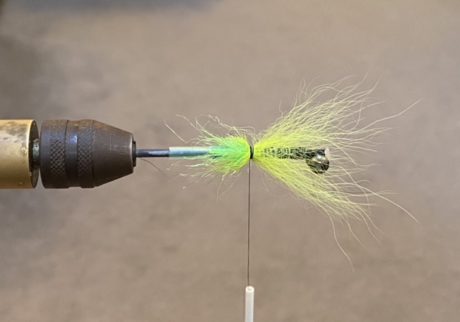
Step 6: Fold the fox back over itself.
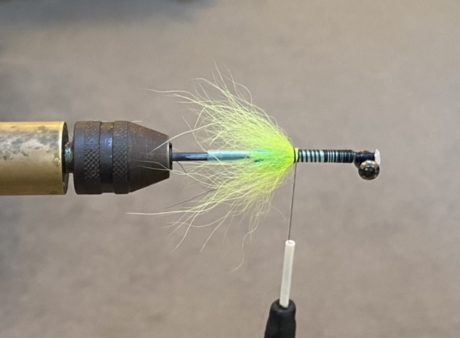
Step 7: Tie in some strands of chartreuse holographic flashabou evenly around the tube.
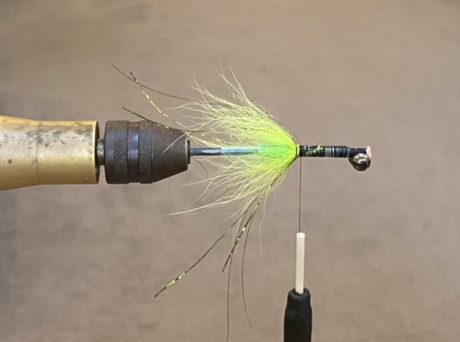
Step 8: Tie in some black Rhea fibers all around the tube.
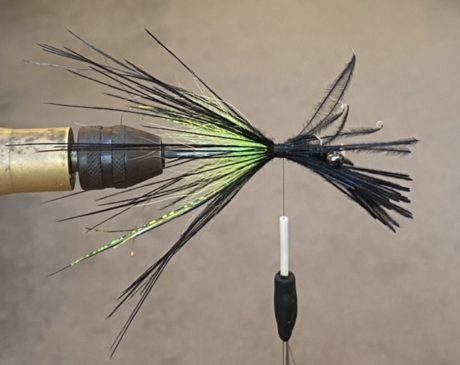
Step 9: Tie down all of the stub ends of the Rhea along the tube evenly, so a lip isn’t created along the body. Tie in some strands of mirage flashabou all around the tube.
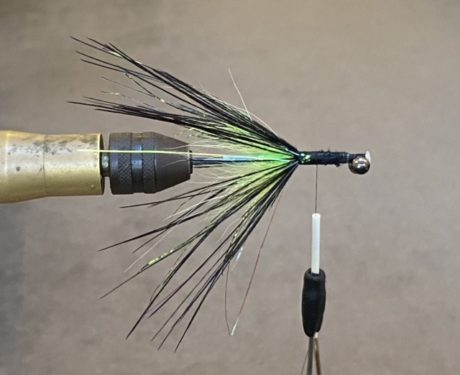
Step 10: Tie down all of the stub ends of the Rhea along the tube evenly so a lip isn’t created along the body. Tie in some strands of mirage flashabou all around the tube.
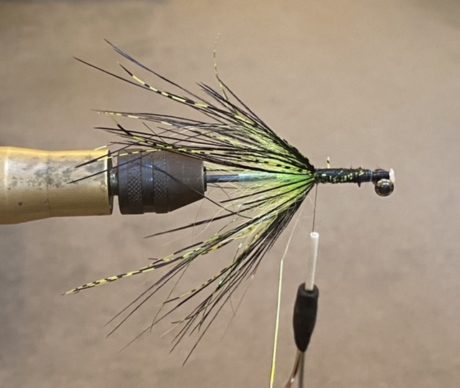
Step 11: Wrap some Pearl braid along the body smoothly.
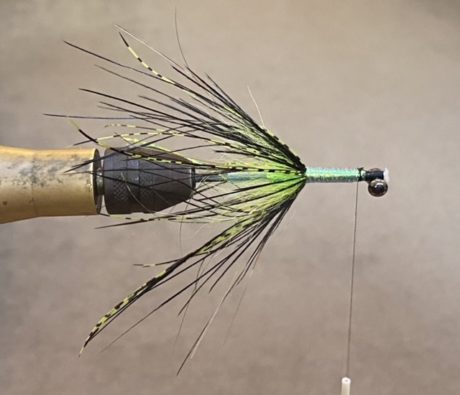
Step 12: Start the front station of the intruder by forming a dubbing ball again.
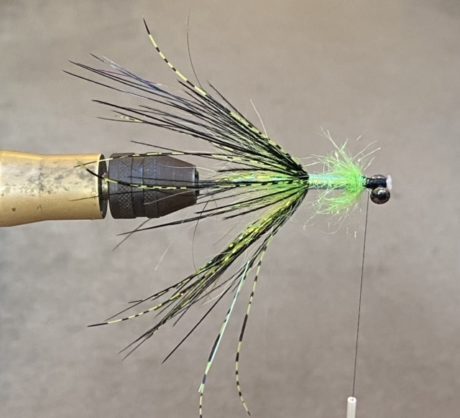
Step 13: Tie in some more chartreuse fox as previous. For the front station I like to use slightly more fox, this helps create more shoulders on the fly.
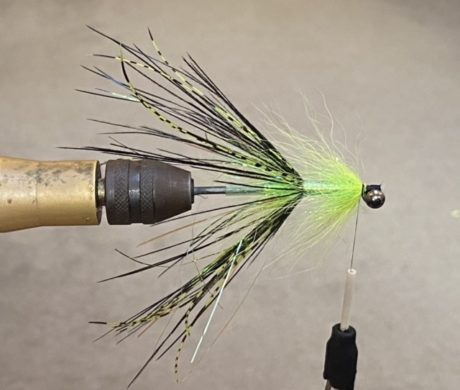
Step 14: Tie in strands of blue holographic flashabou all round the tube.
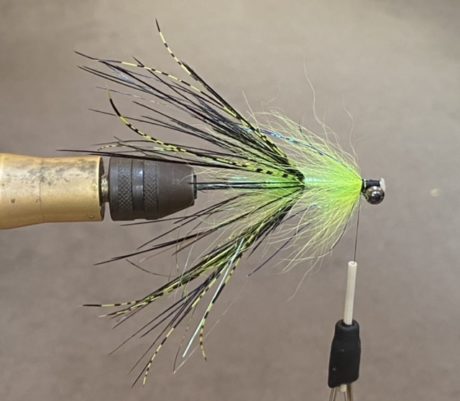
Step 15: Black Rhea tied in all round as previous. Notice how I haven’t tied the front Rhea as long as the rear Rhea. This helps with movement of the fly in the water.
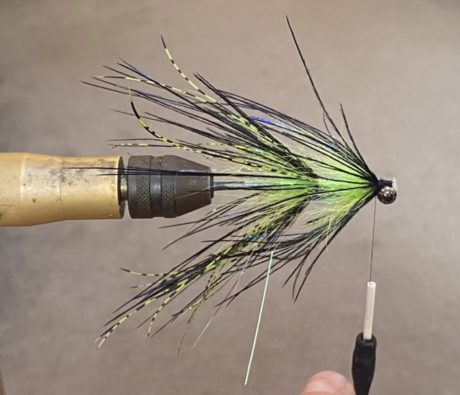
Step 16: More strands of the mirage flashabou all around the tube.
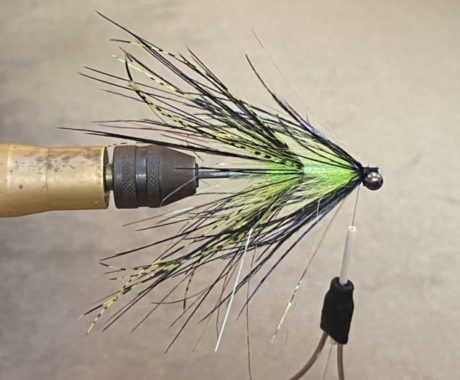
Step 17: As a ‘crest,’ I’ve added some long strands of mirage flashabou and black Rhea on the top of the fly to extend just short of the length of the fly.
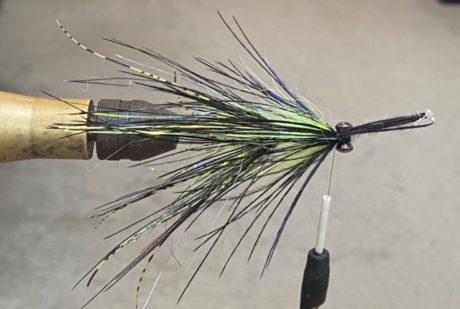
Step 18: Choose a long-fibred, webby black schlappen hackle to finish off the head of the fly. From the side view you can see how the ‘crest’ thickens the look of the fly. Whip finish and varnish the head well.
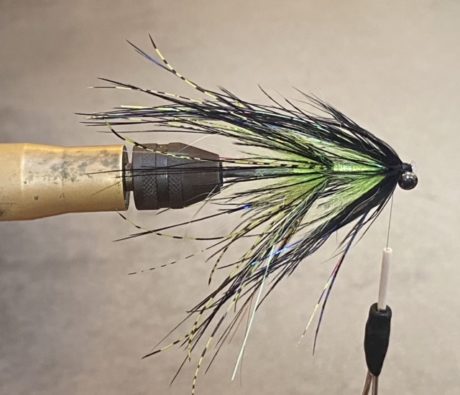
Finished Flies!
This is how the fly should look after you’ve finished tying it. Please note although there is a lot of materials incorporated in this fly, it isn’t overdressed. Too much material restricts the movement of the fly in the water.
Now just cast out and hold on tight….really tight!!!!!

Other Flies By Stuart Foxall:
Great post! Thank you for sharing! I’ve tried tying these on shanks, like the one I bought. Tube tying might be next for me. The one I purchased either has fine ostrich or thick rhea. I like using golden pheasant tail fibers on the back station. Definitely need some blue lady amhearst fibers for the front.