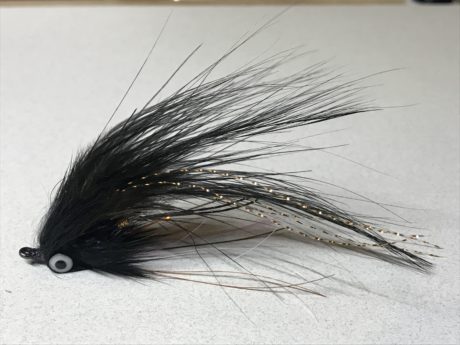
Halloween is just around the corner and what better fly to tie than a fly called the “Goblin.” This is a pattern created by Alaska fishing guide and fisheries conservationist, Mark Heironymus. Initially designed with Steelhead in mind, this versatile fly is effective in fishing for Rainbow Trout and with the right color schemes, for Salmon also.
Like any good Goblin, this pattern is uber versatile as it mimics a sculpin, leech, smolt, or just about any swimming prey fish out there It is lightweight and casts well, regardless of your setup.
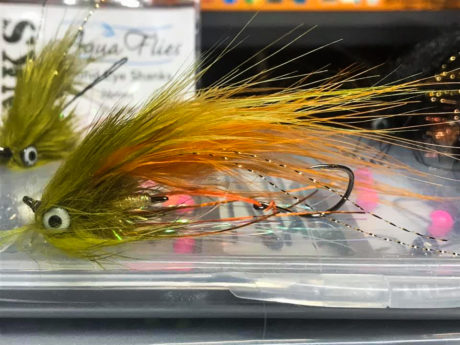
The fly that follows is not an exact replicate of Mark’s Goblin, as some liberties with material substitutes. Regardless, you’ll find this pattern is fun to tie. Please note the color variation of the finished fly at the bottom of the post.
Fly Designed by: Mark Heironymus
Tie, Instructions and Photos by: Kevin Foley
Material List:
- Shank: 26mm Aqua Flies Shank
- Hook: Firehole 714 Sz 6
- Braid: Berkely Fireline Crystal 30lb
- Barbell Eyes: Pseudo Eyes – Medium
- Thread: Veevus GSP 100D – White
- Body Braid: Veevus Mini Flat Braid – Copper
- Bump: Frizzle Chennile, Large – Black
- Belly Flash: Pearl Flashabou
- Underwing: Copper Krystal Flash
- Wing: Bird Fur – Black
- Head: Rabbit – Black
Step 1. Affix the barbell eyes behind the eye of the shank leaving a distance between the barbell and the eye of the shank about one shank eye’s length. Attach the stinger loop such that the loop is 1-1/8” in length from the tie in point. This length works well for the hook used; however different hooks may require different loop lengths. Start the thread at the rear of the shank when tying in the braid, wrap up the shank to the barbell, fold the braid to the rear, then wrap back towards the tie in point. Apply crazy glue to the braid when you wrap up to the eye, and again when you wrap back. Cut the braid about 1/8” before the tie in point and continue to wrap to the tie in point.
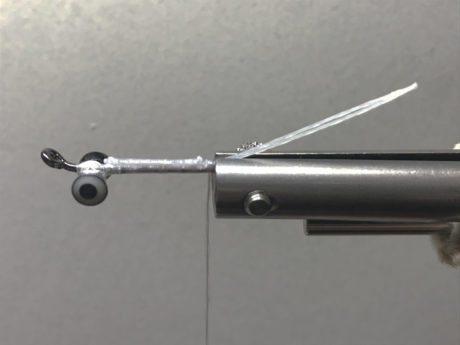
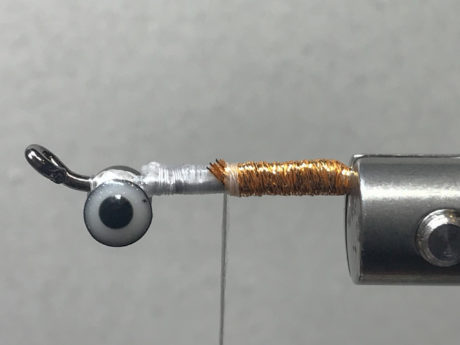
Step 2. Tie in the flat braid at the rear of the shank. Advance thread forward 1/2 the length of the shank. Wrap the flat braid forward with touching turns and secure the flat braid at the halfway point.
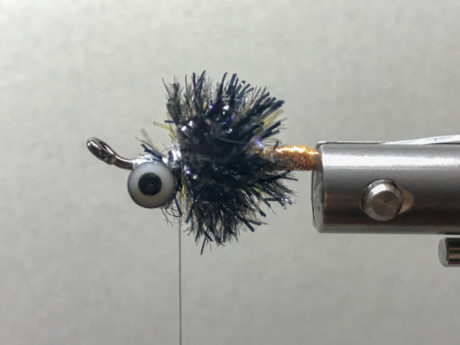
Step 3. Cut a length of frizzle chenille. Prepare the end by stripping away the black frizz exposing ¼” of the braided core and tie in. Wrap the frizzle chenille up to the barbell eyes making sure to stroke all the fibers to the rear as you wrap.
Step 4. Attach 5-10 strands of flashabou directly behind the barbell eyes on the underside of the fly (same side as the barbell eyes). Tie in the strands at the center of their length and double the front ends of the flashabou back over the shank and wrap the thread over the fold to anchor the clump in place. It may be necessary to spread the flashabou a little around the underside of the shank, so the individual strands do not clump together.
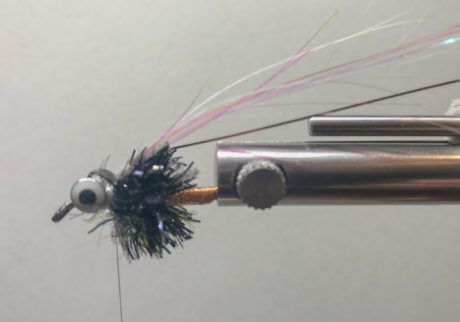
Step 5. Tie in two strands of krystal flash atop the fly directly behind the barbell eyes. Tie in strands at the center of their length and double the front ends of the krystal flash back over the shank. The strands should be tied in and folded back at a slight angle, so they do not fall in line with the shank.
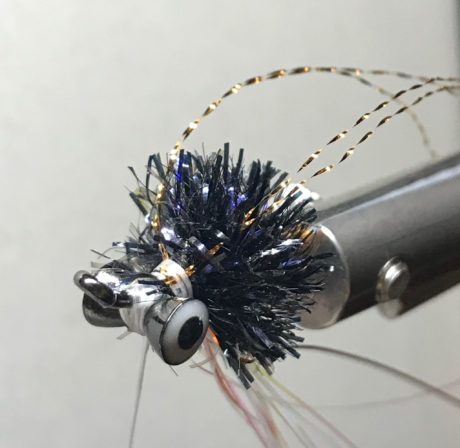
Step 6. Prior to tying in the feather wing in the next step, lay down a “pillow” of dubbing to help seat the feather(s). This ensures the feather(s) will remain exactly as positioned on the fly when tied in. Ordinarily, you would not do this for a single feather. However, for this pattern, three feathers are tied directly atop one another. Without a pillow to seat them in place, subsequent feathers tied in will roll to either side of the feather tied in previously. Laying down two or three wraps of a dubbed thread will do the trick. Do this before tying in the second and third feathers.
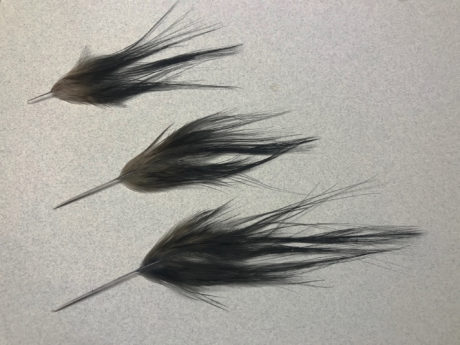
Step 7. Tie in the feather wing. The first feather tied in should be the longest and extend from the tie-in point, behind the barbell eyes, to the bend of the hook. If two or more feathers are used for the wing, the second and/or the third should be shorter than the previous feather. Layering the feathers creates a natural taper and maximizes movement for a lifelike appearance. See the photo below for the three feathers used in the fly.
Place the longest feather atop the fly to visualize the tie-in point. Pinch the feather down onto the fly and secure it with one or more thread wraps as you wrap towards the chenille. Using GSP will allow you to apply greater thread tension without breaking the thread. This helps lock the securing wraps but also cinches the feather rachis into the dubbing pillow. Add dubbing to the thread and create a pillow as done previously before adding the remaining feathers.
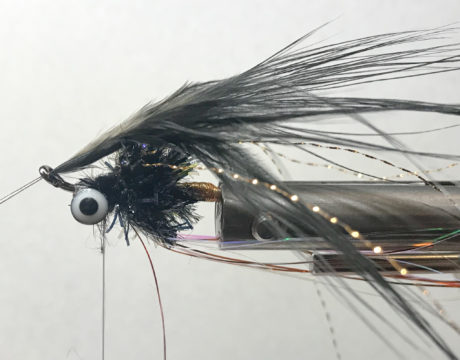
Step 8. Create a dubbing loop approximately 5-6” in length. Advance the thread ahead of the barbell eyes. Fill the dubbing loop with approximately 3” of black rabbit. Spin the loop and pick out any tangled rabbit fur that is trapped. Use a brush to vigorously brush the dubbing loop along its length to remove any loose materials.
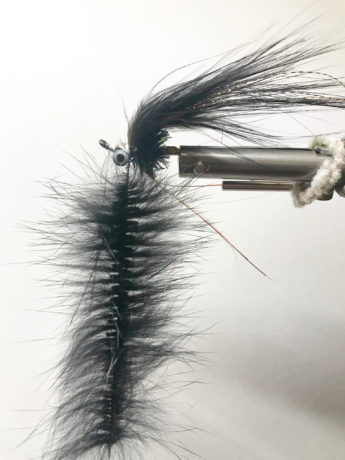
Step 9. Wrap the dubbing loop behind, over, and in front of the barbell eyes. Secure the loop behind the shank eye. Whip finish.
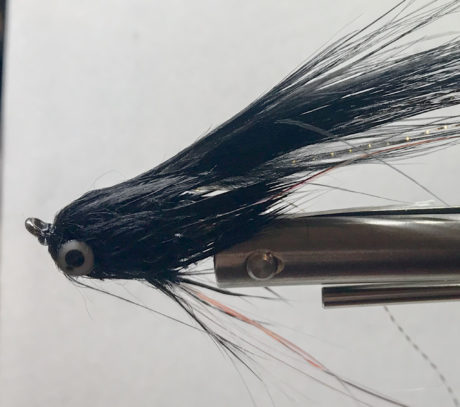
Finished Fly.

Other Fly Tying Instructions:
Thanks, nice tie Kevin.