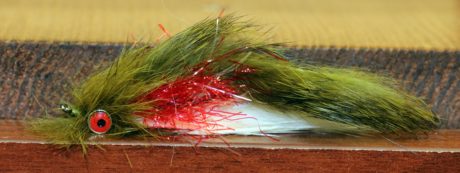
Deneki Friend and Alum Jerry French tied the original version of “The One Sculpin,” an articulated stinger style fly. Jerry came out with the Ultra Rig Kit last year, and we decided to tie his pattern using that system. We also changed the throat material as well.
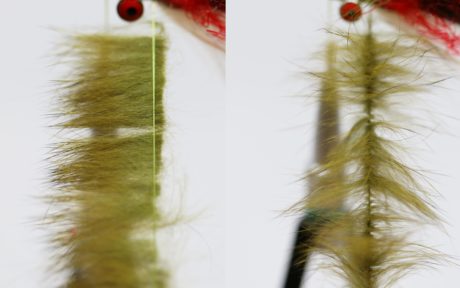
What is the “Ultra Rig” you ask? In short, it’s a trailer loop made from a limp 50# braid using a piece of silicone tubing to keep the trailing hook “up.” Tying stinger-style flies has always been challenging in keeping the hook riding straight behind the fly and not sagging down. Commonly wire is used, but the wire has its challenges. It’s bulky, stiff, and tends to break. It also can be a pain to change out hooks.
Through trial and tribulation, Jerry started to think about how tube flies are rigged and how he could combine a stinger pattern and a tube fly. By cutting a small 1” long piece of a flexible tube and running your stinger thread through the tube, looping on your hook, and then sliding the tube up onto the hook eye allows you to then place the tube onto the stub end of your shank, giving you a flexible yet rigged stinger that stays “up.”
Why would you use an Ultra Rig setup? By using this system, you can get away from bulky, heavy wire that is hard to lace through a hook eye as well as it allows you to rotate your hook up or down at any time.
Enjoy playing around with the ultra rigging, don’t be afraid to try it on your favorite stinger style flies. Play around and experiment. That is one of the greatest things about tying your own fly.
Instructions, photos, and tied by Mike Brown, Mossy’s Fly Shop owner, in Anchorage, Alaska.
Material List:
- Shank: Aqua Flies 26mm Round Eye Shank
- Stinger Material: 30lb Fireline Smoke and Aqua Flies Ultra Rig Tubing
- Body: Red UV Polar Chenille
- Top Wing: Straight Cut Rabbit strip in color of choice
- Belly Wing: Straight Cut Rabbit Strip in color of choice
- Dumbell Eyes: Medium Lead Eyes
- Head: Cross Cut Rabbit Strip cut from the hide in color of choice
- Thread: Veevus 140 Olive
- Hook: Aqua Flies Talon Sz 2
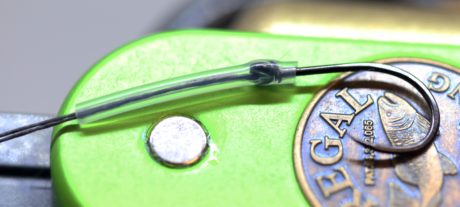
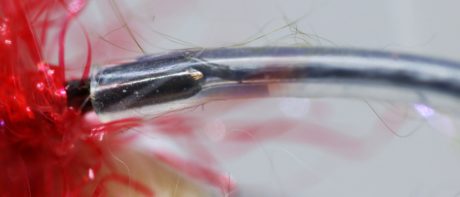
Step 1. Assemble your Ultra Rig. Cut appx 5” of your braid, then cut a 1” piece of your tubing. Double your braid over in half and slide through the tube. Loop your hook on, then slide the tube over your hook eye.
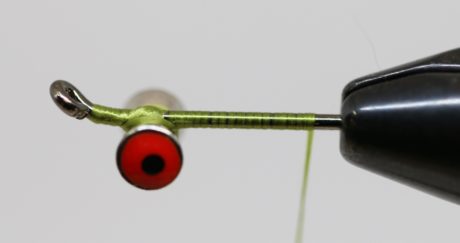
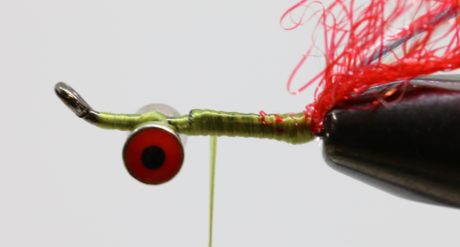
Step 2. Place your shank in the vise. Leave appx 3/16” of shank for your tube to attach to. Start your thread and place your dumbbell eyes, using figure-eight wraps, appx 2 hook eye widths back. Wrap your thread all the way back.
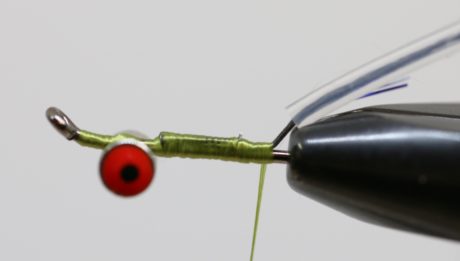
Step 3. Attach you’re the braid of your ultra rig on top of the shank, adjust the tube to appx 1/16” of the shank. Tie the braid down all the way to the eyes, double it over and tie it in all the way back—trim excess braid off.
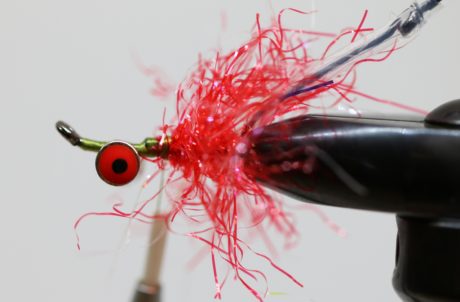
Step 4. Tie in your UV polar chenille.
Step 5. Wrap the UV Polar Chenille forward, appx 3-4 turns, tie off and trim excess.
Step 6. Tie in your top rabbit strip. Trim the rabbit strip. If you are running hook down, leave it a little longer than the hook. If you are running hook up, trim inside hook point.
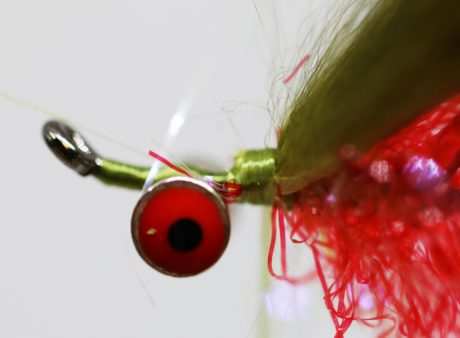
Step 7. Rotate fly upside down and tie in bottom rabbit strip. Trim this strip slightly shorter than the top strip. This is to give your sculpin a nice even tapper up to the top strip.
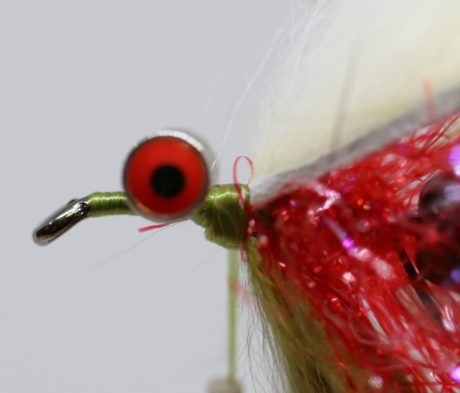
Step 8. Create a dubbing loop. Trim your rabbit hair off the hide and place in the loop. Spin your loop up.
Step 9. Wrap your spun dubbing loop up to the back of the eyes, then figure 8 wrap around and over the eyes, finishing with two to three turns in front of the eyes: whip finish and glue.
Step 10. Pull your ultra rig tubing forward and slide onto the short piece of shank you left sticking back.
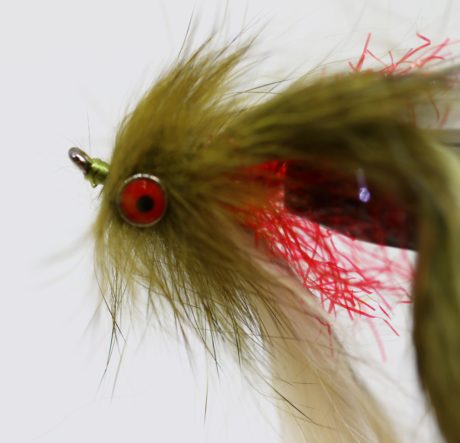
Finished Fly:
Other Posts:
Leave a Reply