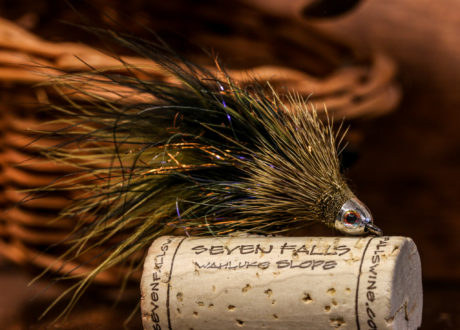
We realize it is Fall, and the flesh bite is starting. Regardless of the flesh bite, Sculpin is still a prime source of food for trout no matter the season.
There are a lot of Sculpin flies out there. What makes the Bow River Bugger stand out is it is a Sculpin pattern that incorporates deer hair. A great combination of flash and movement, the Bow River Bugger, is a must in your fly box regardless of the season.
Fly Designer: Unknown
Instructions, Tying, & Photos by Mike Brown. Mike Brown is a lifelong Alaskan, has a passion for fly fishing and fly tying. He is also the owner of Mossy’s Fly Shop in Anchorage, Alaska.
Ingredients:
- Hook: Firehole 811 Sz 4
- Thread: Veevus 140 Olive
- Conehead: Small X Eyed Cone
- Eyes: 1/8” Super Pearl
- Lead Wire: .025
- Tail: 1 Olive and 1 Black Marabou plume
- Body: 1 Olive, 1 Black Schlappen feather and Olv/Copper UV Polar Chenille
- Rubber Legs: Grizzly Flutter Legs Black Barred Rootbeer
- Collar: Olive Deer hair
Step 1. Slide your conehead on and slide it up to the hook eye. Using appx 15 wraps of your lead wire, wrap the shank and then push it up tight into the cone. Start your thread at the base of the lead wire.
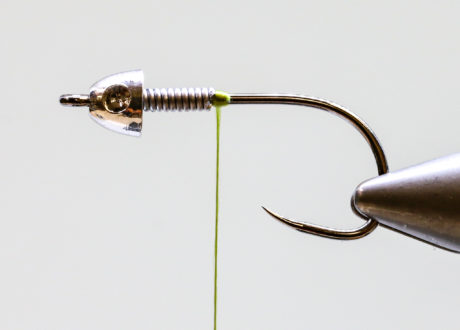
Step 2. Build a nice little ramp at the base of the lead wire, then cover the lead wire really well (you want to make sure the lead can not move around). Run your thread back to the start of the bend in the hook.
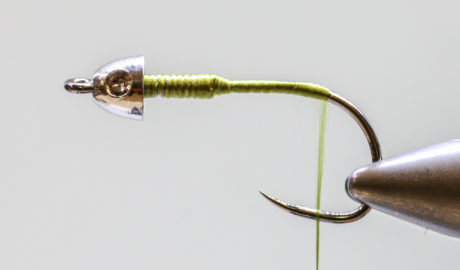
Step 3. Tie in your first piece of marabou by the tip.
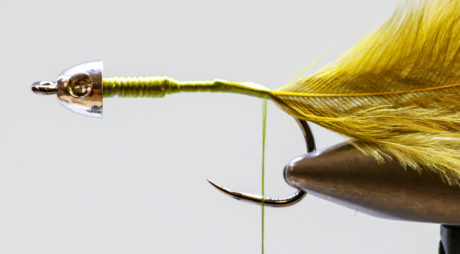
Step 4. Tie in your second color of marabou by the tip.
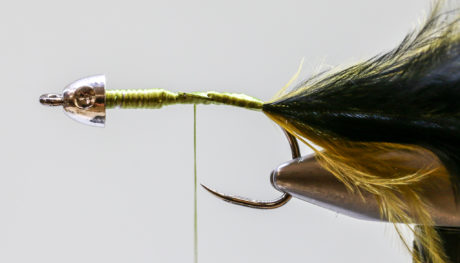
Step 5. Holding both pieces of marabou together, wrap them up to the base of the lead wire. Sweep the feathers back with each wrap, which will help reduce them from being trapped and blend them together. Pull all the feathers back to create a tail, then tie the feathers down back to where you started.
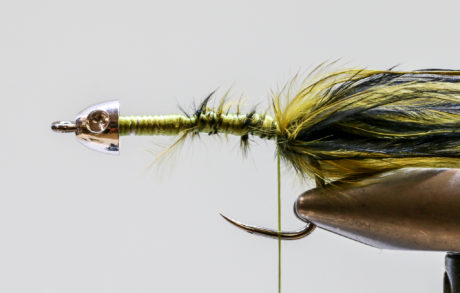
Step 6. Tie in your first color of schlappen by the base.
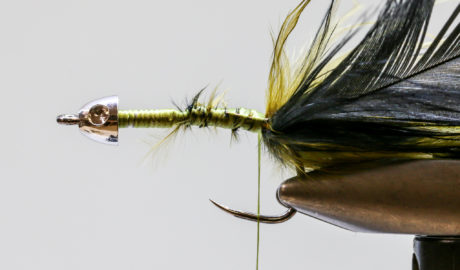
Step 7. Tie in your second color of schlappen by the base.
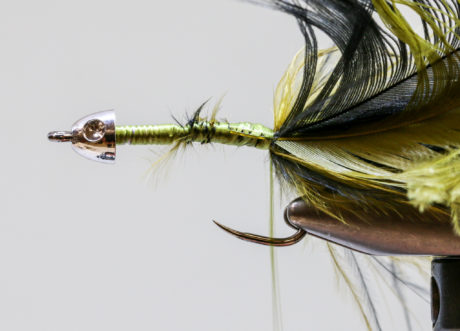
Step 8. Tie in your UV Polar Chenille.
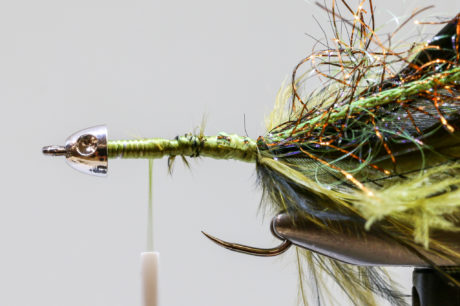
Step 9. Take all three pieces and pull them down together in a layer. Using your hackle pliers or dubbing spinner (the Loon Dubbing spinner with Gator Grip works best for this), spin all three pieces together. As you are spinning everything together, keep working with the feathers to reduce them being trapped. Once spun enough, you should have a nice small center core.
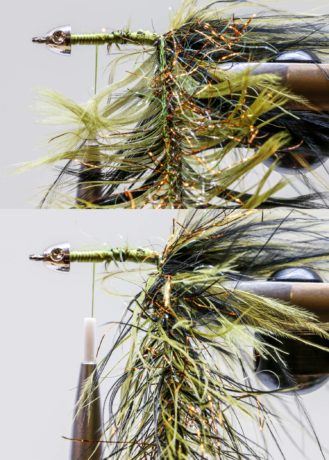
Step 10. Holding your complex twist tight, wrap forward with touching wraps to appx ½” from the conehead. Tie off and cut excess.
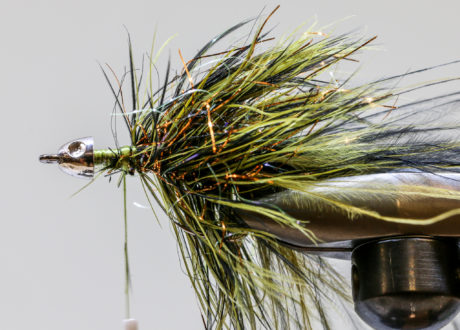
Step 11. Tie in 3 rubber legs centered on the side. Repeat this step on the opposite side. Trim legs to match the length of tail.
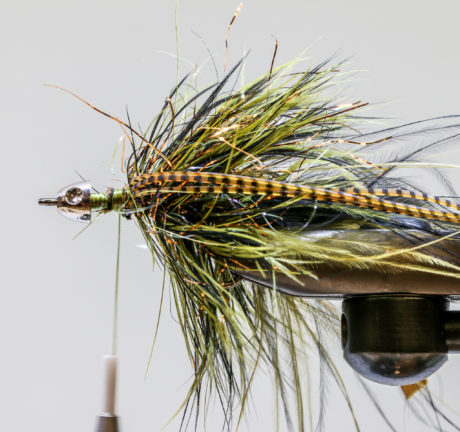
Step 12. Using a generous clump of deer hair, stack the tips. Holding your clump of deer hair on the top of the shank, make your tips go back appx half the length of the body, tie down. When tying the hair down, don’t spin it. Hold the tips keeping them on the top side. Tie down with several wraps, then spin fly upside down.
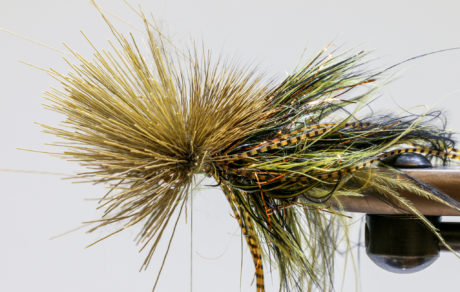
Step 13. Repeat step 12 on the bottom side of the shank. Once both sides are tied in, you can maneuver some of the hair to the sides to fill in any gap if needed. Pull hair back and work your thread to the cone—whip finish.
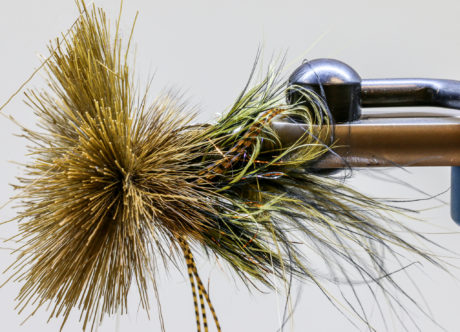
Step 14. Using a razor blade, start trimming your deer hair back to the base of the tips. I use the conehead as my gauge and trim the hair straight with the conehead. Be careful not to cut back on your tips. Take little amounts at a time. When you are finished, you should have a nice round collar. Finally, glue your eyes to the cone.
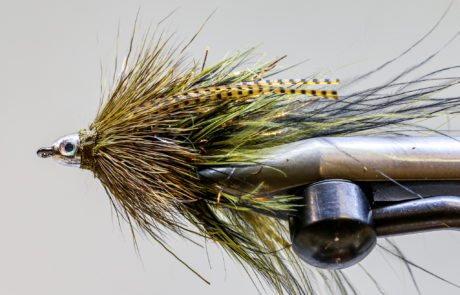
Finished Fly:

More on Flies:
Leave a Reply