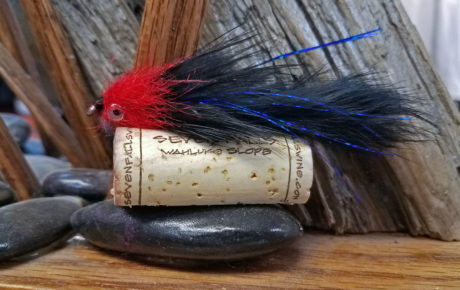
Music and Fly Tying. Call it what you will…synonymous, compatible, or tantamount, music and fly fishing complement each other like gin and juice.
Originally composed by Wally Adams, the Wille Nelson leech pattern was conceived while guiding in Bristol Bay, Alaska, and really gained tempo in the nineties, especially among Spey rod users. Wally understood the challenge of Spey casting a rabbit-wrapped, heavy dumbbell-eyed fly and sought to design a leech pattern that would harmonize with a Spey cast. This is where the Willie Nelson was created, followed by other improvs the Miles Davis (blue head), and the Al Green (chartreuse head).
Being an avid musician, Wally’s three flies quickly obtained the moniker “Musician Series.” Today, various color mashups emulate the same design and are mainstays in fly shops because of the simple, easy-to-tie design and effectiveness. Spey or single hand conductor, the Willie Nelson can play in almost any water where leeches are prevalent.
Originated by Wally Adams
Tied and Photos by Mike Brown is the owner of Mossy’s Fly Shop in Anchorage, Alaska. A lifelong Alaskan with a passion for family, fly fishing and fly tying.
Material List:
- Rear Hook: Gamakatsu B10s Stinger Hook Sz 6
- Thread-Rear Hook: Veevus GSP Black
- Tail: Black Rabbit Zonker Strip
- Articulation Thread: White Power Pro 30lb
- Body: Black Rabbit Zonker
- Flash: Holographic Flashabou Blue
- Dumbbell Eyes: 5/32” Nickle/Pearl Dumbbells
- Head: STS Trilobal Dubbing Red
- Front Hook Shank: OPST Shank or Any turned eye hook to cut
- Thread Front: Veevus 140 Black
Step 1. Using GSP thread (We use this thread on the rear hook only to give the fly some strength and longevity from all the grabs), wrap the shank of the hook back to the start of the bend. Attach your zonker strip down with 4 or 5 good turns. You want to leave a short tail about 1/2”. Wrap your thread up to about one hook eye width from the eye.
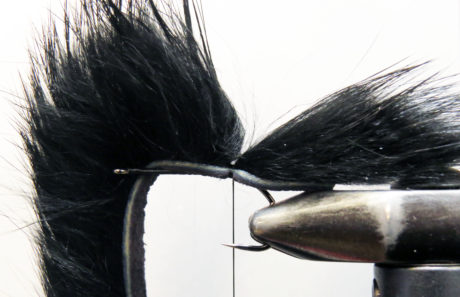
Step 2. Now pull your rabbit zonker tight on top of the shank and tie it in with 4-5 good tight wraps of thread. Lift the zonker and wrap a small head, then whip finish. Glue is optional.
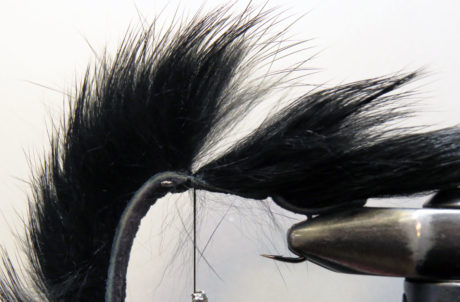
Step 3. Cut a piece of your 30lb braid (we use braid for its strength and smaller diameter, dacron backing will work but will rot over time after being wet) about 5-6” long. Cut the ends even and fold in half. Take the loop end and place through the hook eye and then take the cut ends and go through the loop. Pull it down tight to form a hitch on the hook eye.
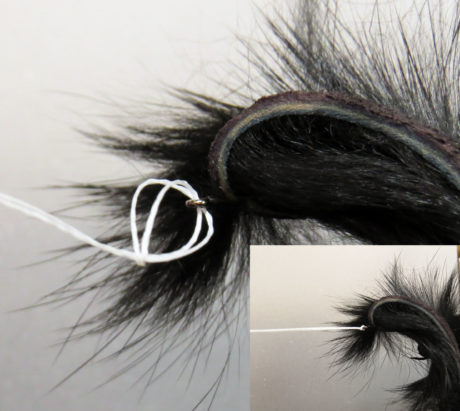
Step 4. Place a shank or cut off hook shank in your vice with the turned eye downward. Take your dumbbell eyes and place them about 1-1/2 hook eye width back on the bottom side of the shank. Tie them in good with figure-eight wraps (you can put some glue over your eyes wraps for strength and security if you would like), then wrap your thread back appx 1” from behind the eyes (this should give you enough for 2-3 turns of the rabbit).
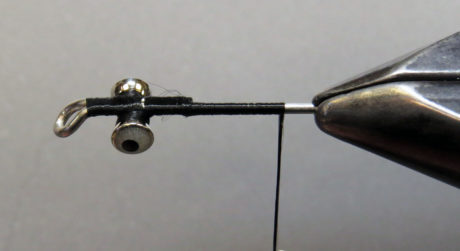
Step 5. Take your braid and tie in on top of your shank; put 3 or 4 wraps. At this point, you can adjust your rear hook to the desired length you want the fly. The Willie is 3” in overall length, but you can make it longer or shorter if you would like. Keeping your braid on top of the shank, wrap your thread over the braid lashing in good and tight. Once you get about 1 hook eye away from the dumbbells, fold the braid over and tie the tag ends down to the back, again making good tight wraps. Once you are to the back, trim the tag ends off (Note: Having a pair of braid scissors on the desk will cut the braid much easier and save your good tying scissors).
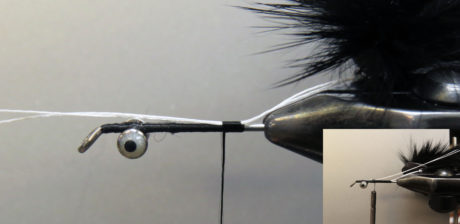
Step 6. While pulling the zonker strip tight, tie your zonker strip down to the top of the shank with 3-4 tight wraps of thread (I use a rubber band to pull the rear hook backward by hooking the band on the back end of the vise to keep tension on the zonker). Wrap your thread up to about 1-1/2 hook eyes width from the dumbbells. Next, wrap the rabbit strip up the shank; you should get 2 to 3 wraps of the strip. Wrap each wrap side by side with touching but not overlapping turns.
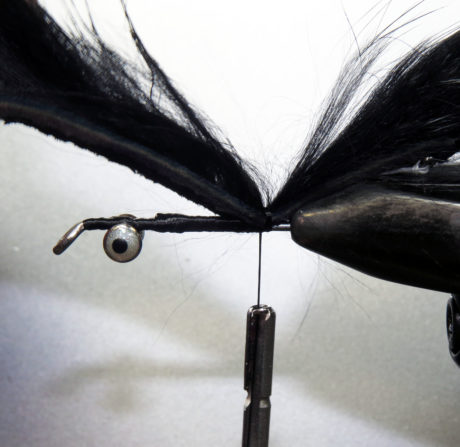
Step 7. Tie off your rabbit with a few turns of thread. Cut the rabbit strip and then finish securing the zonker in with tight thread wraps.
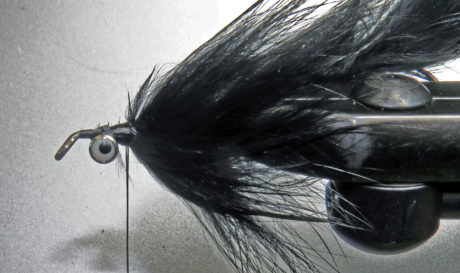
Step 8. Take 2 strands of blue holographic flash and fold over your thread. Make sure ends are all even, slide down the thread to the front of your rabbit and place slightly above center. Then secure the flash with a couple of thread wraps. Repeat these steps on the other side.
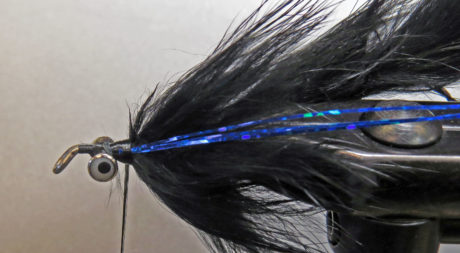
Step 9. Create a dubbing loop. Take a small but generous clump of red STS Trilobal dubbing. Prepare the dubbing by pulling and stacking a few times in your fingers to even up the ends. Then, cut the dubbing in half and place both clumps in the dubbing loop, one below the other. Using a bodkin, spread the dubbing out evenly down the loop. You want to have about a 2-3” length of dubbing in the loop. Spin your loop up and tight and using your bodkin to pick all the trapped fibers out. This will create a thin rope-like base and give you nice long fibers to fold back as you wrap.
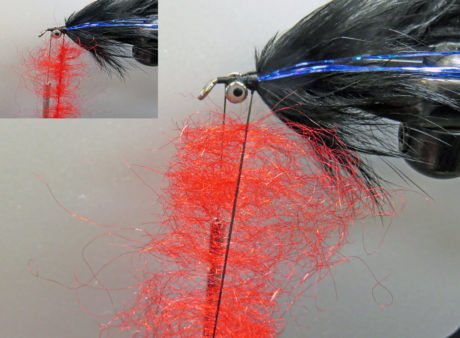
Step 10. Time to form the head. Make two turns with your loop while folding the dubbing back after each wrap. Once you are tight to the eyes, you will figure-eight wrap the dubbing around them, finishing with one or two wraps in front of the eyes.
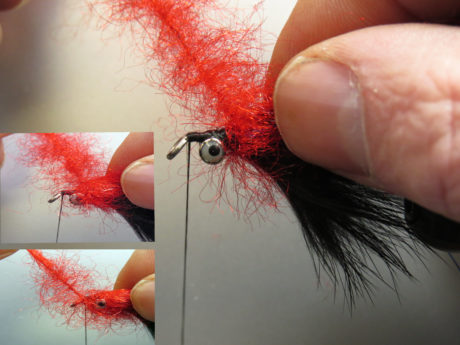
Step 11. Tie off the dubbing and build a small head and whip finish. Use a small comb or toothbrush to brush your head out. Your fly is complete.
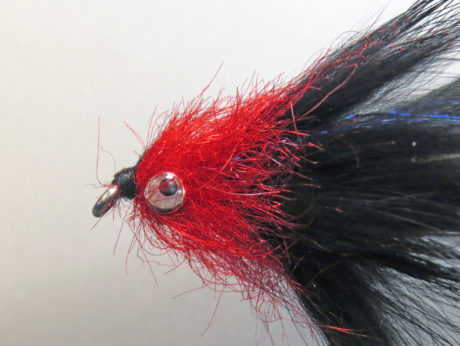
Finished Fly.

Other Fly Tying Posts:
Leave a Reply