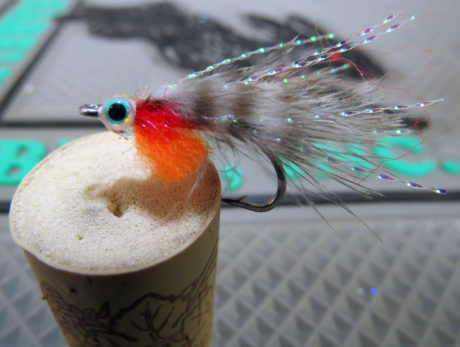
Well, it’s springtime. Streams and rivers are starting to open up, and water is beginning to flow. (Channel your best David Attenborough while reading this next part) During this time, a beautiful natural phenomenon occurs; salmon alevin starts to arise from the bottoms of the river. Alevin is the second stage of a salmon’s life cycle. They hatch into larvae and cannot feed themselves; therefore, they carry the yolk for sustenance. While in this stage, between 30-50 days, the alevin is a great food source for hungry trout. Dead drifting to swinging a small alevin is a very effective fly pattern in the spring. Make sure you have a few of these Alevin Fly Patterns in your fly box this spring.
Originator: Unknown
Tying Instruction & Photos by Mike Brown, owner of Mossy’s Fly Shop in Anchorage, Alaska.
Materials List:
- Tail: Small Natural Grizzly Marabou, Pearl Krystal Flash
- Body: Veevus Silver Tinsel
- Throat: Dark Roe Glo Bug Yarn, Red Laser Dub
- Wing: Small Natural Grizzly Marabou, Pearl Krystal Flash
- Head: 1/8” Pearl 3D stick-on eyes
- Hook: Daiichi 2546 Sz 6
- Thread: Veevus 8/0 White
- UV Epoxy: Loon Thick and Loon Flow (for non-tack finish)
Step 1. Wrap the entire shank of the hook with your thread. Try to cover the entire shank on this fly, helping give the body a little more girth.
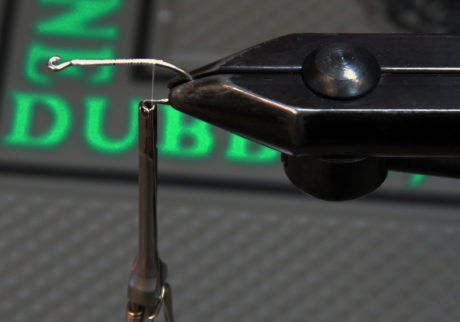
Step 2. Tie in your grizzly marabou tail. Pick out a little bushier, wider, marabou plume. Make the tail length about ½ the length of the hook shank. Tie in the marabou and then tie the stem down to about 1-1/2 hook eye width behind the eye. Do this once again to give the body a little more girth. Wrap your thread back to the base of the marabou to start the next step.
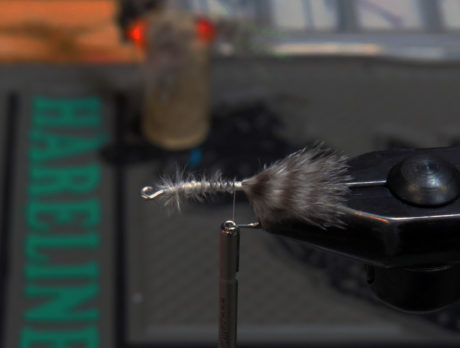
Step 3. Tie in your Krystal flash. Take two strands and fold them in half around your thread. This method allows you to slide them down the thread with more placement control. Tie down, and then trim them to match up with the tips of the marabou tail.
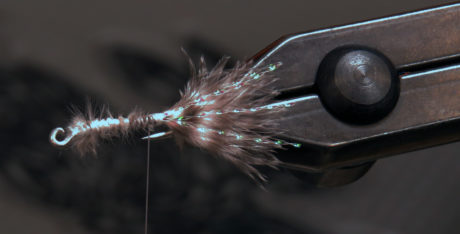
Step 4 & 5. Tie in your tinsel at the base of the Krystal flash. Then palmer your tinsel up the shank to about 2 hook eye widths behind the hook eye.
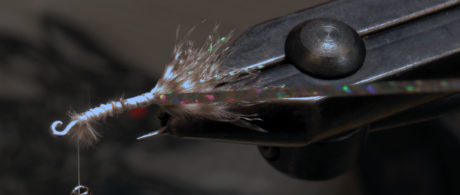
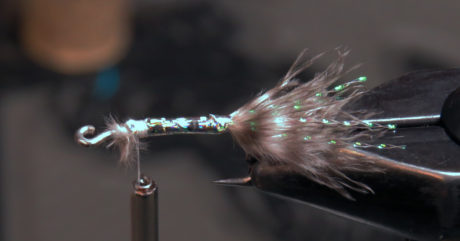
Step 6. Now rotate the vise to tie in your glo bug yard to the bottom of the hook. Cut a small (appx 1”) piece of glow bug yard and split that in half. You don’t want to make the egg sack too big. Tie the yarn down at the very end and trim the excess off.
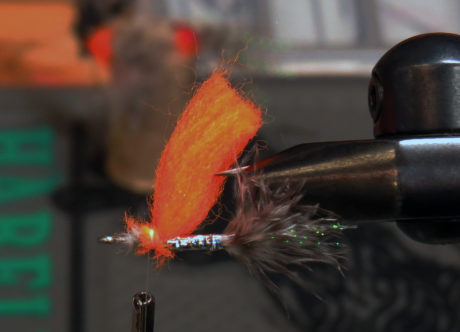
Step 7. Pull the glo bug yard tight, then trim it to be a little shorter than the point of the hook. Try to curve the scissors as you cut to give it a little bit of a round appearance.
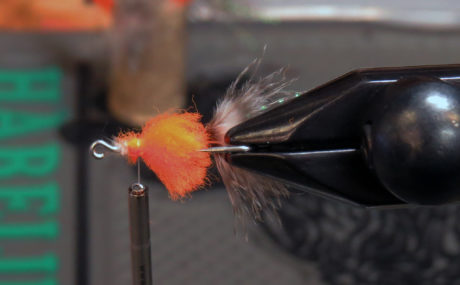
Step 8 & 9. Grab a pinch of your dubbing, appx 1/8” to 3/16” width worth. Then pinch the dubbing with both hands, pull it apart, put it back together a few times, and even up the ends as best you can. Center the patch of dubbing on the hook, tie the dubbing in at an angle to match up with the angle of the glo bug yarn. Now, take the other half of the dubbing, fold it over at an angle to match the other side, and tie it down.
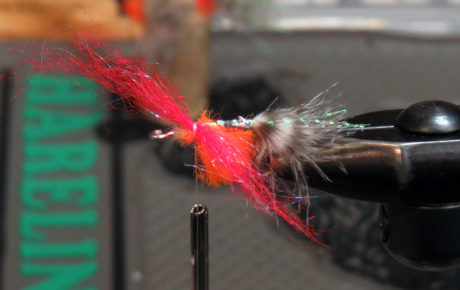
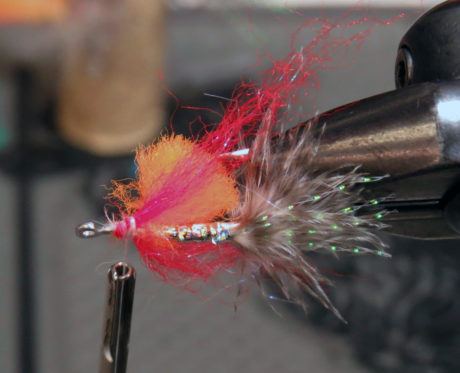
Step 10. Trim the dubbing to a little less than half the length of the glo bug yarn. You can vary this length as you see fit, but keep in mind you are really trying to make just a red dot.
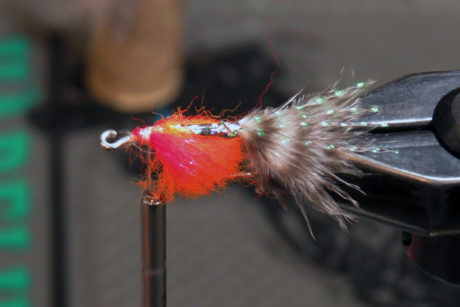
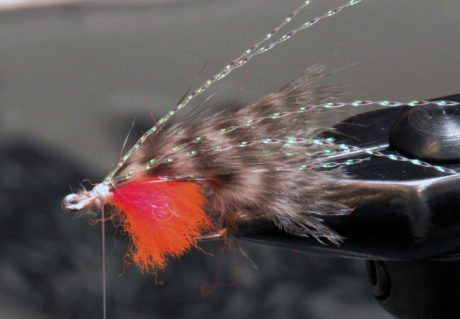
Step 11. Take another grizzly marabou plume and try to pick one this time that is more on the slim side and tie in as a wing. You want to have this feather match up just short or even with the tail plume.
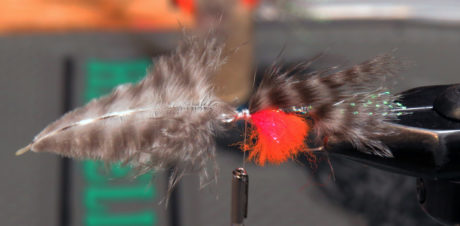
Step 12. Take 2 more pieces of Krystal flash and fold over the thread and tie down on top of the wing. Trim the flash to match up with the tip of the wing. Make a bunch of wraps to build a base up for the head and whip finish.
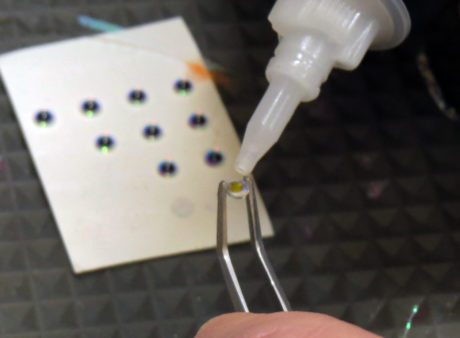
Step 13. Take one of your eyes and place a small drop of Loctite Gel on the back of the eye. Place the eye centered on the shank at the end of your material; this should be centered on the head you built up. Repeat this step on the other side. Give it a few seconds to set up.
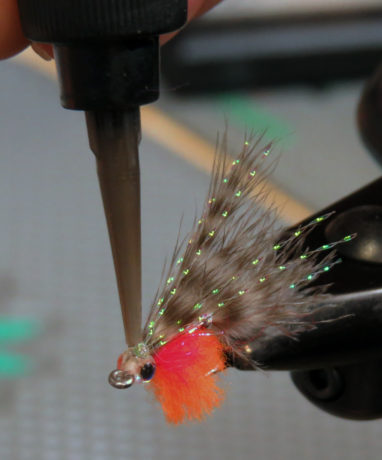
Step 14 & 15. Take your thick UV epoxy and put a small drop in between your eyes on the top, then take your bodkin and smooth it out to make a small rounded head. Hit it with your light. Rotate the fly over and repeat the same steps. Your fly is complete.
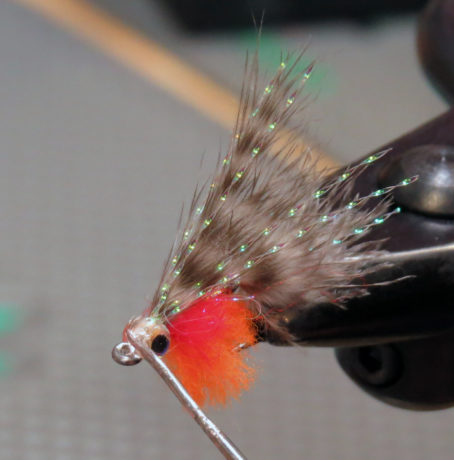
(Note: When the thick UV epoxy sets, it will have a little tack to it. If you don’t want to have the tack, put a drop of the Loon UV Flow over the thick and cure it with your light, this will take away the tack)
Finished Alevin Fly

Other Fly Tying Posts:
Leave a Reply