Fly fishing in Alaska is super fun. People from all around the world travel to Alaska to fly fish. Among all the flies, patterns, and ways to fish for Rainbow Trout in Alaska, fishing topwater with a mouse pattern has got to be the most exciting and exhilarating. It’s such a rush to skate a mouse across the water, and then all of a sudden see a trout porpoise out of the water to strike.
The challenge with using a mouse pattern is sometimes you have to throw it onto a bank, or amidst some log jams, and sweepers, then try to pop them off as if a varmint has fallen into the stream. With this action, you tend to get hung up…a lot. Losing flies is normal territory for mousing in Alaska, so it’s always good to have extra. Maybe even a lot extra. So this week, we visit a tried and true mouse pattern that you can tie to fill your fly box with in preparation for your trip to fish Alaska.
Originator, Tying Instruction, and Photos by Mike Brown at Mossy’s Fly Shop in Anchorage, Alaska (@mossysflyshop)
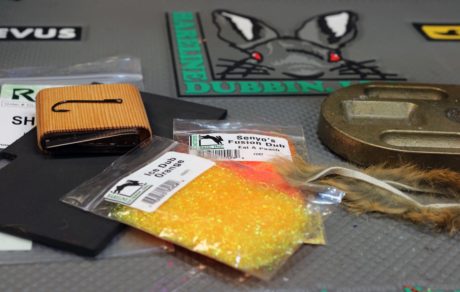
Fly Ingredients:
- Hook: Daiichi 2141 Sz 1
- Dubbing: Hareline Eat a Peach Fusion Dub & Hareline Orange Ice Dun
- Tail: Zonkered Rabbit Gold Variant
- Foam: 4mm Black
- Body: Crosscut Rabbit Gold Variant
- Thread: Veevus 140 Black
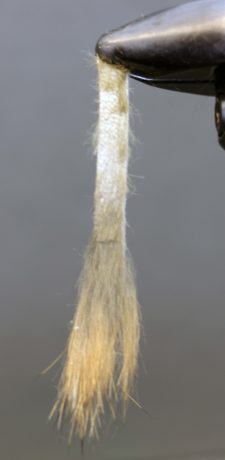
Step 1. Prep Work. Cut a piece of zonkered rabbit strip, about the length of your hook shank. Strip the hair from the hide, leaving just a small clump of hair for the tail.
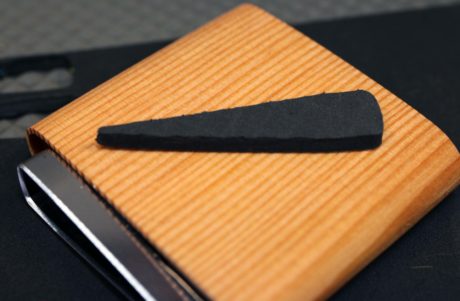
Step 2. Prep Work. Cut a tapered body out of your foam. I have used the new Morrish Mouse cutter from Hareline, this takes out all the guess work of making the back correct.
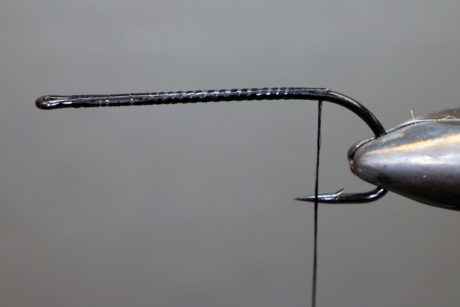
Step 3. Start your thread, wrap it back to appx the front of the barb.
Step 4. Take a small pinch of the eat a peach dubbing and a sparse pinch of the orange ice dubbing and blend together. Form a dubbing loop and spin the dubbing up tight. This will allow you to make a nice egg ball.
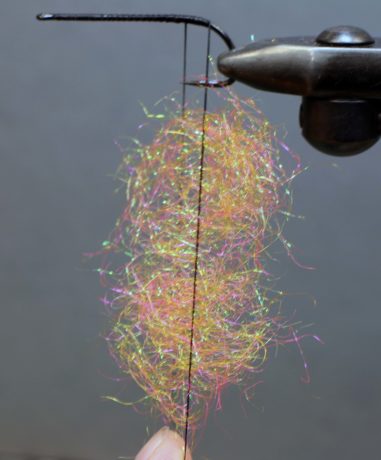
Step 5. Wrap the dubbing around the shank making a small ball. You can pick out the fibers if you like, I like it wrapped tight personally.
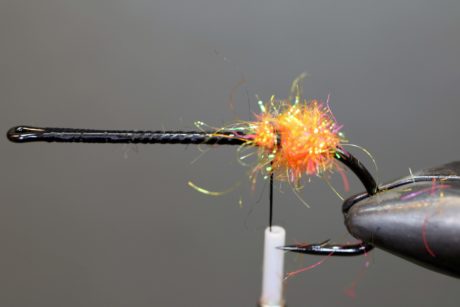
Step 6. Tie in your pre-made tail over the top of your egg.
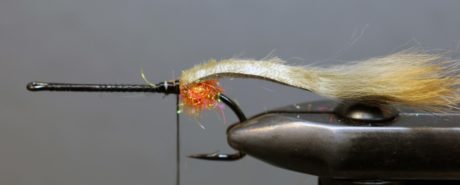
Step 7. Tie in your foam. I start the tip of the foam appx 1-1/2 hook eye widths back, this gives you some room for a small head. Tie the foam down tight, this will create a nice underbody.
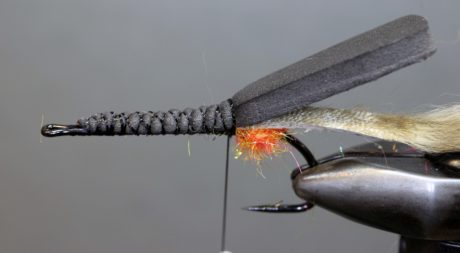
Step 8. Tie in your crosscut rabbit strip and wrap your thread forward to the end of the foam.
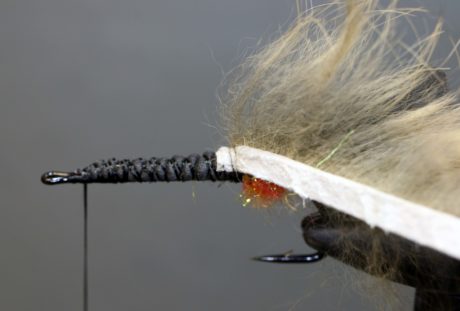
Step 9. Wrap your rabbit forward with touching turns, try not to let the hide overlap. Part the hair on the top of the shank making a flat for your foam back.
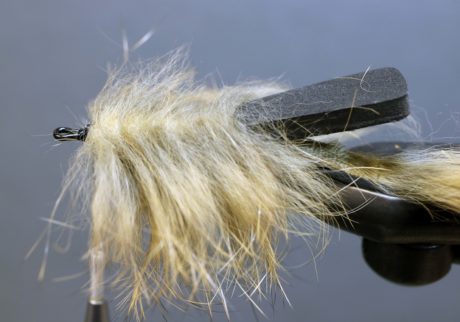
Step 10. Pull your foam over the top. Pulling tight on the foam, make a few tight wraps of thread over the foam. Cinch the thread down tight pulling the foam down tight. This will create the front lip and make it stand up. Whip finish the thread under the foam in the gap left.
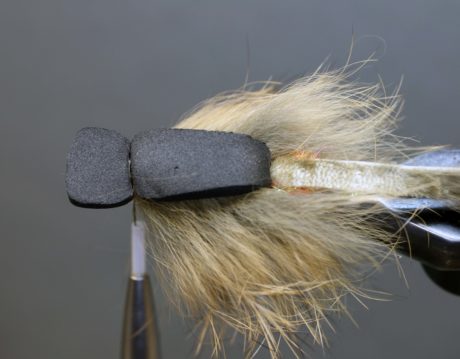
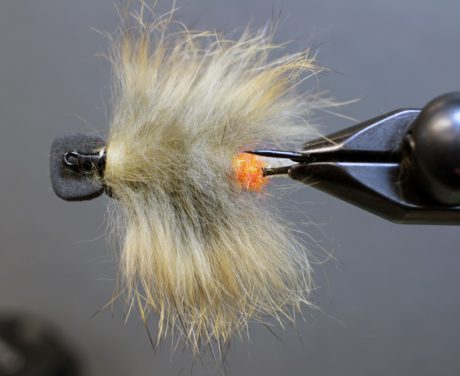
Step 11. Turn the fly over and trim the hair from the center, this will help create a flat bottom and give the egg ball visibility.
Other Fly Tying Instructions:
Leave a Reply