If you’re into fly tying or been around it for a while, there is a saying, ” there are no new flies, only different variations.” As much as that statement can be true, there are still tiers out that dip into their passion bucket of creativity and design something new. Jonathan Farmer is one of those guys. Owner of Midnight Sun Custom Flies (@midnightsuncustomflies), Jonathan has a knack of whipping up pattern designs that sure feel new and the Graboid Leech is one of those flies.
The Graboid Leech is one of the freshest patterns out right now. The beauty behind it, like all other great design is the simplicity. It’s simple, has a broad profile, and the ease at which you can swap colors and change size makes this fly a favorite among fly tying anglers. Intended for trout, but with the right change in colors, it can be well suited as an attractor for salmon and steelhead. With that in mind, tie one for each. Happy Tying!
Tying & Instruction By Johnathan Farmer, Owner of Midnight Sun Custom Flies (Instagram- @midnightsuncustomflies)
Photos By Mike Brown, Owner of Mossy’s Fly Shop (Instagram- @mossysflyshop)
Material List:
- Hook: Firehole 714 sz 4
- Conehead: Large Copper
- Shank: 33mm Aqua Fly Round Eye
- Tail/Wing: Gold Variant Zonker
- Body Dubbing: Super Kraken Gold Demon
- Gill Dubbing: Kraken Enhanced Red
- Rubber Legs: Grizzly Flutter Legs Orange
- Flash: Rootbeer Krinkle Flash
- Pectorals: Golden Pheasant Tail
- Collar: Golden Variant Rabbit
- Trailer Thread: 30lb Power Pro
- Thread: Veevus 140 or GSP 100
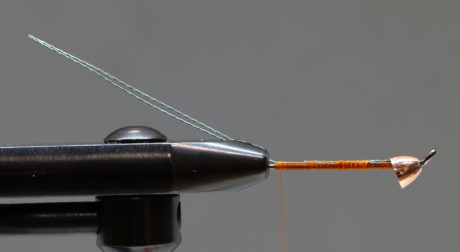
Step 1. Slide your conehead on to the shank and up to the back of the eye. Double over your power pro, to create a loop for the hook, and attach to the shank. Adjust the loop for your desired length, then tie down securely.
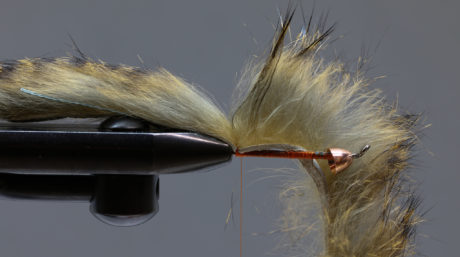
Step 2. Attach your rabbit to the shank. Make your tail length a little longer than the power pro loop. DO NOT CUT OFF RABBIT, move out of the way to be used again.
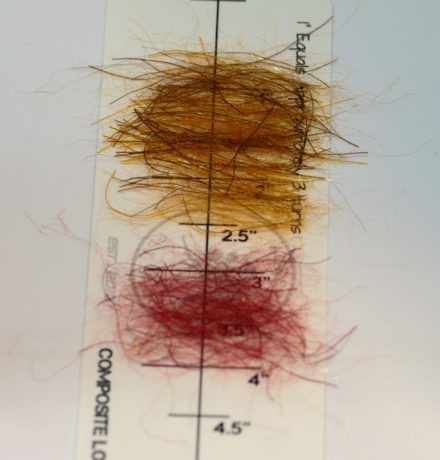
Step 3. Using a moderate clump of your body dubbing, even up the ends and lay out. Using a small clump of your gill dubbing, even up ends and lay below the body dubbing.
Step 4. Create a dubbing loop, long enough for both sections of dubbing. Place both sections of dubbing into your loop, you want your body dubbing to be first and your gill dubbing to be the last part wrapped.
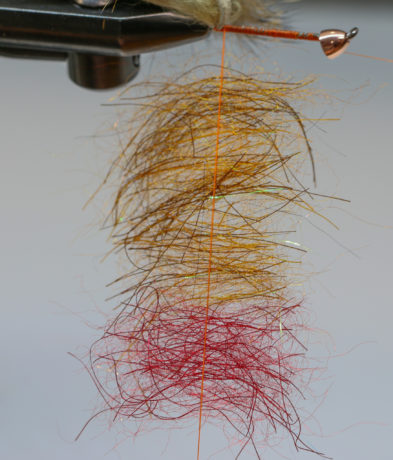
Step 5. Spin your dubbing loop. Using a pick or brush, pick and brush out your dubbing till you achieve a thin center core. This keeps bulk down.
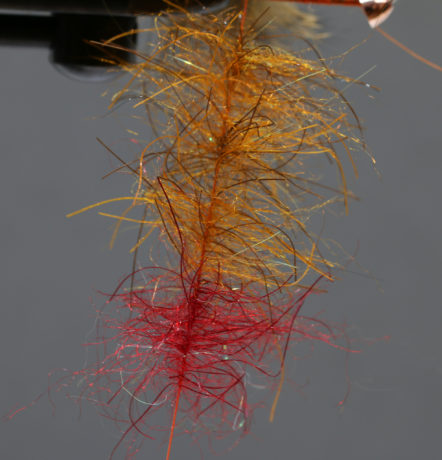
Step 6. Wrap your spun dubbing loop forward, you should end appx 2 hook eye widths back of the cone.

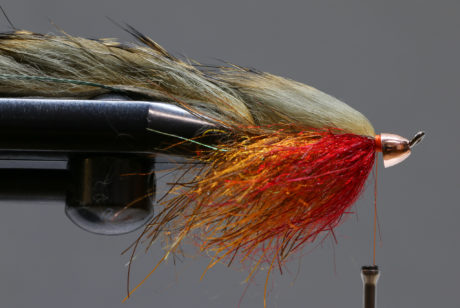
Step 7. Fold your dubbing down each side of the shank, this will create a level flat top. Pull your rabbit strip over the top, to the front of your body and tie down. Trim off excess rabbit. If you leave a small tag of the leather, you can then secure it down into the cone, this will help tighten up the cone.
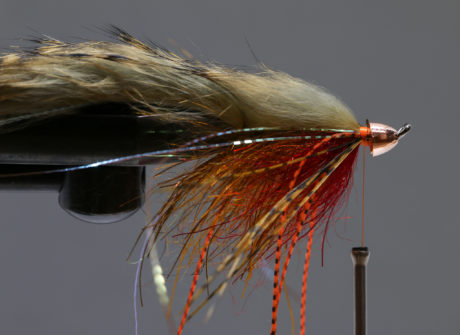
Step 8. Attach two rubber legs to each side of the shank. Trim the legs appx. the length of the tail.
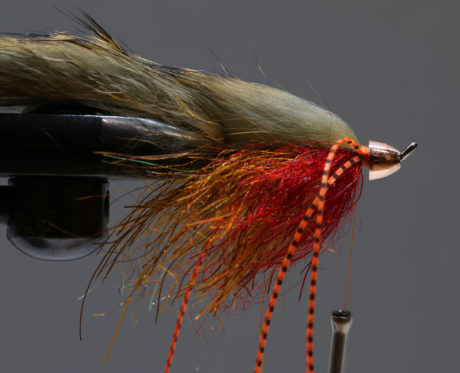
Step 9. Attach two strands of your crinkle flash to each side of the shank, on top of the rubber legs. Trim the length of the legs.
Step 10. Using 5-6 pieces of your golden pheasant tail, attach a clump to each side of the shank.
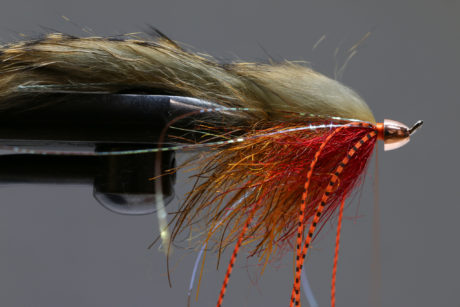
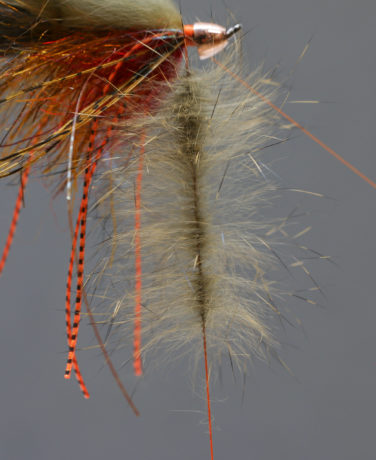
Step 11. Using 1-1/2” of rabbit, cut from the hide and place into a dubbing loop. Spread out hair evenly, leaving very little overhang in the loop.
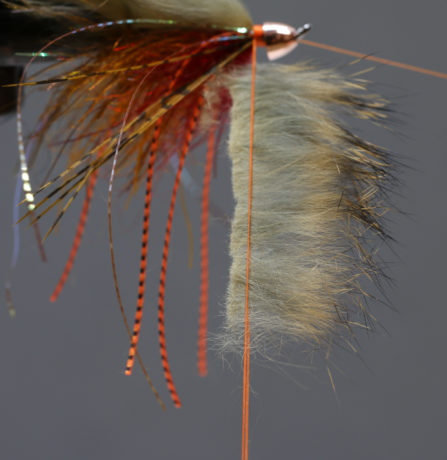
Step 12. Spin your dubbing loop. Brush out rabbit till a thin core is achieved.
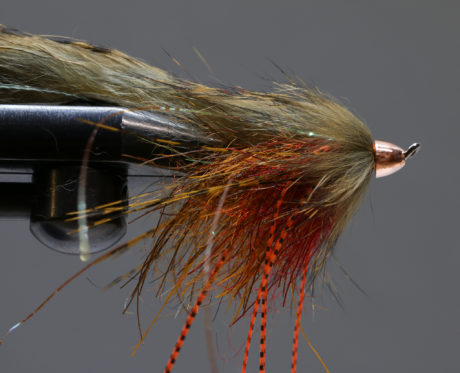
Step 13. Wrap your rabbit hair collar tight into the cone. Tie off and whip finish.
Step 14. Place your hook onto the power pro, using a half hitch method, place your tail into the half hitch loop and tighten. To learn how to do the half hitch method, watch the end of this video (starts at 22:10) for a demonstration, as this was too complex to shoot. Check it out HERE.
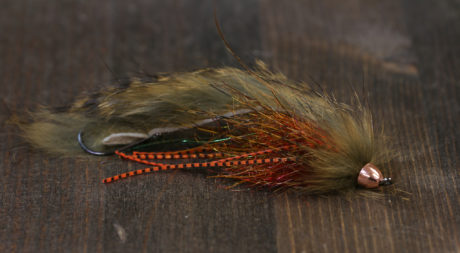
Finished Fly
That looks identical to a pattern a buddy of mine has been tying for nearly 20 years. Great pattern, but definitely NOT original. Nice that someone’s making money off it though.