The days are getting longer, the sun is brighter and more intense, and the thaw freeze cycle puts our wipers to the test. All good signs that spring is coming upon us. As the rivers and streams begin to increase their flow, we can’t help but think about spring fishing, especially after a long dark winter in Alaska.
A big misconception about Alaska trout is they only eat flesh, egg, steamers, and mouse patterns. This can’t be further from the truth, especially during the early season. During the early season when old flesh is limited, trout will feast on the cornucopia of aquatic insects; nymphs, stoneflies, sculpin, fry/alevin patterns, and leeches are all on the menu. That being said, sometimes it takes a little bit of “figurin’” before you can find the right pattern trout are searching for. This is where a searching nymph comes in handy.
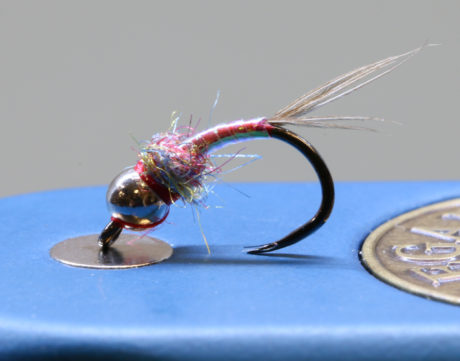
The Rainbow Warrior is a searcher fly pattern, that doesn’t imitate anything. The disco colors and flashiness are great attractants for trout which can make it a very effective fly, especially in the early season. In addition, the fly is simple to tie, making it easy to tie, and put in your fly box. Don’t assume this is only a springtime pattern. This Lil’ bug is good for trout most of the season making it a good fly to carry all season. Happy tying!
The Rainbow Warrior- Created by Lance Egan
Tying instruction and photos, by Mike Brown of Mossy’s Fly Shop in Anchorage, Alaska.
Materials List:
- Hook: Firehole 316 Sz 16-12
- Thread: Veevus 6/0 Red
- Beadhead: 1/8 Nickle plated. Tungsten or Brass
- Tail: 6-8 Pieces of Pheasant Tail
- Body: Veevus Pearl Tinsel Large
- Thorax: Hareline Rainbow Dubbing
- Wing Case: Veevus Pearl Tinsel Large
Step 1. Slide your bead on the shank and start your thread. Wrap your thread just pas the bend in the hook and then back to the front.
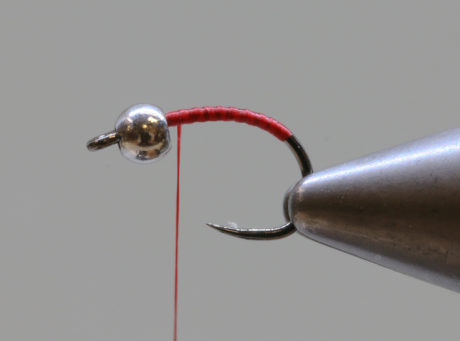
Step 2. Using 6-8 pieces of pheasant tail, tie them in behind the bead. You want to make your tail a little longer than the shank of the hook. Tie the pheasant tail down to where you stopped your initial wraps and then back to behind the bead. This will give you a nice level body.
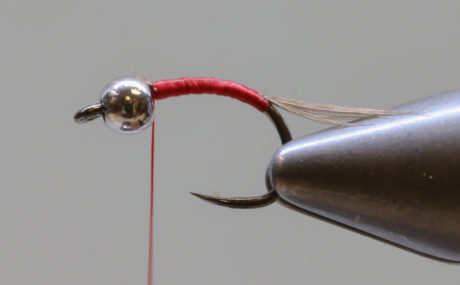
Step 3. Tie in your tinsel behind the bead.
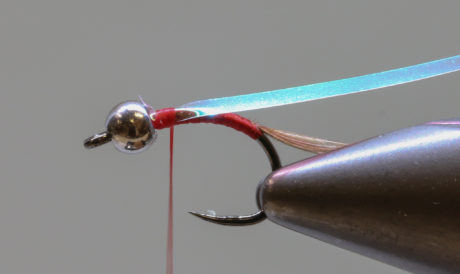
Step 4. Tie down the tinsel to the end of your thread body, then wrap your thread back to behind the bead.
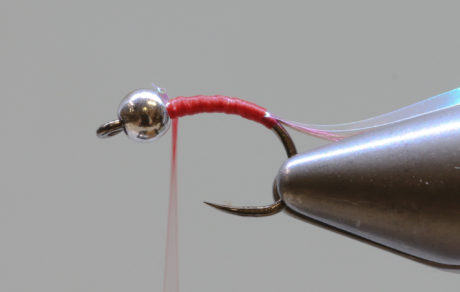
Step 5. Wrap your tinsel forward. Make sure each wrap lays over half of the previous wrap. This will create a strong and level body. Tie down the tinsel but do not cut.
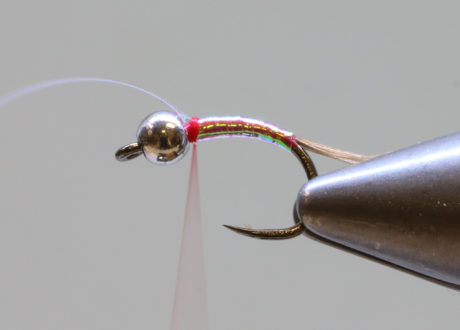
Step 6. Fold your tinsel back and tie down appx 1-1/2 hook eye widths back. This is going to create your flash back over the thorax.
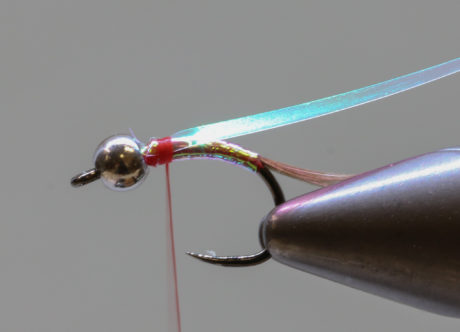
Step 7. Using a small amount of your rainbow dubbing (remember with dubbing, less is more) twist the dubbing on to your thread and wrap a small ball for the thorax. You thorax should cover the gap you left behind the bead.
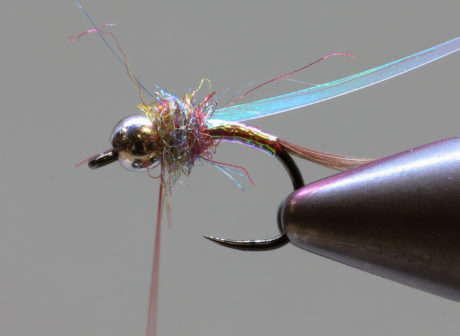
Step 8. Take the tag end of your tinsel and fold over the top of your dubbing thorax and tie down tight behind the bead. Cut excess tinsel off. Wrap a nice red collar with your thread. Whip finish.
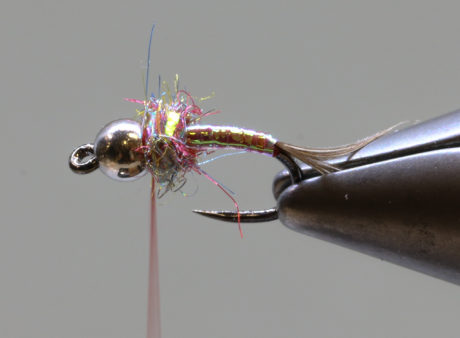
Completed Fly.
Leave a Reply