Today’s post is from Mike Brown. Mike is the owner of Mossy’s Fly Shop in Anchorage, Alaska. A lifelong Alaskan with a passion for family, fly fishing, and fly tying.
In today’s fly tying world, materials and tools are changing and advancing constantly. You see all kinds of ads telling you about how great this is and how great that is, but you must sit back and wonder, is it? To answer that, yes and no, like all things there are cool new items that are great and some that just are not as cool as they sound. In this blog post, we are going to show you what we like and what makes tying flies easier and more enjoyable. So compare what you got on your tying table with what we have and let us know what your favorite tools are. Enjoy!
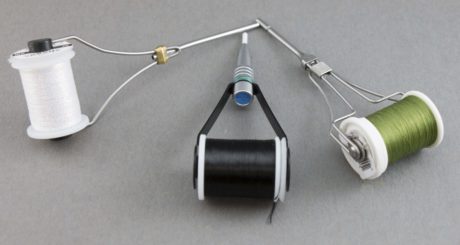
Bobbins: There are a ton of bobbins on the market today, choosing a bobbin can be budget-oriented or just personal preference (easy to thread, spool tension adjustment, ceramic or not and the list goes on) but for us, it’s mainly about having multiple bobbins to speed up time. We like to have one set with thread, one set with flat braid (this helps not waste an expensive material). Having the ability to just switch material being used quickly and efficiently makes things move smoother.
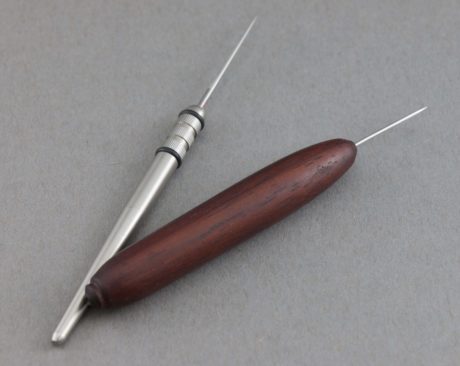
Bodkin: Since we do a lot of composite loops and just dubbing loops in general, a bodkin is a big piece of picking out the material and is a must on the bench.
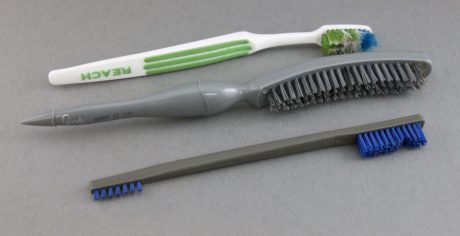
Brushes: We keep a variety of brushes on the bench. While stiff brushes can be hard to come by, we use them to brush out materials in dubbing loops and to brush out heads or bodies after we wrap them.
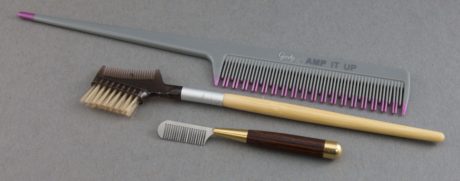
Combs: We use a lot of rabbit and fox, combs make for getting the under fur out easy, allowing us to get a smaller and more manageable diameter for wrapping reducing bulk and wet fly weight. Combs are great with deer hair as well as craft fur (you’d be surprised how much under fur is in craft fur).
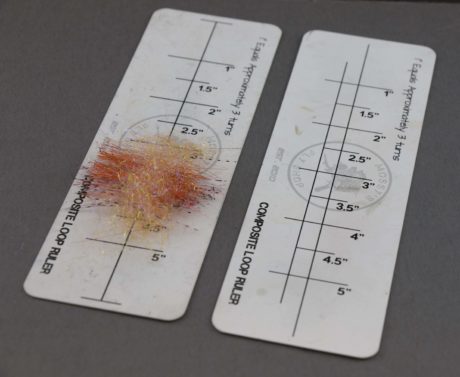
Composite Loop Ruler: This ruler, designed by Jerry French, is a must for the composite loop tyer. Measuring out your material and knowing exactly how many wraps you will get is essential to a good composite loop fly.
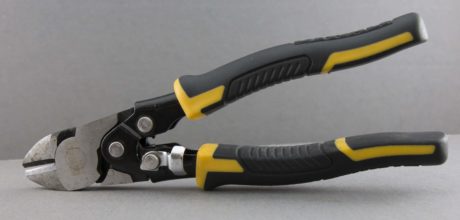
Cutters: We tie a lot of articulated and stinger styles, so we cut a lot of steel. A good pair of wire cutters is a must to get a good clean finish to your fly. Just like mono tags are a no go, so are metal shank tags.
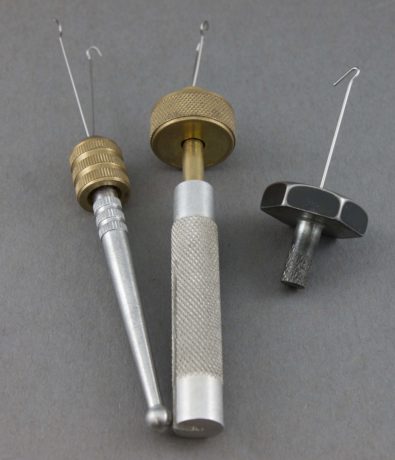
Dubbing Twister: Since we use dubbing loops in just about every fly we tie, a good dubbing twister is a valuable tool on the desk.
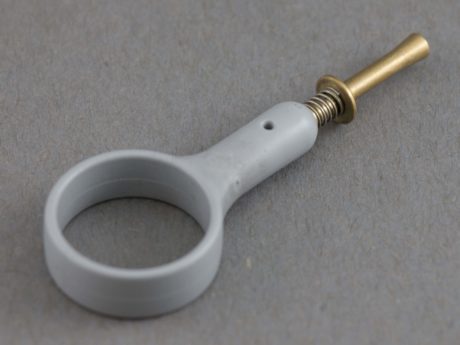
Hackle Plier: Hackle pliers are a versatile tool for us. We have all popped a dubbing loop off before and groan, grab your hackle pliers and save that loop. It’s also a handy tool to grab a strip of the rabbit as well or anything you are wrapping for that matter.
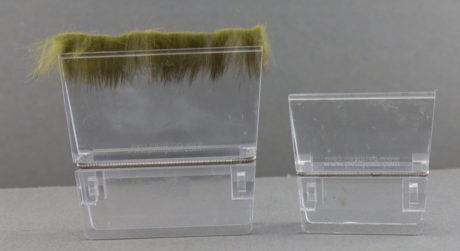
Material Clip: These potato chip looking bag clips have saved the day more than once. These clips are fantastic with rabbit cut from the hide, fox, ostrich and the list goes on. These clips allow you to prep for your fly, freeing up your hands and make for placing material in a loop a breeze. It’s like having a third hand.
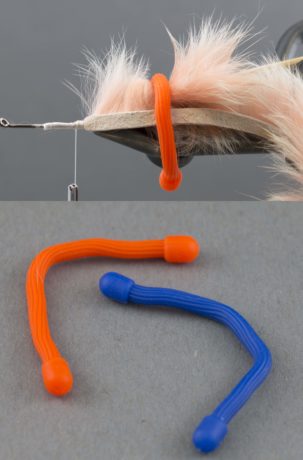
Material Holder: What we are showing here are the small gear holders from Nite Ize, these little bendable ties are great for holding down anything you need to hold back and out of the way until you are in need of it. Small hair clips are a great option for this as well.
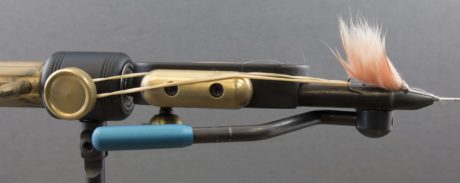
Rubber Band: I keep rubber bands on my vice to hold a rear hook back and out of the way on articulated style flies. Keeping that hook help back tight helps keep a hook point out of your finger.
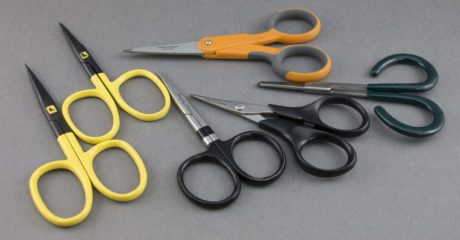
Scissors: We use up to four scissors during the process of tying a fly. Good sharp pair for thread and materials only, a braid scissor for cutting articulation/stinger braid, a junk pair for wire and lead, and occasionally a thinning scissor to make tapered tails on sculpin type patterns.
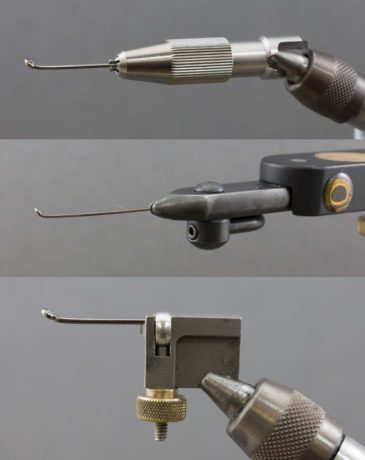
Shank Adapter: We tie on a lot of shanks or cut hooks for articulated style patterns, most vises don’t hold a hook shank very well at all. The HMH tube fly adapter was the first tool we used to hold a shank and it worked great, then OPST came out with their shank adapter which allowed for better maneuverability around the back end of the pattern. Since we tie on Regals, we approached Regal about adding a grove to the jaw to hold shanks. This has proven to be a great option, not requiring extra parts to float around on the desk and get lost.
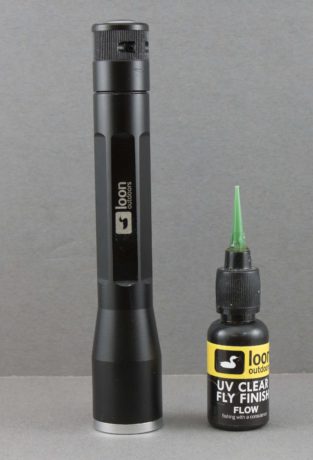
UV: UV resins have replaced head cement for us. The ability to apply a small amount and hit it with the light and you are done in seconds has proven it’s worth time and time again. One thing we have learned in the UV resin crazy, buy a good light the first time. There are a lot of light options on the market, but what we have found is that the cheaper lights burn up batteries and wear out fast.
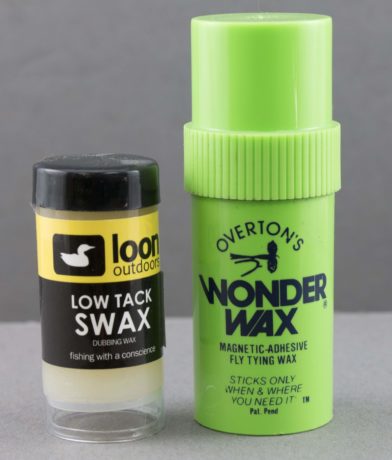
WAX: Wax is an important item when using dubbing loops, keeping material in place and not letting it get dumped on the table makes for a lot less frustration. We really like Overton’s wax due to it’s less static.
Other Gear Topics:

I keep 3 small hair clips on the stem of my vise so that they are handy for when I need to keep materials in place while tying.
Hi Bruce, That is an awesome tip. Thank you for contributing.