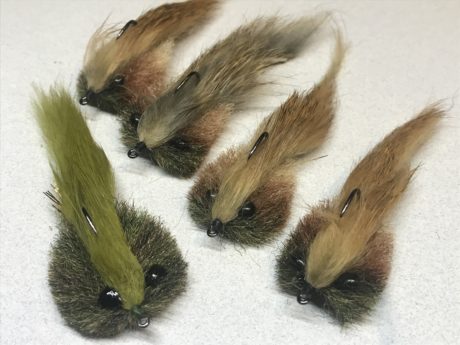
Kevin Foley’s philosophy on fly tying involves the use of natural and synthetic materials to create the illusion of life. As a scientist, having received his Master of Science in Fisheries, he believes that observation and time on the water is as important as time spent behind the vise, and that incorporating aspects of fish biology and behavior into patterns results in superior flies.
His passion for fly tying began on the temperate shores of the Atlantic Coast, learning innovative saltwater streamer patterns to lure inquisitive Striped Bass. This early influence lead to what Kevin now describes as a fusion of contemporary saltwater streamers of the Nor’ East with steelhead, salmon, and trout patterns of the Pacific Northwest. Kevin is always eager to tie new patterns, learn new techniques, and incorporate materials of an ever changing market into old (and new) patterns.
Kevin loves a dark beer, a good joke, and laughing with his mouth open (ask him about it sometime). When not tying flies, Kevin enjoys spending time with his wife and his less-than-hunting-savvy bird dog, Chewbacca the Griff.
In this step-by-step, four separate colors of EP fibers were blended together to represent the mottled coloration of most sculpins. The EP fibers may be purchased separate (as shown here) and blended, or premixed (EP Fibers 3-D – Sculpin). As a fly tier that seeks to capture the nuances and lifelike characteristics of the intended mimic, I find it incredibly advantageous to blend my own for that “perfect” hue or contrast. After all, sculpin, and slimy sculpin (Cottus cognatus) in particular, will shift their body coloration and pattern to better match the surrounding substrate. Knowing the waters where we fish, and the substrate types most common there, helps us blend the color of EP fibers to most closely match these habitat conditions.
Material List:
- Hook: Firehole 718, #6
- Thread: Veevus 8/0, Olive
- Undertail: Polar Flash, Gold; Loon UV Clear Fly Finish
- Body: EP Fibers, Black, Brown, Tan, Olive
- Underbelly: Tungsten bead, 3.8 mm Gold; Berkley FireLine, Clear 30#; Loon UV Fly Paint, White
- Wing: Magnum Cut Rabbit Hide, Olive
- Eyes: Loon UV Fly Paint, Black
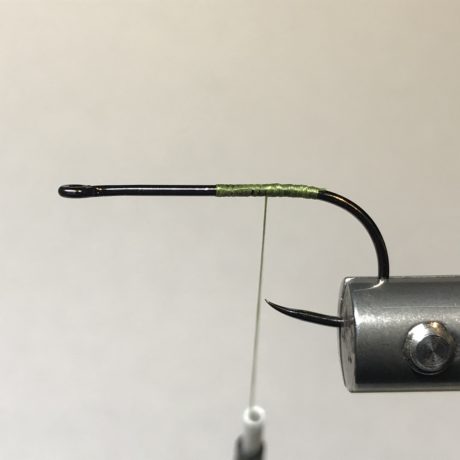
Start your thread at about the halfway point on the shank, wrap to the hook bend, then back again stopping on the hook above the hook point. [PIC 1]
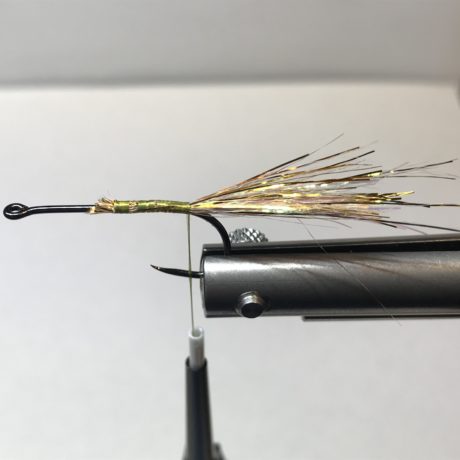
Cut a clump of 10-15 Polar Flash fibers, fold the fibers in half and cut at the fold, then fold and cut it in half again. Firmly hold the clump of flash between your fingers and pull a few strands to create a taper in one end. Tie in the Polar Flash leaving about 1” extending past the hook bend. (Note – If you don’t taper your ends or they are longer than 1” no problem, you’ll have an opportunity to trim the tail at a later time. [PIC 2]
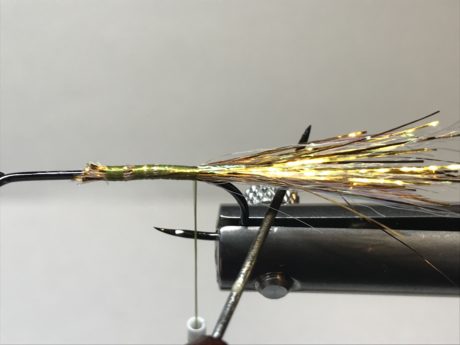
Spread out the Polar Flash fibers to make a relatively flat tail. This will become the platform that not only props up the rabbit strip, but also help prevent fouling. To do this, apply a small drop of UV acrylic at the Polar Flash tie in point and spread it with your bodkin but do not spread it on the Polar Flash much further back than to a point above the hook bend. Be careful not to apply to much UV acrylic to the Polar Flash; excessive uv acrylic will wick towards the end of the tail and saturate more than needed. [PIC: 3]
Tie in a 6” piece of Fireline just forward of the Polar Flash tie in point. Secure the FIreline to the hook, wrapping first towards the hook eye, then back to the tie in point. Build a taper with the tying thread at the end of the Fireline where you wrap back. Apply crazy glue to the thread wraps for durability. [PIC: 4]
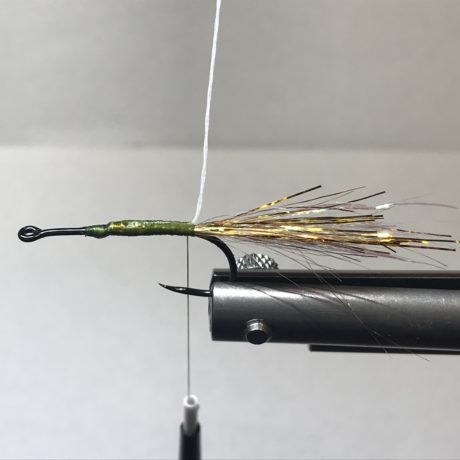
Tie in the first of several EP fiber clumps on top of, and perpendicular to the hook shank. The first hanks should be tied in just forward of the Fireline braid. Place the hank across the top of shank (opposite side from the hook point) and secure with “X” wraps. Make two -three wraps directly over the top of one another from the back to the front, then make two-three thread wraps from the front to the back, forming an X over the top of the material. Pinch both ends of the material clump and position it in place where you want it. Once in position, apply greater thread tension and make two-three more wraps in both directions. (Don’t worry about making the wraps too tight, the material will be locked in place with UV acrylic at the end.) Once your X wraps are complete, advance the thread immediately in front of the EP material clump and make several wraps tight against the material locking it in place. Advance the thread (~1/8”) and tie in the next clump. Repeat this for two additional tie-ins of material clumps. [PICS: 5, 5a, 5b]
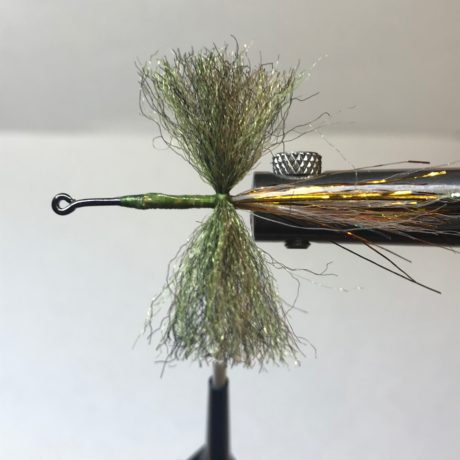
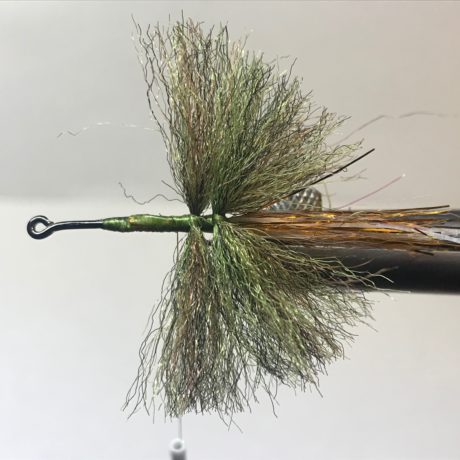
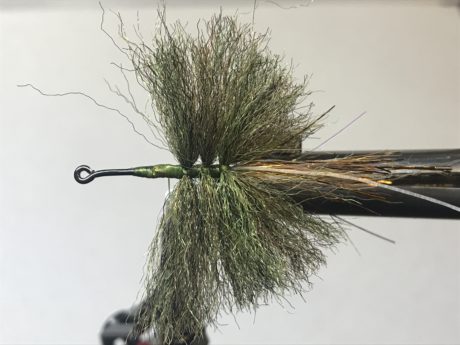
Thread two tungsten beads onto the braid, pull the braid forward and secure with several loose wraps to hold in place. Seat the two beads within the spaces between the material clumps. Secure the Fireline in place with several more thread wraps, wrapping first towards the hook eye. Then, fold the Fireline back on itself and wrap the thread towards the hook bend, over the Fireline locking it into place. Apply a drop of crazy glue to the thread wraps for durability. [PICS: 6, 6a, 6b]
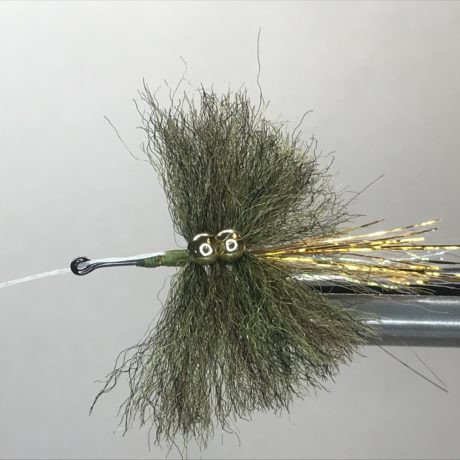
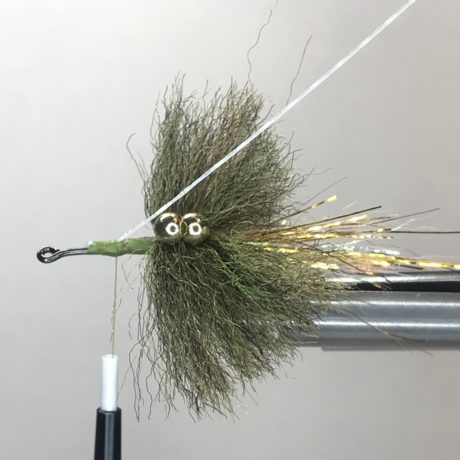
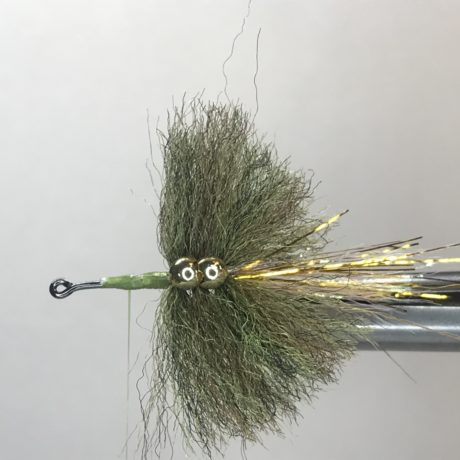
Add additional clumps of EP fibers to the fly. Continue adding clumps, stopping at about a hook eye’s length behind the hook eye. [PICS: 7, 7a, 7b, 7c, 7d]
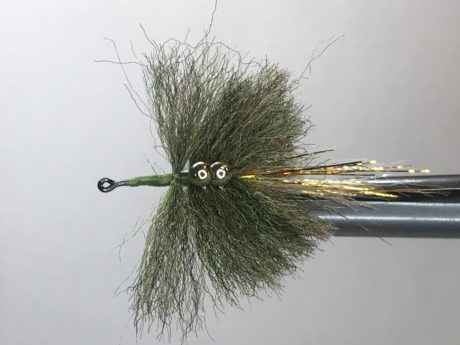
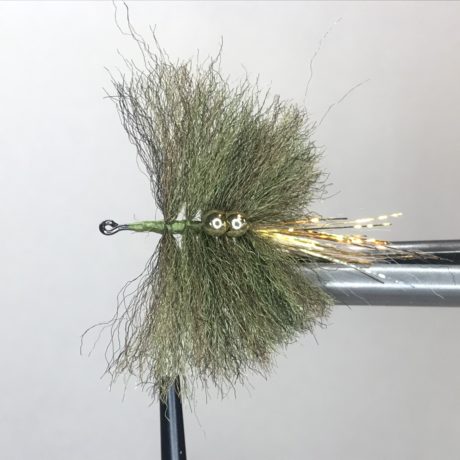
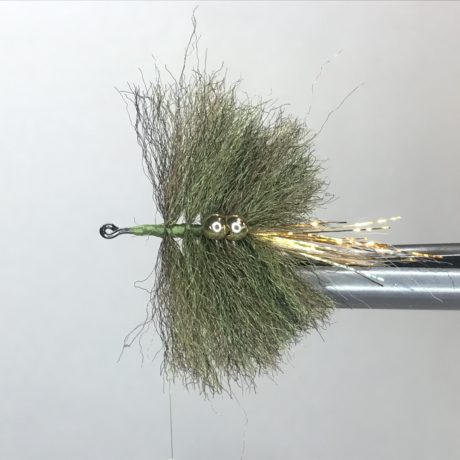
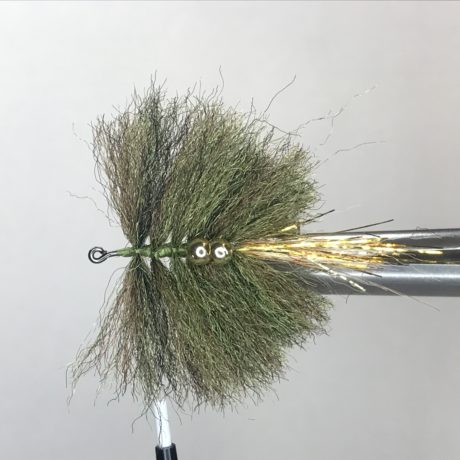
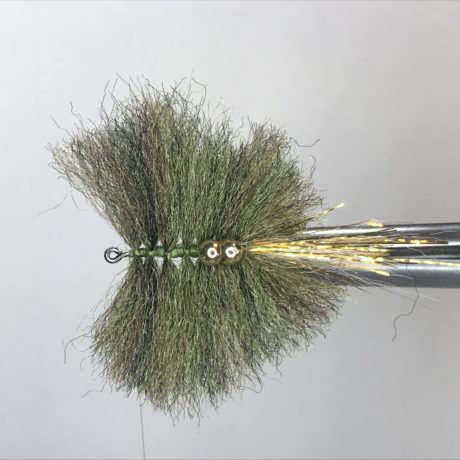
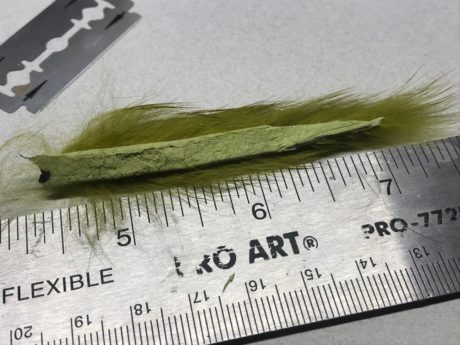
Prepare a 2.5” rabbit strip by cutting a taper in the “back” end of the strip. The back will be determined by the direction the hair extends off the hide (See pic). A good taper length is between 1/2” – 3/4”. I prefer using a double edged razor blade to cut the taper because it slices easier through the hide than scissors. As part of the material prep, I will also comb through the zonked and remove any underfur that will come off easily. [Pic 8]
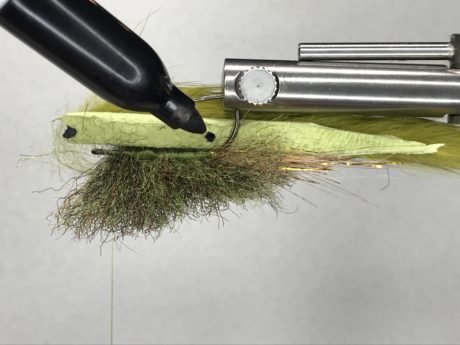
Place the zonker strip against the hook and make a mark in the location where the hook will pierce the hide. Mark the hide at about the Polar Flash tie-in point, making sure to give yourself about 1/4” of hide that extends past the eye of the hook. Remove the fly from the vise, pierce the hook through the hide, and return the hook back into the vise. [PICS: 9, 9a]
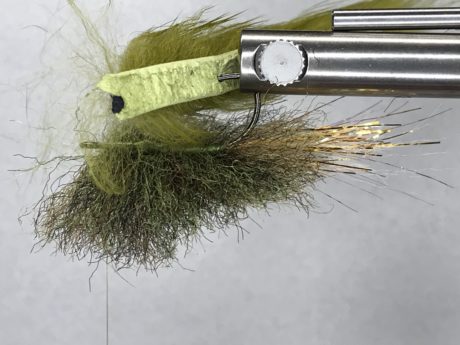
Part the rabbit fur on the hide where the last EP fiber clump was tied in. It is helpful to pinch the end of the rabbit strip and apply forward pressure; pulling it forward will stretch the hide slightly, remove any slack in the hide and give you a better feel for the actual tie-in point. Make several wraps of thread to secure the rabbit strip, then cut off the extra. I prefer to use a double-edged razor for this as it provides a more precise cut. [PICS: 10, 10a]
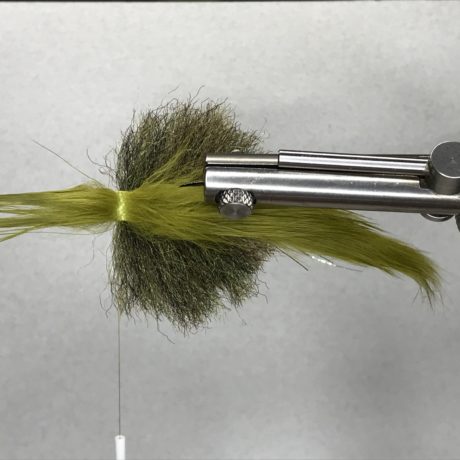
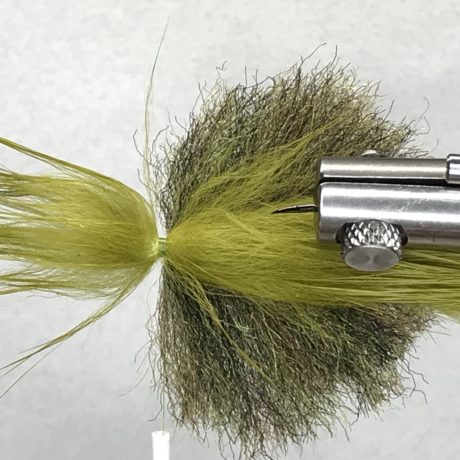
Apply a drop of head cement to end of the rabbit hide and cover with thread wraps to the hook eye. Whip finish and cut thread. Comb out and untangle the fibers of the fly. [PICS:11]
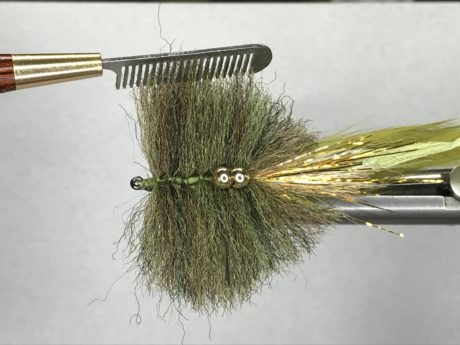
Liberally coat the underside of the fly with white Loon UV Fly Finish, paying close attention to filling the voids between the material clumps and tungsten beads, as well as coating the thread wraps. This will increase the durability of the fly and add a light colored underside that closely mimics a sculpin’s ventral surface. [PICS: 12, 12a]
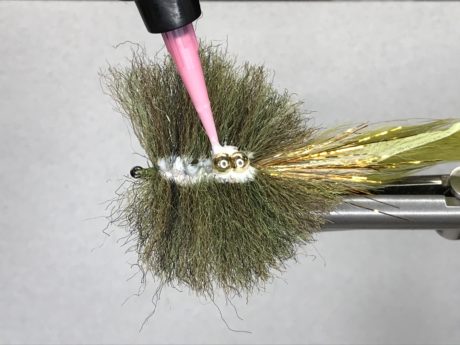
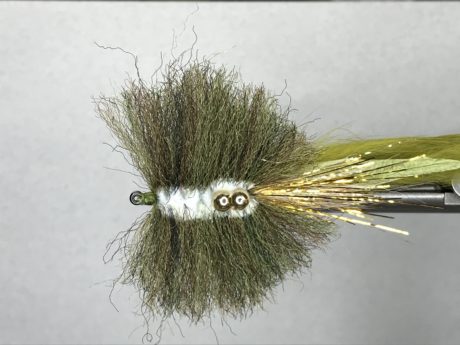
Trim the fly to shape. Start at the head and work your way around to the back, trimming one side at a time. It’s easy to trim the fly into oblivion! However, less is more. It is easier to make many small cuts, than it is to make a few large cuts, to attain the profile you are after. [PIC: 13].
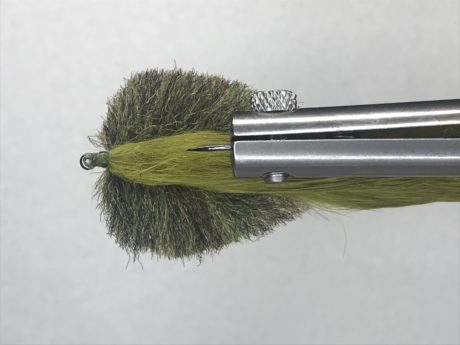
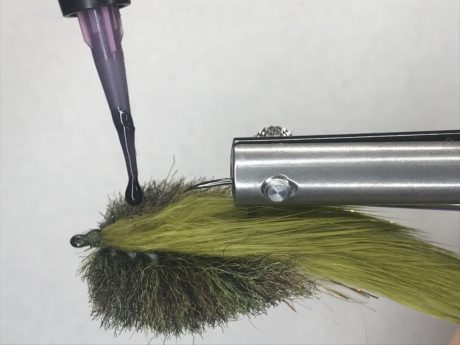
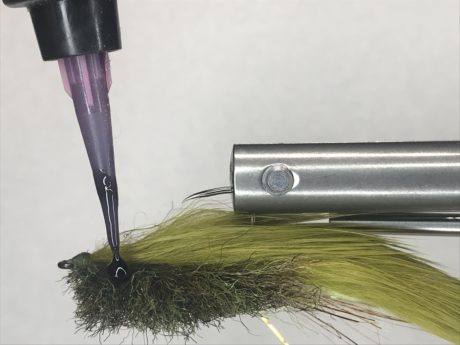
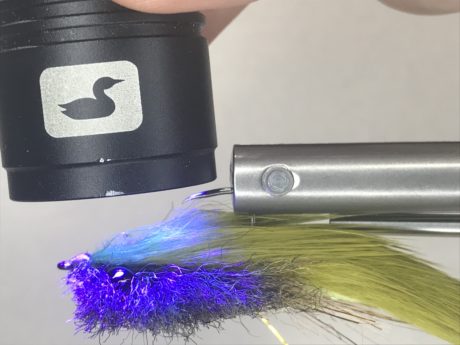
Black Loon UV is used to create the eyes. Invert the bottle about an inch over the fly where you want the eye. A droplet of the product will begin to form at the tip of the bottle applicator. Allow the droplet to build until it falls onto the fly. Immediately after the droplet falls, gently touch the applicator tip to the droplet and squeeze the bottle until the desired eye size is formed. Once formed, quickly cure with the UV light. Repeat this step for the other eye. [PICS: 14, 14a, 14b, 14c]
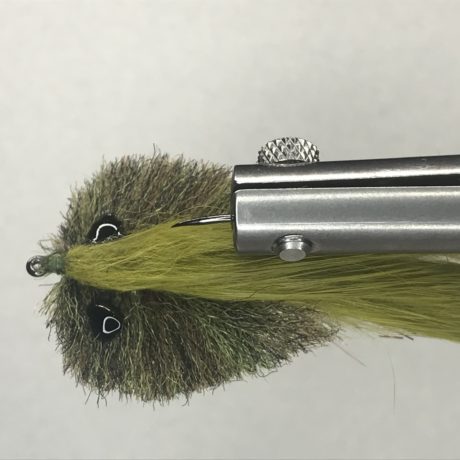
Finished fly. I like to tie the fly in a variety of colors including incorporating contrast into the individual hanks of EP fiber. [PICS: Finished Fly, Finished Fly Variants]
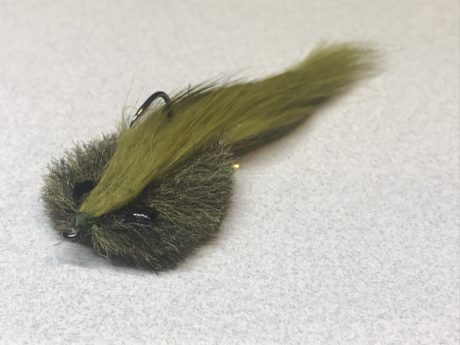

Well Designed Pattern! I have made it and used it. Sinks well and has great movement.
I’m going to try this out as a salt water fly in Tampa Bay.