From our Head Guide at Rapids Camp Lodge Chad Bryson drops some great tips on building leaders. Since it’s coming from Chad…I’d take it to heart. Enjoy!
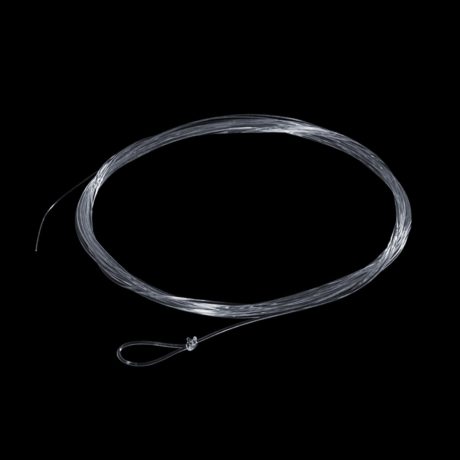
There are probably as many different opinions about how to build the perfect Alaska fly fishing leader as there are opinions on the perfect Alaska fly rod. So many different ideas and techniques. Truth is that most of them will probably work just fine. As long as the leader will turn over the rig you are trying to cast, all is good. However, some very specific fishing situations can be made easier by having a well tapered hand-tied leader. This is the system I use for fly-out fishing.
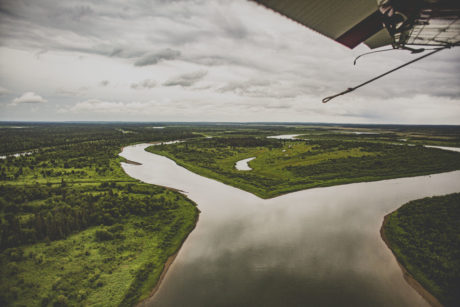
Fly-out fishing by Rapids Camp Lodge’s description typically involves getting on a floatplane, flying to a remote location, hiking to a creek or stream to sight fish for large rainbow trout, then hiking back to the airplane for a flight back to the lodge. The fishing techniques could involve anything from dry flies to swinging leeches and all points in between. I find the most common methods to be skating mice and dead drifting beads under an indicator. Consequently, I use almost the same leader successfully for both applications. This invariably makes my life much easier.


Someone always asks, “What’s wrong with the tapered leaders I get from my local fly shop?” The answer is absolutely nothing. They work just fine for a short term solution. If you have availability to dozens upon dozens of manufactured tapered leaders and don’t mind spending the $6-$15 each, they work flawlessly. If you are a guide in the bush 1000 miles from the “local” fly shop with at least a week turnaround for delivery, tying your own leaders is a necessity and when done correctly can (and will) outperform the “store bought” leaders every day of the week.

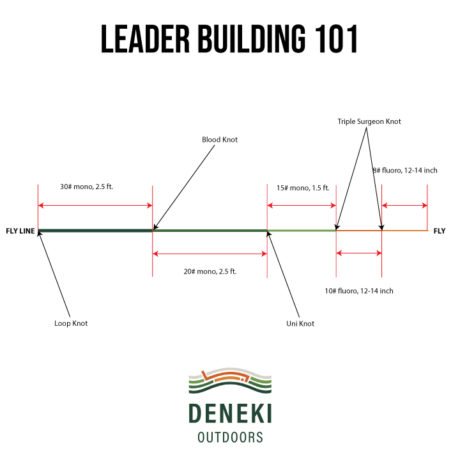
We will begin with the butt section of the leader. Not dissimilar to the foundation of a building, the butt section is the foundation to the leader. It needs to be strong. I use. For Alaska trout fishing, I use a stiff 30# monofilament. Use whatever brand you like/want as long as it is stiff. To obtain a length of butt section, I hold the spool at my sternum, dead center of my chest, with my right hand and pull the tag end of the line from the spool with my left hand until my left arm is fully extended. I am 5’11” so this is the equivalent to somewhere just under three feet of butt section. Cut this length of line from the spool. I tie a loop knot in one end and connect it to the loop in the fly line or I hang it on a hook in the wall of my cabin. This makes the following steps easier to execute. Three feet of butt section may seem like a lot but, by the time the loop knot is tied and the butt section is connected to the mid section base with a hairy blood knot, it should be about 2.5’.
Next, I use some stiff 20# mono for the base of the midsection. Again, I hold the spool with my right hand at my sternum and pull the line off with my left hand until my left arm is fully extended. Clip this length of the line from the spool. I mentioned using a “hairy blood knot” before. We will connect this midsection base to the butt section using a standard seven turn blood knot (see link below on how to tie a blood knot). The key to strength in the blood knot is using some form of lubricant while cinching down the knot. Regular water is fine but most guides use plain old saliva. It’s readily available at all times. If you try to cinch down a blood knot dry, the friction will burn the mono leaving a weak spot in the knot itself. What makes it “hairy” is leaving the tag ends of the knot trimmed long. About 1/16-1/32” is perfect. Leaving the blood knot hairy will ensure that when you hook a big fish, the knot has plenty of room to continue to tighten without pulling the tag end all the way through. Yes, that really does happen. Trust me.
To finish the midsection with the upper portion, I use a stiff 15# mono. Holding the spool in my right hand at my sternum, I pull the line from the spool with my left hand until my arm extends only 3/4 full. I want to start shortening the lengths now to achieve the ultimate in leader turnover power. Because the 15# and 20# mid section lengths are similar diameter, I use a double uni knot (see link below on how to tie a double uni knot) to connect the two. Again, be sure to moisten the knot so as not to burn it with friction thus weakening the line. When this is complete, you should have around 6.5’ of leader with the butt section and mid section base making up for 5’ of it. This combination of butt and mid-sections creates a tremendous power transfer from the fly line to the leader.
Now we start what would be known as the tippet section. I use about 12-14” of 10# fluorocarbon attached to the upper midsection using a very simple triple surgeon’s knot ( see link below on how to tie a triple surgeon’s knot). Attaching the 15# mono and 10# fluoro using this knot is strong and efficient as long as it is moistened correctly. Now you should have somewhere between 7.5-8’ of leader. If I am mouse fishing, I stop building leader here. Rainbow trout that eat mice aren’t leader shy and you are going to want the turnover power to cast this frisbee like pattern through the wind. If I am going to dead drift a bead (egg pattern) under an indicator, I would add another 12-14” of 8# fluoro at the end of the 10# fluoro. By doing this, my overall leader length is close to 9’ with almost 2/3 composed of stiff mono in the butt and mid section followed by 2.5-3’ of fluoro for the tippet sections.
Here is why this system works better than a traditional tapered leader:
1) the power transfer from fly line to leader is greater because the butt and mid-sections make up 2/3 of the leader. This makes it easier to turn over indicator rigs with split shot or frisbee sized mouse patterns in the wind.
2) It is quickly adaptable to go back and forth between indicator fishing and mouse fishing by only adding or subtracting one piece of section. More time fishing, less time watching someone tie knots…
3) this leader can be easily fine-tuned to adapt to any fishing condition that may arise during the course of the day without having to do a complete swap and rebuild.
4) Because monofilament floats and fluorocarbon sinks, I have a leader with 6-6.5’ of neutral buoyancy. This gives me more options for indicator placement with a neutral buoyant leader making technical mending much easier. The fluoro tippet naturally sinks making it perfect for holding a mouse pattern just in the film of the surface water or for dead drifted beads under spilt shot.
With a little ingenuity and experimentation, you can modify this system to customize a leader for any fishing situation you may have. There is no substitute for proper knot tying. Take some time, learn your knots. Test them to see where the failing points are. It will make you a better angler.
Thanks for reading
Chad Bryson
Head Guide Rapids Camp Lodge
Knot’s mentioned in this post:

Leave a Reply