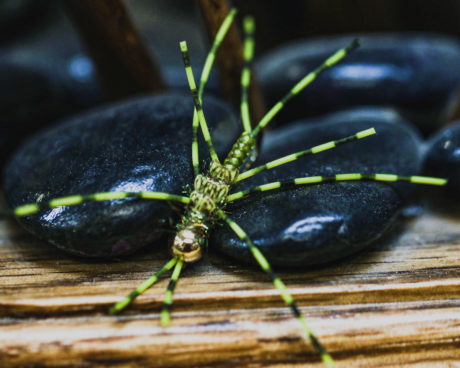
When it comes to trout fishing in Alaska; egg patterns, flesh and big streamers are the typical soup de jour commonly associated with Alaska fishing. But, we are targeting trout and salmon aren’t present all the time. So, what are they feeding on, yes mice of course, but they also feed on bugs just like they do everywhere else trout are pursued, and we have aquatic bugs and insects just like the rest of the world.
One of my personal favorite bugs to tie and fish are stoneflies. We have eight different types of stoneflies in Alaska. Forestflies/Little Brown Stoneflies, Golden Stoneflies, Needleflies/Rolledwinged Stoneflies, Sallflies (this is the state’s most rich stonefly family, with 23 different species), Salmonflies/Giant Stoneflies, Snowflies/Slender Winter Stoneflies, Stripetail and Springfly Stoneflies and Willowflies. So yeah, we have a lot of just stones alone to figure out. The list of aquatic insects goes on from here.
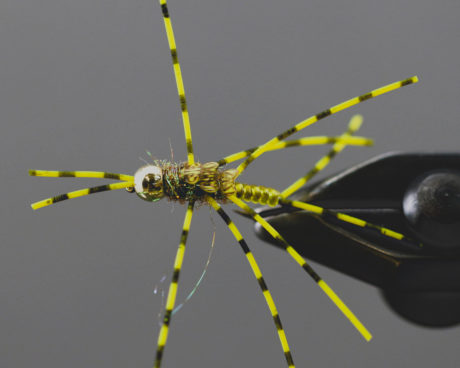
I picked a golden stone because it’s a go-to pattern for me in the Spring. This style of the pattern can be tied in all kinds of sizes and color variations. There are so many styles of patterns to tie for stone imitations and I just find them all fun and creative. Hope you enjoy this tutorial.
Tied by: Mike Brown
Mike Brown is the owner of Mossy’s Fly Shop in Anchorage, AK. A lifelong Alaskan with a passion for family, fly fishing, fly tying and friend of Deneki Outdoors.
Material List:
- Hook: Daiichi 1730-10
- Beadhead: 5/32 Gold Bead
- Body: Medium V Rib Yellow
- Dubbing: Ice Dub Golden Brown
- Wing Casing: Pro Sportfisher Stonefly Back Small Olive
- Legs: Grizzly Barred Rubber Legs Fl Yellow Chartreuse
- Lead Wire: .020
- Thread: Veevus 8/0 Light Cahill
Step 1. Slide your bead on the hook and start your thread right behind the hook eye.
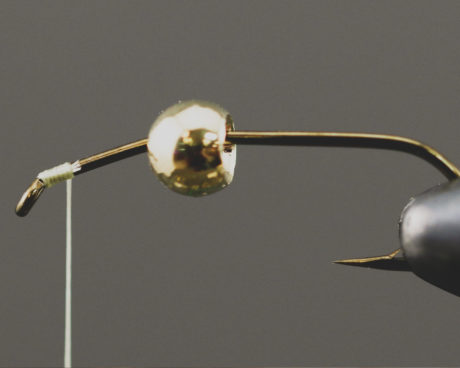
Step 2. Take one full-length rubber leg and fold it in half. Put the loose ends through the bead and pull the loop end of the rubber leg within appx 1” from the hook eye. Fasten the rubber legs down right behind the hook eye. Wrap your thread back a little longer than the bead is wide. Whip finish and slide bead down to hook eye.
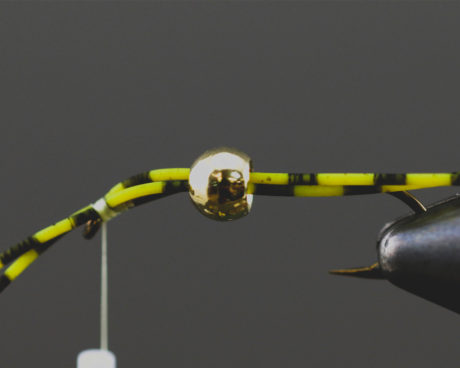
Step 3. Restart your thread behind your bead and tie your rubber leg to the top pf the hook shank. Pulling the legs tight, and at a slight downward angle will help in keeping them on top of the shank. Tie back to appx just behind the hook barb.
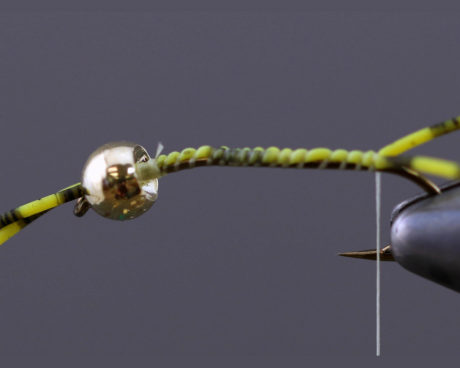
Step 4. Wrap your wire behind the bead head to just past the bend in the hook. Now push your lead into the bead head, this will tighten up the bead.
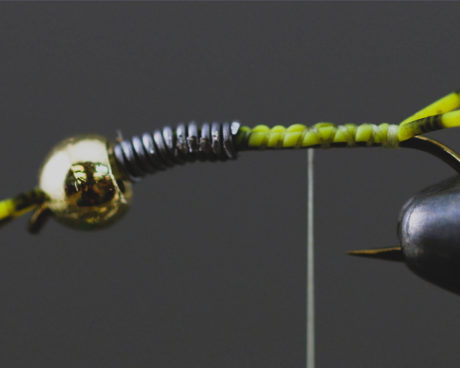
Step 5. Wrap your thread up and secure the lead down good. As you wrap back towards where you stopped on the legs, build a nice little transition tapper behind the lead. This will give you an even transition from the body to the thorax.
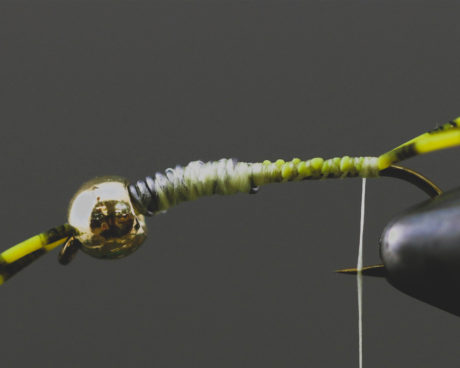
Step 6. Tie in your v-rib. I like to cut the end of the v-rib at an angle, this gives you a nice even transition to your first wrap. On a golden stone, I like to put a few brown dots on the thread, this gives it a realistic look under the yellow.
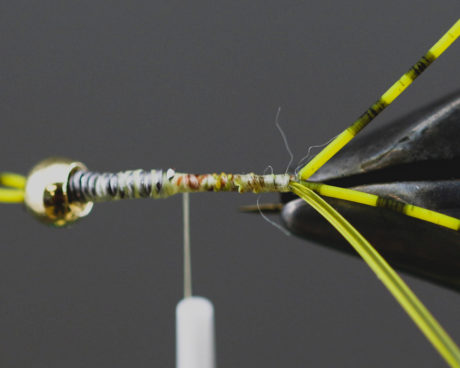
Step 7. Wrap your v-rib up to just behind the lead wire and tie off.
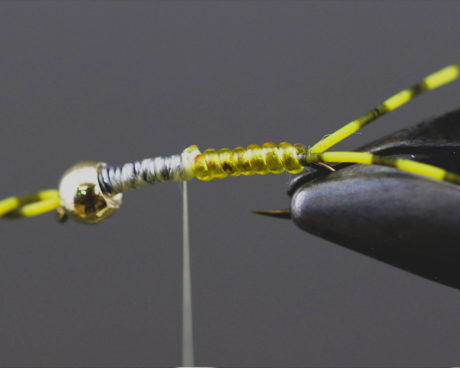
Step 8. Tie in your rear legs. You want these to v backwards and to be centered on each side of the hook shank.
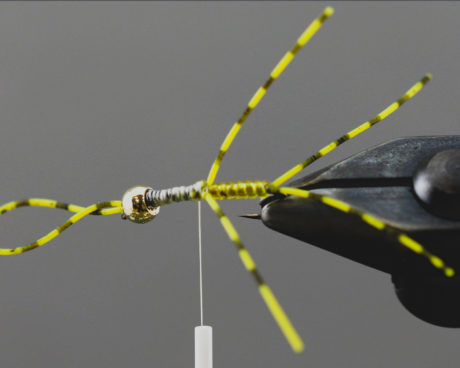
Step 9. Take a very small amount of your dubbing and wrap a couple turns over the bump of your rubber legs.
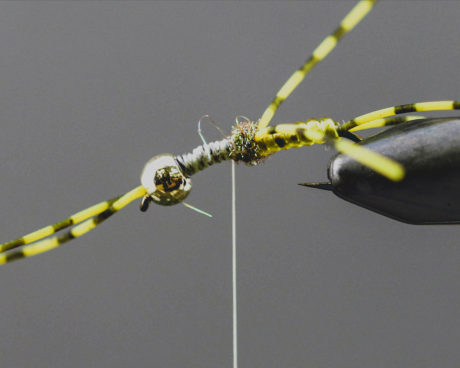
Step 10. Now we are going to start using the Pro Sport Fisher stonefly backs. When you open them up, you will notice each set is numbered 1, 2 and 3. Obviously No. 1 is the first one you will use, the legs that you tie down are designed to give you the correct proportions for your finish. Since we are using a beadhead No. 3 will be altered. I use a pair of tweezers to hold the backs, this makes placing them simple. Holding No. 1 in place, tie the leg portion of the back to the top of the shank. Your back should be propped up against the small amount of dubbing you tied in.
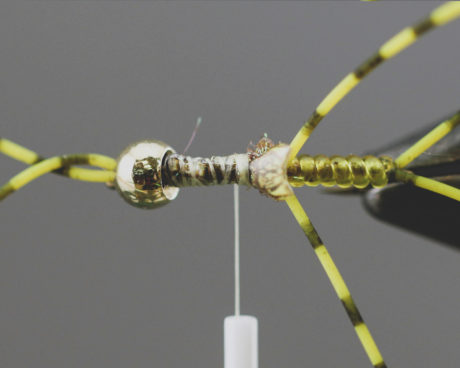
Step 11. Move forward from the back just a little bit and tie in both sets of rubber legs, I cut these legs about 2” long. Position the legs centered on each side of the shank. Repeat the dubbing behind, over and a little in front of the legs. You wan to make this dubbing ball a little bigger than the one in step 11 to create a nice tapper for the thorax.
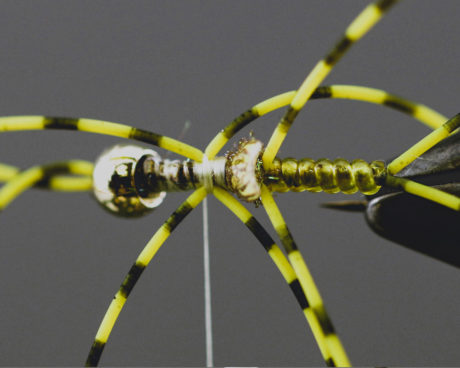
Step 12. Tie in stonefly back No. 2
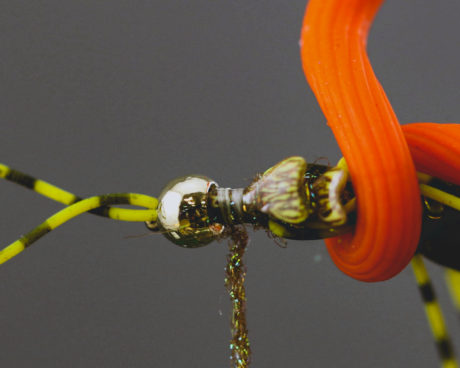
Step 13. Tie in more of your dubbing, again building a little bump up in tapper.
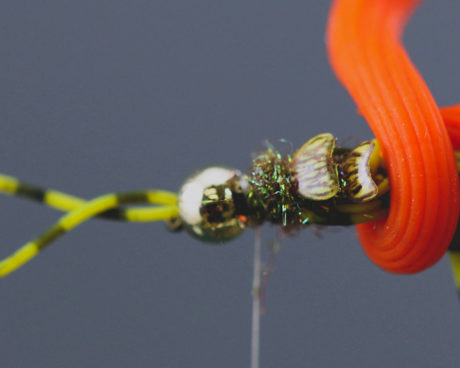
Step 14. Tie in stonefly back No. 3, this will require a little variance from how it’s designed to lay out. Position the back where it needs to be, you will be tying it down right about the two black eyes.
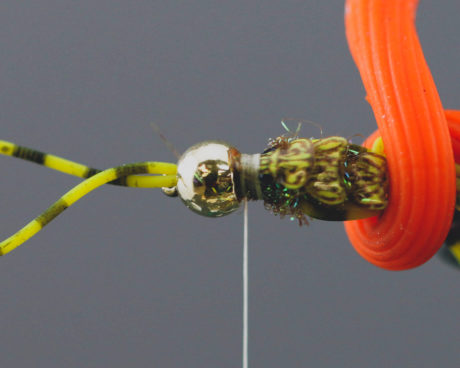
Step 15. Tie in just a little bit of dubbing to cover the small gap to finish it off. Whip finish and glue.
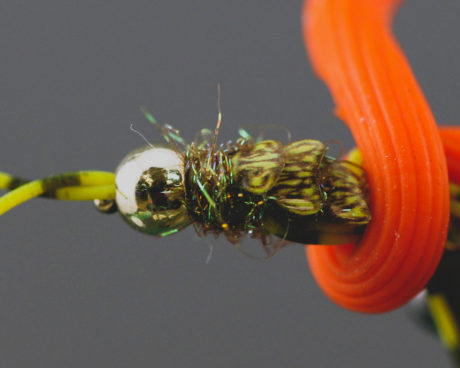
Step 16. Trim all the legs to the desired lengths that you like. I tend to vary these links from fly to fly just to give options for those picky fish days.
Other Fly Tying Posts
Leave a Reply