To start off I’d like to tell you of an early experience in my Alaska sportfishing career that might help you make a bit of sense out of the fly recipe below. This was the early 90’s and I had only been in Alaska a couple of years at that point and also just out of high school. I did originally go to Alaska “just for the summer” to fish with my grandfather and other family members as well and I just never went back.
It was on one of those early trips with “gramps” that I saw something that to this day still blows me away. It was late July and we were fishing the mighty “Kenai” at the Russian River confluence for the second run sockeye. I had stayed across the river all night and was waiting for the “Ferry” to head back to camp. As I’m waiting I sat on a short bluff above the river and below me sat a fillet table. The usually busy fillet table which was sitting out in the river in about a foot of water had multiple filleted sockeye carcasses underneath it. Then out of nowhere a monster rainbow comes right to the table and grabs an entire sockeye carcass, turns around, and swims away with it. And he did it like a boss, he knew exactly what he was looking for. I have since been lucky enough to witness a lot of big trout for myself and clients and that bow is still the largest I have ever set eyes on. That fish had to be in the 33” to 35” range and for the Kenai at that time, that was possible, although not at all common in the upper river.
The story leads me to this crazy fly. The “Flesh & Bone” should be more about thinking outside the box than anything. It has inherent issues due to the mono you use as the “Bones” can make the fly more apt to tangle with parts of your upper leader if you’re not watching your casting. However, I do think that very large Alaska rainbows are pretty wise to what gets thrown at them so having something totally different now and then can’t hurt. I think you may even find a couple of flies commercially that have the same thing in mind.
Always keep in mind that flesh flies come in a myriad of colors throughout the season. My colors listed below for rabbit strip and chenille are pretty much just suggestions so you should feel free to experiment. Also, the fly can be made on a hook of course and some may feel the need to add weight either to a tube or a hook and that’s all on you. Keep one thing in mind for adding weight to a flesh fly. If you can do without weighting the fly and just use split shot as needed you will generally have a more natural-looking piece of meat flowing down the river.
The Recipe
- Kevlar thread / not pretty / very durable / peach/orange/red
- 1”-2” Tube preferably non-weighted
- 6-8 x 2” pieces of 20lb clear or light green monofilament
- Small Chenille in peach/orange/white or whatever color suits your water
- Rabbit Strip straight cut in white/dirty sock/peach or whatever color suits your water
- Hook / barbless hopefully / size and style can be variable depending on fishery
- Head Cement
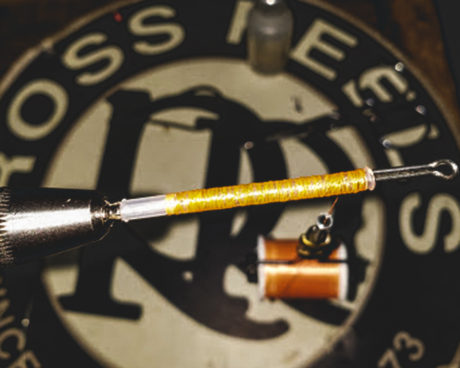
Step 1 – Secure your tube in the vice and start your thread about a ¼” in front of the “butt” of the tube. From there forward cover the entire length of the tube with a layer or two of thread and leave your bobbin at the “head” of the fly. Use a bit of head cement on these first layers of thread to help lock everything in as you tie the fly.
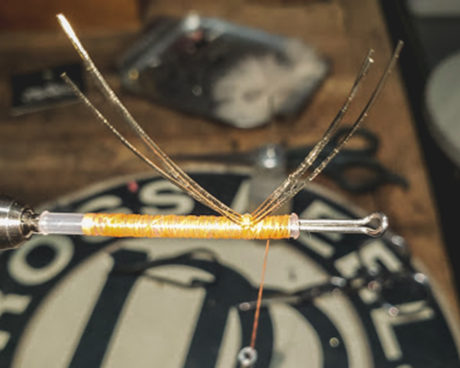
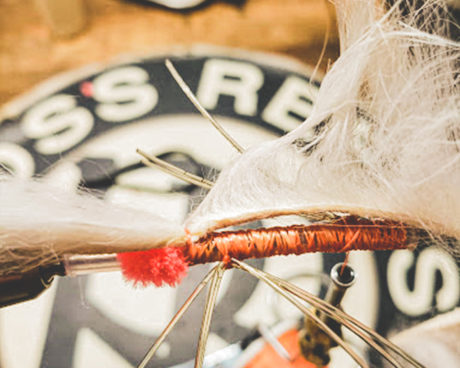
Step 2 – Take 3-4 2” pieces of 20lb monofilament and tie them in about ¼” back from the head. This is where the kevlar thread shines. Once tied in, take the other 3-4 pieces of mono and tie them in. Placement should be on the opposite side from the first stack and another ¼”-½” towards the butt of the fly. Once these are tied in I will pinch them by hand or even with pliers so that they stand up and away from the tube body. They should look awful and very random. Throw some head cement at the base of where you have the mono pieces tied in before proceeding.
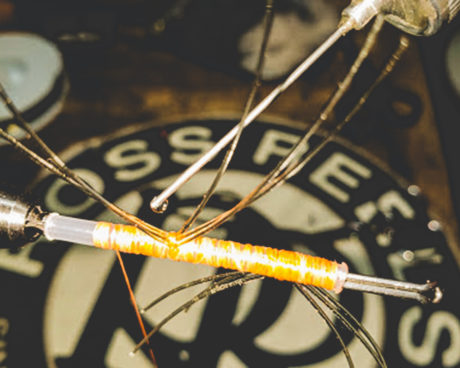
Step 3 – Move your bobbin to the rear of your thread base at the butt of the fly and take a short piece of small body chenille and tie it in. We just want to make a little pink butt on this fly, basically like an old school “Iliamna Pinkie” mini egg. Only needs to be about an ⅛” egg. Once tied in cut the chenille short.
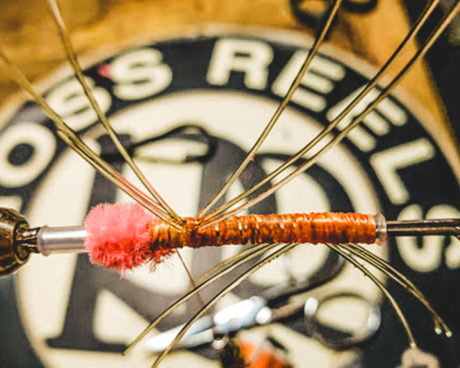
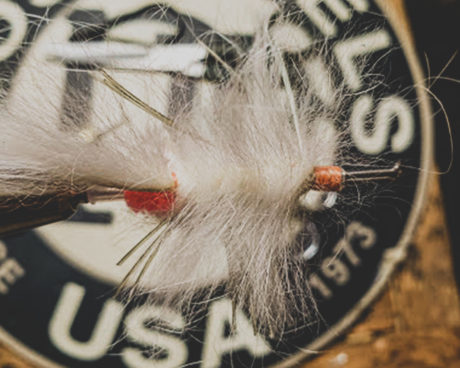
Step 4 – Take a 4” piece of rabbit strip, wet and separate the hair at about 1” from the end. Tie this in right where we finished the chenille so you should have a little 1” rabbit strip tail, take your thread forward to the head. We will now wrap the rest of the rabbit strip forward weaving through the mono “bones” as needed until finishing at the head with a very heavy thread wrap to secure the strip. Whip finish by hand or with a tool then give it a shot of head cement.
Step 5 – Find a river with meat eaters in it, cast it in, and hopefully the fly does the rest!
Leave a Reply